Capturing stunning photographs in the digital age has become a passion for many of us. With the advent of digital cameras and smartphones, it has become easier than ever to take pictures. However, simply taking pictures is not enough to create memorable photographs. It requires skill, knowledge, and creativity to digitally capture and edit photographs that tell a story. This guide is designed to provide you with a comprehensive understanding of how to digitally capture and edit stunning photographs. Whether you are a beginner or an experienced photographer, this guide will provide you with the tools and techniques needed to create breathtaking images that will last a lifetime. So, let’s get started!
Understanding the Basics of Digital Photography
What is Digital Photography?
Digital photography is a method of capturing, storing, and sharing images using digital technology. It is a modern form of photography that has replaced traditional film-based photography due to its convenience, accessibility, and ability to produce high-quality images.
In digital photography, images are captured using a digital camera, a smartphone camera, or a webcam, and are stored as digital files on a computer, a memory card, or a cloud storage. These digital files can be edited, shared, and printed using various software and hardware tools.
Digital photography offers numerous advantages over traditional film-based photography, including:
- Instant feedback: Digital cameras and smartphones allow photographers to view and evaluate their images immediately after taking them, which helps in capturing better shots.
- Easy sharing: Digital images can be easily shared online, via email, or on social media, making it easier to share memories with friends and family.
- Editing capabilities: Digital images can be edited using various software tools, allowing photographers to enhance, correct, and modify their images to create stunning photographs.
- Cost-effective: Digital photography is more cost-effective than traditional film-based photography, as it eliminates the need for film, processing, and printing costs.
Overall, digital photography has revolutionized the way we capture, store, and share images, making it easier and more accessible for everyone to create stunning photographs.
The Differences Between Digital and Film Photography
In the era of digital photography, it’s important to understand the differences between digital and film photography. Here are some key points to consider:
- Sensitivity to Light: Film is more sensitive to light than digital sensors, meaning that film can capture images in low light conditions that would be too dark for a digital camera. However, digital sensors have a higher dynamic range, meaning they can capture more details in high-contrast scenes.
- Image Quality: Film has a natural grain that adds texture and character to images, while digital images are typically sharper and more detailed. Film also has a unique color palette that can’t be replicated in digital photography.
- Processing Time: Film requires time to be processed and printed, while digital images can be edited and shared instantly. This means that digital photography is much more convenient for photographers who need to work quickly.
- Cost: Film is generally more expensive than digital photography, as it requires the cost of film, processing, and printing. Digital photography, on the other hand, only requires the cost of the camera and storage media.
- Editing Capabilities: Digital photography offers a wide range of editing capabilities, including the ability to adjust exposure, color, and contrast. Film photography, on the other hand, is more limited in its editing capabilities.
Understanding these differences can help photographers choose the right medium for their needs and preferences. Whether you prefer the unique look of film or the convenience of digital photography, there are many options available to help you capture and edit stunning photographs.
Choosing the Right Camera for Your Needs
Selecting the right camera is a crucial step in capturing high-quality digital photographs. It is essential to consider factors such as image quality, sensor size, lens compatibility, and overall durability when making a decision. Here are some key aspects to keep in mind when choosing a camera:
- Image Quality: Higher megapixel cameras typically produce better image quality, but it’s important to remember that more megapixels don’t always translate to better pictures. The quality of the lens and the sensor also play a significant role in determining image quality.
- Sensor Size: The size of the camera’s sensor can greatly impact image quality. Full-frame sensors tend to produce better results in low-light situations and offer better dynamic range, while smaller sensors may be more lightweight and budget-friendly.
- Lens Compatibility: Consider the type of photography you plan to do and ensure that the camera is compatible with the lenses you need. Some cameras have a more extensive selection of compatible lenses, while others may require specific lenses to achieve optimal results.
- Budget: Establish a budget and compare cameras within that price range. While higher-end cameras can offer advanced features and better image quality, it may not be necessary for all users.
- Durability: If you plan to take your camera on adventures or use it in harsh environments, consider a camera with a sturdy build and weather sealing features.
- Additional Features: Think about any additional features you may need, such as built-in Wi-Fi, GPS, or an articulating display.
By taking these factors into account, you can select a camera that best fits your needs and helps you capture stunning digital photographs.
The Basics of Composition in Digital Photography
In digital photography, composition refers to the arrangement of visual elements within the frame. A well-composed photograph can create a powerful visual impact, capturing the viewer’s attention and evoking emotions. To achieve a stunning composition, photographers must consider various factors such as the rule of thirds, leading lines, symmetry, and contrast.
Rule of Thirds
The rule of thirds is a fundamental principle of composition that involves dividing the frame into thirds both horizontally and vertically, creating a grid of nine equal parts. Key elements of the image, such as the subject, should be placed at the intersection points or along the gridlines, creating a more visually pleasing and dynamic image.
Leading Lines
Leading lines are lines within the image that lead the viewer’s eye from one point to another, creating a sense of depth and guiding the viewer through the scene. These lines can be natural, such as a path or a road, or man-made, such as a wall or a set of stairs. By using leading lines, photographers can create a sense of movement and direction in their images.
Symmetry
Symmetry refers to the balance and harmony created when the elements in the image are arranged around a central point or axis. This can be found in natural landscapes, architecture, and even human faces. Using symmetry in composition can create a sense of calm and stability, making the image feel more balanced and harmonious.
Contrast
Contrast refers to the difference between light and dark areas in an image. High contrast can create a dramatic and dynamic image, while low contrast can result in a more subtle and peaceful image. By carefully balancing contrast, photographers can control the mood and tone of their images, drawing the viewer’s attention to specific areas and creating a sense of depth and dimension.
By understanding and applying these basic principles of composition, photographers can create stunning images that capture the viewer’s attention and convey a message or emotion.
Capturing the Perfect Shot
Understanding Exposure and Light Metering
Exposure and light metering are two of the most important factors to consider when capturing the perfect photograph. Understanding how to properly expose an image and meter light can make a significant difference in the final outcome of your photographs.
Exposure
Exposure refers to the amount of light that enters the camera’s sensor or film. The goal is to capture an image that is correctly exposed, meaning that the highlights and shadows are neither too bright nor too dark. Proper exposure is crucial for creating a photograph that looks natural and has a wide range of tonal values.
Light Metering
Light metering is the process of measuring the amount of light that is entering the camera. There are several different metering modes available on most cameras, including matrix/segment metering, center-weighted metering, and spot metering. Each metering mode measures light differently, and understanding how each mode works can help you to capture the perfect exposure.
Matrix/Segment Metering
Matrix or segment metering is the most commonly used metering mode. It measures light across multiple segments of the scene and calculates the exposure based on the overall brightness and contrast. This mode is ideal for most situations and is a good starting point for most photographs.
Center-Weighted Metering
Center-weighted metering gives more weight to the light metered in the center of the frame. This is useful when the subject is off-center and you want to ensure that the subject is correctly exposed, while still allowing for some brightness in the surrounding area.
Spot Metering
Spot metering measures only a very small area of the scene, typically about 1-5% of the total area. This mode is useful when you have a high-contrast scene and want to meter for a specific area of the scene. However, it can be difficult to use accurately, as it requires careful consideration of the area being metered.
Understanding how to use these different metering modes can help you to capture the perfect exposure and create stunning photographs.
Focusing and Shutter Speed
In photography, capturing the perfect shot requires a combination of technical knowledge and creative vision. Two crucial elements that contribute to this are focusing and shutter speed. Understanding how to adjust these settings to your specific needs will enable you to take stunning photographs that convey your intended message or mood.
Focusing
Focus refers to the point of the image where the lens is aimed, determining which part of the scene will be sharp and clear. Proper focusing is essential for achieving a clear and crisp image, especially when capturing moving subjects or low-light conditions. There are several methods to focus your camera:
- Manual Focus: This involves adjusting the focus ring on the lens to manually set the focus point. Manual focus is useful when you want complete control over the focus, but it can be time-consuming and requires practice to get right.
- Autofocus: Most modern cameras use autofocus, which automatically adjusts the focus based on the scene. Autofocus is fast and convenient, but it may not always accurately capture the intended focus point, especially in complex or low-light situations.
- Zone Focusing: This method involves focusing on a specific zone or area of the scene, rather than a specific point. Zone focusing is useful for capturing images of moving subjects or groups of people, as it allows you to keep the subject in focus even as they move through the scene.
Shutter Speed
Shutter speed refers to the length of time the camera’s shutter is open, and it is measured in seconds or fractions of a second. Controlling the shutter speed is essential for capturing the desired exposure and effect in your photographs. Here are some guidelines to consider when adjusting your shutter speed:
- Freeze Action: To freeze fast-moving subjects, such as sports or wildlife, use a fast shutter speed (1/1000 second or faster). This will help to capture the subject in sharp detail, without any motion blur.
- Capture Motion: To create motion blur and convey a sense of movement, use a slower shutter speed (1/30 second or slower). This will cause the moving subjects to appear blurred, emphasizing their motion through the scene.
- Control Exposure: In low-light conditions, use a slower shutter speed to allow more light into the camera. However, be careful not to use a shutter speed that is too slow, as it may result in motion blur or camera shake.
In conclusion, focusing and shutter speed are critical elements in capturing the perfect shot. By understanding how to adjust these settings based on your subject and the scene, you can take stunning photographs that convey your intended message or mood.
White Balance and Color Temperature
One of the most important factors in capturing a stunning photograph is getting the white balance and color temperature right. White balance is the process of adjusting the colors in an image to remove any color cast, such as blue or yellow, and to ensure that the colors appear natural. Color temperature, on the other hand, refers to the color of the light source in an image, which can range from warm (yellow-orange) to cool (blue-white).
There are several different methods for setting the white balance and color temperature in your photographs, including using the camera’s built-in presets, adjusting the color temperature manually, or using a gray card to calibrate the camera. The method you choose will depend on the lighting conditions and the type of photograph you are trying to capture.
If you are shooting in natural light, for example, you may want to use the camera’s shade or cloudy preset to remove any blue or green cast from the image. If you are shooting in artificial light, such as a studio or a nightclub, you may need to adjust the color temperature manually to match the color of the light source.
Regardless of the method you choose, it is important to experiment with different settings and make adjustments as needed to ensure that your photographs look natural and balanced. With practice, you will develop an eye for the right white balance and color temperature, and you will be able to capture stunning photographs in any lighting conditions.
Shooting in RAW Format
When it comes to capturing the perfect shot, shooting in RAW format is a must-know technique for any photographer. RAW format is an uncompressed image file that captures all the details and data from the camera’s sensor. Unlike JPEG or other compressed formats, RAW files do not lose any image data during compression, allowing for greater flexibility during post-processing.
Here are some reasons why shooting in RAW format is essential:
- Greater Dynamic Range: RAW format allows for a greater dynamic range, which means that more details can be recovered from both the shadows and highlights of an image. This is particularly useful when shooting high-contrast scenes or when the subject is backlit.
- More Accurate Colors: Shooting in RAW format allows for more accurate colors, as the image data is not compressed and altered during the compression process. This is especially important when shooting in challenging lighting conditions or when trying to match colors across multiple shots.
- Flexibility in Post-Processing: With RAW format, photographers have greater flexibility in post-processing, as they can adjust settings such as exposure, white balance, and color temperature without degrading the image quality. This allows for more creative control over the final image.
To take advantage of the benefits of shooting in RAW format, photographers should make sure to use a camera that supports RAW format, such as a DSLR or mirrorless camera. It is also important to have software that can process RAW files, such as Adobe Lightroom or Adobe Photoshop. Once the image is captured, it can be edited and processed to create a stunning final image.
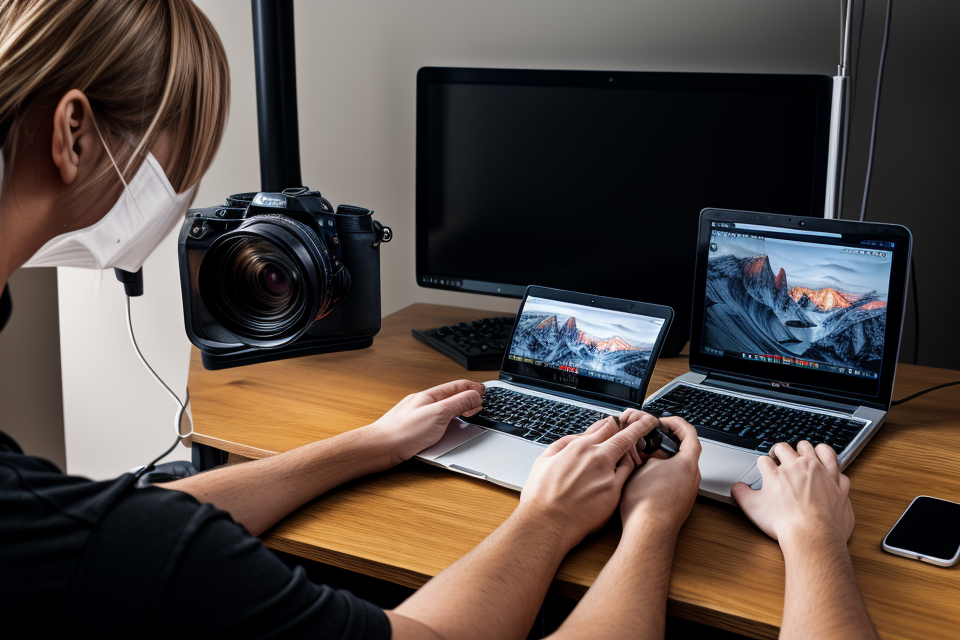
Editing Your Photographs
The Basics of Photo Editing Software
When it comes to editing your photographs, you will need photo editing software that is easy to use and provides you with the tools you need to enhance your images. Here are some of the basics of photo editing software:
- User Interface: A good photo editing software should have an intuitive user interface that is easy to navigate. It should be organized in a way that makes sense, with tools and features easy to find and use.
- Editing Tools: The software should offer a range of editing tools, including basic tools such as cropping, resizing, and exposure adjustments, as well as more advanced tools like layers, masks, and filters.
- Color Correction: A good photo editing software should also have robust color correction tools, allowing you to adjust the color balance, saturation, and contrast of your images.
- File Formats: The software should support a range of file formats, including RAW, JPEG, and TIFF, so you can work with your images in the format that best suits your needs.
- Image Organization: It’s also important to consider the software’s image organization tools, which can help you keep track of your images and make it easier to find the ones you need.
- Plugin Compatibility: Finally, it’s worth considering whether the software is compatible with plugins, which can add even more tools and features to your editing workflow.
Overall, the best photo editing software for you will depend on your specific needs and preferences. Some popular options include Adobe Photoshop, Lightroom, and GIMP. It’s a good idea to try out a few different options to see which one works best for you.
Enhancing and Adjusting Your Images
In order to create stunning photographs, it is essential to know how to enhance and adjust your images digitally. Here are some key techniques that can help you improve your photographs:
- Adjusting the Exposure: One of the most common adjustments that photographers make is adjusting the exposure of their images. This can be done by using the exposure slider in your photo editing software. If your image is too dark, you can increase the exposure, and if it is too light, you can decrease it.
- Contrast Adjustment: Contrast adjustment is another essential technique that can help you enhance your images. Contrast adjustment can be used to bring out the details in the shadows and highlights of your image. This can be done by using the contrast slider in your photo editing software.
- Brightness and Contrast: Brightness and contrast are two separate adjustments that can be used to enhance your images. Brightness adjustment can be used to make your image brighter or darker, while contrast adjustment can be used to increase or decrease the difference between the brightest and darkest parts of your image.
- Curves Adjustment: Curves adjustment is a powerful technique that can be used to enhance the tonal range of your images. This adjustment can be used to adjust the shadows, mid-tones, and highlights of your image separately.
- Color Balance Adjustment: Color balance adjustment is used to adjust the color temperature of your image. This adjustment can be used to make your image warmer or cooler, depending on the lighting conditions.
- Hue and Saturation Adjustment: Hue and saturation adjustment is used to adjust the color saturation of your image. This adjustment can be used to make your image more vibrant or muted, depending on your preference.
By mastering these techniques, you can enhance and adjust your images to create stunning photographs that will stand out from the rest.
Retouching and Restoration
Retouching and restoration are essential tools in digital photography editing that allow photographers to enhance and improve their images. This section will discuss the various techniques and tools used in retouching and restoration.
Techniques
The following are some of the techniques used in retouching and restoration:
- Skin Smoothing: This technique involves removing blemishes, wrinkles, and other imperfections from a subject’s skin. This can be done using various tools, such as the healing brush, the clone stamp, and the spot healing brush.
- Fixing Red-Eye: Red-eye is a common problem in photographs, especially in low-light conditions. Retouching software can help to fix this problem by removing the red-eye effect from the image.
- Removing Background Distractions: Sometimes, a photograph may contain unwanted distractions in the background, such as wires, poles, or other objects. Retouching software can help to remove these distractions, leaving the subject in focus.
- Enhancing Colors: Photographs can be enhanced by adjusting the colors to make them more vibrant and eye-catching. This can be done using various tools, such as the color balance slider, the hue/saturation adjustment layer, and the curves adjustment layer.
Tools
The following are some of the tools used in retouching and restoration:
- Adobe Photoshop: Adobe Photoshop is a popular retouching and restoration software that offers a wide range of tools and features for enhancing and improving photographs. It is a powerful tool that is widely used by professional photographers.
- Lightroom: Lightroom is another popular software used for retouching and restoration. It offers a more streamlined workflow than Photoshop and is often used for basic editing tasks, such as adjusting exposure, contrast, and color balance.
- Topaz Gigapixel AI: Topaz Gigapixel AI is a software that can be used to upscale images without losing quality. This software is useful when you need to enlarge an image for printing or other purposes.
Retouching and restoration are essential tools in digital photography editing that allow photographers to enhance and improve their images. By using the right techniques and tools, photographers can create stunning images that stand out from the crowd.
Adding Special Effects and Filters
Enhancing your photographs with special effects and filters can transform them into stunning works of art. These effects can bring out the hidden details in your photographs, create a sense of atmosphere, and give your images a unique style. Here are some tips on how to add special effects and filters to your photographs:
- Choose the right filter for the job: There are countless filters available, each designed to enhance a specific aspect of your photographs. Experiment with different filters to find the one that best suits your needs. For example, a “Lens Correction” filter can fix lens distortion, while a “Clarify” filter can enhance details in your images.
- Apply filters with caution: Filters can dramatically change the look of your photographs, so it’s important to use them with caution. Apply filters sparingly and only when necessary, and be mindful of the mood and tone of your images.
- Experiment with different effects: There are many different effects you can apply to your photographs, such as vignettes, frames, and textures. Experiment with different effects to find the ones that work best for your images.
- Use adjustment layers: Adjustment layers allow you to make non-destructive edits to your photographs. This means you can adjust the exposure, contrast, and other settings without affecting the original image. This is especially useful when experimenting with different effects and filters.
- Save your work: It’s always a good idea to save your work as you go along. This way, if you accidentally delete or overwrite an important layer, you can always revert back to an earlier version.
By following these tips, you can add special effects and filters to your photographs and create stunning images that stand out from the crowd.
Exporting and Sharing Your Images
After you have finished editing your photographs, it is time to export and share them with the world. The following are some important steps to consider when exporting and sharing your images:
File Formats
When exporting your images, it is important to consider the file format you will use. The most common file formats for photographs are JPEG, TIFF, and PNG. JPEG is the most commonly used file format for photographs because it compresses the image file while maintaining a high level of quality. TIFF is a high-quality file format that is often used for printing or archiving photographs. PNG is a lossless file format that is commonly used for images with text or transparent backgrounds.
Image Resolution
Image resolution refers to the number of pixels in an image. It is important to consider the resolution of your images when exporting them for sharing. Most digital cameras and smartphones capture images at a high resolution, but it is important to consider the intended use of the image when deciding on the resolution. If the image is intended for web use, a lower resolution may be sufficient, while a higher resolution may be necessary for printing or large-scale display.
Image Size
The size of your image file can also be an important consideration when exporting and sharing your photographs. Large image files can take longer to upload and download, and may also require more storage space. It is important to consider the intended use of the image when deciding on the size. For example, if the image is intended for web use, a smaller file size may be sufficient, while a larger file size may be necessary for printing or large-scale display.
Metadata
Metadata refers to the information that is embedded in an image file, such as the camera settings used to capture the image, the date and time it was taken, and any copyright information. It is important to consider whether or not to remove metadata from your images before sharing them. Some photographers choose to remove metadata to protect their intellectual property, while others choose to leave it intact for copyright purposes.
Sharing Options
There are many options for sharing your photographs, including social media platforms, photo sharing websites, and online galleries. It is important to consider the intended audience and purpose of the image when choosing a sharing platform. For example, social media platforms such as Instagram and Facebook are great for sharing personal photographs with friends and family, while online galleries such as SmugMug and Flickr are better suited for professional photographers looking to share their work with a wider audience.
Overall, exporting and sharing your photographs is an important step in the digital photography workflow. By considering file format, resolution, size, metadata, and sharing options, you can ensure that your images are shared in the best possible way.
Tips and Tricks for Improving Your Digital Photography Skills
The Importance of Practice and Patience
- Cultivating Expertise: Mastering the Art of Digital Photography
Digital photography is a craft that requires time, dedication, and perseverance. Achieving excellence in this field necessitates a willingness to learn and an eagerness to practice. Successful photographers understand that practice and patience are essential components of their journey towards becoming proficient in their art.
- The Benefits of Persistence: Why Practice Matters
Regular practice helps photographers to develop their technical skills, improve their creative vision, and gain a deeper understanding of the intricacies of digital photography. Through consistent effort, photographers can learn to anticipate and capture the perfect moment, compose visually stunning images, and effectively use light and color to enhance their photographs.
- Embracing the Learning Curve: Overcoming Obstacles and Persevering
Every photographer encounters challenges and setbacks on their journey towards mastery. However, it is through facing these obstacles and pushing through them that photographers grow and develop their skills. Maintaining a positive attitude, seeking feedback, and staying committed to improvement are key to overcoming difficulties and achieving success in digital photography.
- Staying Motivated: Cultivating a Passion for Photography
Photography is a passion that can be both rewarding and fulfilling. Remaining motivated and excited about the art of digital photography is crucial for maintaining a steady progress. Seeking inspiration from other photographers, setting personal goals, and continuously challenging oneself are all effective ways to stay motivated and driven in the pursuit of excellence in digital photography.
Experimenting with Different Genres and Styles
When it comes to improving your digital photography skills, one of the best things you can do is to experiment with different genres and styles. This can help you to broaden your skill set, discover new techniques, and develop your own unique style. Here are some tips to help you get started:
1. Try Different Genres
There are many different genres of photography, each with its own unique techniques and styles. Some popular genres include landscape, portrait, street, and wildlife photography. By trying out different genres, you can learn new skills and find your own niche within the world of photography.
2. Experiment with Different Styles
Within each genre of photography, there are many different styles to explore. For example, within landscape photography, you might experiment with abstract, minimalist, or panoramic styles. By trying out different styles, you can find what works best for you and develop your own unique approach to photography.
3. Look for Inspiration
To get ideas for new genres and styles to try, look for inspiration from other photographers. Browse through photography magazines, books, and online galleries to see what other photographers are doing. You might find a particular style or genre that resonates with you and want to try it out for yourself.
4. Don’t Be Afraid to Fail
Experimenting with new genres and styles can be intimidating, especially if you’re not sure where to start. But don’t be afraid to fail – every photographer starts somewhere, and every photographer makes mistakes. The key is to learn from your mistakes and keep pushing yourself to try new things.
By experimenting with different genres and styles, you can improve your digital photography skills and develop your own unique approach to photography. So don’t be afraid to try new things – the only way to get better is to keep pushing yourself and learning from your mistakes.
Learning from Other Photographers
- One of the best ways to improve your digital photography skills is by learning from other photographers. This can be done by studying their work, looking at their techniques, and understanding what makes their photographs stand out.
- You can find inspiration from other photographers by following them on social media, attending photography workshops, and reading photography blogs and magazines.
- By studying the work of other photographers, you can gain a better understanding of composition, lighting, and editing techniques. This can help you to develop your own unique style and approach to photography.
- Additionally, you can also learn from other photographers by participating in online photography communities, where you can share your work, get feedback, and learn from others.
- Another way to learn from other photographers is by attending photography events and exhibitions, where you can see their work in person and gain a better understanding of their techniques and processes.
- Lastly, it’s important to keep in mind that everyone has their own unique perspective and style, so don’t be afraid to experiment and find what works best for you.
In conclusion, learning from other photographers is a great way to improve your digital photography skills. By studying their work, attending events, and participating in online communities, you can gain a better understanding of composition, lighting, and editing techniques, and develop your own unique style and approach to photography.
Utilizing Social Media for Feedback and Inspiration
In today’s digital age, social media platforms have become an invaluable resource for photographers to showcase their work, connect with fellow enthusiasts, and gain valuable feedback and inspiration. Here are some tips on how to make the most of social media for your photography journey:
- Share Your Work: One of the best ways to get feedback on your photography is to share your work on social media platforms like Instagram, Facebook, and Twitter. By posting your photos, you’ll be able to get a sense of what resonates with your audience and what doesn’t. Additionally, you can engage with other photographers and gain insight into their processes and techniques.
- Engage with the Community: Social media platforms are also great places to connect with other photographers and engage with the community. You can follow your favorite photographers, comment on their work, and even reach out to them for advice and guidance. This can help you stay motivated and inspired as you continue to develop your skills.
- Join Photography Groups: Many social media platforms have groups dedicated to photography. These groups can be a great way to connect with other photographers, share your work, and get feedback on your photos. You can also participate in photography challenges and contests to keep your skills sharp and push yourself to try new things.
- Stay Inspired: Social media can also be a great source of inspiration for your photography. By following photographers whose work you admire, you can stay up-to-date on the latest trends and techniques, and be inspired to try new things in your own photography.
By utilizing social media to share your work, connect with the community, and stay inspired, you can take your photography skills to the next level and create stunning photographs that capture the world around you.
Keeping Your Equipment Maintained and Organized
As a photographer, having the right equipment is crucial to capturing stunning photographs. However, it is not enough to simply have the best equipment; it is also important to keep it maintained and organized. In this section, we will discuss some tips and tricks for keeping your equipment in top condition and organized for easy access.
Equipment Maintenance
Proper maintenance of your equipment is essential to ensure that it functions correctly and lasts longer. Here are some tips for maintaining your equipment:
- Clean your equipment regularly: Dust, dirt, and grime can accumulate on your equipment and affect its performance. It is important to clean your equipment regularly to ensure that it functions correctly.
- Lubricate moving parts: Moving parts such as lens rings and focusing mechanisms should be lubricated regularly to ensure smooth operation.
- Check for wear and tear: Check your equipment regularly for signs of wear and tear, such as loose screws or worn-out parts. Replace any damaged parts promptly to avoid further damage.
Equipment Organization
Keeping your equipment organized is crucial to ensure that you can find what you need quickly and easily. Here are some tips for organizing your equipment:
- Assign a place for everything: Assign a specific place for each piece of equipment in your bag or studio. This will help you to find what you need quickly and easily.
- Use labels: Label each piece of equipment with its name and location. This will help you to identify equipment quickly and easily.
- Keep your equipment in good condition: Make sure that your equipment is always in good condition before storing it away. This will help to prevent damage and extend the life of your equipment.
In conclusion, keeping your equipment maintained and organized is crucial to ensuring that you can capture stunning photographs. By following these tips and tricks, you can keep your equipment in top condition and ensure that you have everything you need for your next shoot.
Summarizing Key Points
- Mastering the basics: Before delving into advanced techniques, ensure you have a strong grasp of the fundamentals. This includes understanding exposure, focus, composition, and lighting.
- Experiment with different shooting modes: While using automatic modes can be helpful for beginners, it’s essential to explore and experiment with manual modes to develop your understanding of photography.
- Shoot in RAW format: RAW format provides more flexibility during post-processing, allowing you to extract maximum detail and color from your images.
- Utilize the rule of thirds: When composing your shots, use the rule of thirds to create more visually appealing and balanced images.
- Play with depth of field: By manipulating the aperture, you can control the depth of field, adding interest and dimension to your photographs.
- Pay attention to color theory: Understanding color theory can help you make more informed decisions about the colors you use in your compositions.
- Learn to edit: Familiarize yourself with photo editing software and learn basic editing techniques to enhance your images.
- Practice, practice, practice: Like any skill, photography requires practice to improve. Regularly take photos and experiment with different techniques to develop your skills.
- Seek feedback: Share your work with others and ask for constructive feedback to help you grow as a photographer.
- Stay inspired: Keep an eye on the work of other photographers, attend workshops, and read photography books to continually inspire and improve your own work.
Staying Motivated and Continuing to Learn
Maintaining a high level of motivation is essential when it comes to improving your digital photography skills. Without a constant drive to learn and grow, it’s easy to fall into a rut and become complacent in your abilities. Here are some tips for staying motivated and continuing to learn as a digital photographer:
- Set achievable goals: Having clear and attainable goals can help keep you motivated and focused on improving your skills. Make a list of specific skills or techniques you want to master, and create a plan for how you will achieve them.
- Surround yourself with other photographers: Joining a photography community or group can provide a supportive environment where you can share your work, get feedback, and learn from others.
- Take inspiration from other photographers: Look to the work of other photographers for inspiration and ideas. Study their techniques, and try to incorporate what you learn into your own work.
- Keep learning: Continuously educate yourself on the latest photography techniques, trends, and technologies. This can be done through online tutorials, workshops, or reading books and articles on photography.
- Practice, practice, practice: The more you practice, the better you will become. Set aside time each day or week to take photos and experiment with different techniques and settings.
By following these tips, you can stay motivated and continue to learn and grow as a digital photographer. Remember, photography is a lifelong journey, and there is always something new to learn and discover.
The Future of Digital Photography
As technology continues to advance, the future of digital photography looks brighter than ever before. With new and innovative technologies constantly being developed, photographers are now able to capture and edit their images in ways that were once thought impossible. Here are some of the key trends that are shaping the future of digital photography:
- Increased Image Quality: One of the most significant advancements in digital photography is the constant improvement in image quality. With the development of better sensors and processing algorithms, cameras are now able to capture more detail and produce higher-quality images than ever before. This means that photographers can now produce images that are of professional quality, even with entry-level cameras.
- Advanced Editing Tools: Another major trend in digital photography is the development of advanced editing tools. With software like Adobe Photoshop, photographers now have access to a wide range of tools that can be used to enhance and manipulate their images. From removing unwanted elements from an image to adding special effects, the possibilities are endless.
- Virtual Reality and 360-Degree Imaging: With the rise of virtual reality and 360-degree imaging, photographers are now able to create immersive experiences that transport viewers to another place and time. This technology allows photographers to capture a much wider field of view, creating images that are truly breathtaking.
- Artificial Intelligence: Artificial intelligence is also playing a big role in the future of digital photography. With AI-powered tools, photographers can now automate many of the tedious tasks involved in post-processing their images. From identifying and removing unwanted elements to adjusting the exposure and color balance, AI is making it easier than ever for photographers to produce high-quality images.
- Social Media and Online Platforms: Social media and online platforms have also had a significant impact on the future of digital photography. With billions of people using social media platforms like Instagram and Facebook, photographers now have a global audience for their work. This has led to a rise in popularity for certain styles of photography, such as mobile photography and street photography.
Overall, the future of digital photography looks very promising. With new technologies constantly being developed, photographers have access to a wide range of tools that can help them capture and edit their images like never before. Whether you’re a professional photographer or just starting out, now is an exciting time to be involved in the world of digital photography.
FAQs
1. What is the best way to store digital photos?
The best way to store digital photos is to use an external hard drive or cloud storage. This ensures that your photos are backed up and protected from loss or damage. It’s important to regularly back up your photos to prevent losing them due to hardware failure or other issues.
2. How do I edit digital photos?
There are many software options available for editing digital photos, including Adobe Photoshop and Lightroom. These programs offer a range of tools for adjusting the exposure, color, and other aspects of your photos. You can also use more basic programs like Microsoft Paint or Apple’s Photos app to make simple edits.
3. How do I properly expose a digital photo?
To properly expose a digital photo, you’ll want to use the “exposure bracketing” feature on your camera. This will take multiple photos at different exposure levels, and you can then review them on your computer to see which one has the best exposure. You can also use the light meter in your camera to ensure that you’re getting the correct exposure.
4. How do I properly focus a digital camera?
To properly focus a digital camera, you’ll want to use the autofocus feature. This will allow the camera to automatically adjust the focus based on the subject you’re photographing. If you’re having trouble getting a sharp focus, you can try using the manual focus option or using a tripod to keep the camera steady.
5. How do I get the best color in my digital photos?
To get the best color in your digital photos, you’ll want to use the “white balance” feature on your camera. This will help to ensure that the colors in your photos look natural and accurate. You can also use the color temperature setting to adjust the color of your photos if needed.


