Are you ready to capture the beauty of the night in your photographs? Night photography is an exciting and challenging field that can produce stunning results if done correctly. This guide will take you through the essential steps of night photography, from choosing the right equipment to editing your shots. You’ll learn how to work with low light conditions, use long exposures to capture movement, and even create your own light sources to create dramatic effects. Whether you’re a beginner or an experienced photographer, this guide will help you take your night photography to the next level. So, get ready to explore the magic of the night and create stunning images that will leave your audience in awe.
Planning Your Night Photography Session
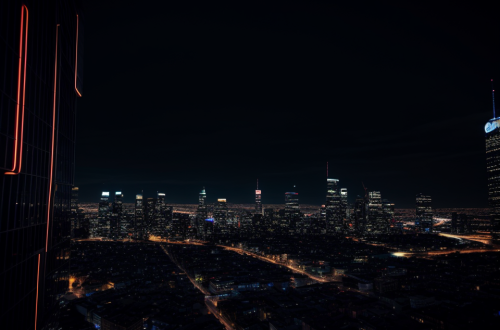
Choosing the Right Location
When it comes to night photography, choosing the right location is crucial to the success of your shoot. The location you choose will determine the lighting conditions, weather conditions, and time of year, all of which can affect the final outcome of your photos. Here are some factors to consider when choosing a location for your night photography session:
Factors to Consider
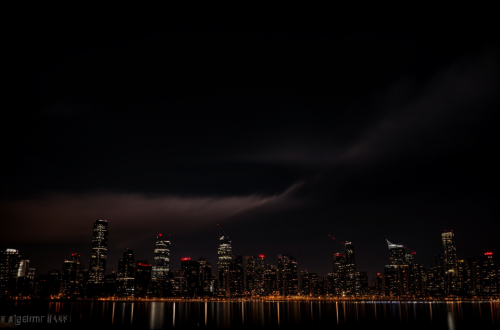
- Light Pollution: Light pollution can have a significant impact on the quality of your night photos. Areas with high levels of light pollution, such as cities, can make it difficult to capture the Milky Way or other celestial objects. On the other hand, remote locations with little to no light pollution can provide stunning views of the night sky.
- Weather Conditions: Weather conditions can also play a significant role in your night photography session. Clear skies are ideal for capturing the stars and Milky Way, while cloud cover can create interesting silhouettes and moods. Be sure to check the weather forecast before choosing a location and plan accordingly.
- Time of Year: The time of year can also affect the success of your night photography session. For example, during the summer months, the sun sets later in the evening, providing more time to capture the Milky Way. In contrast, during the winter months, the sun sets earlier, limiting the amount of time you have to capture the Milky Way.
- Equipment Requirements: The location you choose should also take into consideration the equipment you will be using. For example, if you plan on shooting at a remote location, you may need to bring additional equipment such as a generator or lighting equipment. Be sure to plan ahead and consider the logistics of getting to and from your location.
Overall, choosing the right location for your night photography session is essential to the success of your shoot. By considering the factors listed above, you can ensure that you choose a location that will provide the best possible conditions for capturing stunning night photos.
Determining the Best Time for Night Photography
Determining the best time for night photography is crucial to capturing stunning images. Several factors must be considered when selecting the ideal time for your night photography session. These factors include moon phases, seasons, weather patterns, and time of day.
Factors Affecting Night Photography
Night photography is influenced by several factors that can either enhance or hinder the quality of your images. Understanding these factors can help you plan your night photography session to achieve the desired results.
Moon Phases
The phase of the moon can significantly impact the quality of your night photography. A full moon provides ample light, which can create overexposed images, while a new moon creates near-total darkness, making it challenging to capture images. The best time for night photography during a full moon is during the last quarter, when the moon is partially illuminated, providing a balanced amount of light.
Seasons
The time of year can also affect night photography. During the summer months, the days are longer, providing more time for night photography. In contrast, during the winter, the days are shorter, and the nights are darker, making it more challenging to capture images. The winter months also bring snow and ice, which can create unique photographic opportunities.
Weather Patterns
Weather patterns can significantly impact night photography. Clear skies provide the best conditions for capturing images, as they allow for ample light and minimal interference from clouds. However, cloud cover can create interesting and dramatic images, especially when capturing cityscapes or landscapes. It is essential to consider the weather patterns when planning your night photography session to ensure you capture the desired mood and atmosphere.
Time of Day
The time of day can also impact night photography. The golden hour, which occurs just after sunset and before sunrise, provides soft, warm light that can create stunning images. During this time, the sky is also more vibrant, with colors ranging from deep oranges to pinks and purples. Capturing images during the blue hour, which occurs after sunset and before the sky becomes fully dark, can also create unique and striking images.
By considering these factors when planning your night photography session, you can ensure that you capture the magic of night and create stunning images that showcase the beauty of the night sky and the world around you.
Tips for Planning Your Night Photography Session
Capturing the perfect night photograph requires careful planning and preparation. Here are some tips to help you plan your night photography session:
Scouting Your Location
Identifying key landmarks is essential when scouting your location for night photography. These landmarks can help you orient yourself and capture unique perspectives of the area. It’s also important to consider the lighting and shadows in the area. Think about how the lighting will affect your composition and whether or not it will create interesting shadows.
It’s also essential to check for any restrictions or permits required for taking photographs in the area. Some locations may have rules against taking photographs, especially at night. Be sure to check for any signs or ask a security guard if you’re unsure.
Setting Your Expectations
Before you begin your night photography session, it’s important to set your expectations. Determine your goals for the session and what you hope to capture. Are you looking to capture the city skyline or the stars in the night sky? Setting your expectations will help you stay focused and motivated during your session.
Selecting the right equipment is also crucial to achieving your goals. Make sure you have a tripod and a camera that can handle low-light conditions. Familiarize yourself with the area and consider the terrain and any obstacles that may affect your shot.
In summary, planning your night photography session requires scouting your location, setting your expectations, and selecting the right equipment. By following these tips, you’ll be well on your way to capturing the magic of night in your photographs.
Setting Up Your Equipment for Night Photography
Choosing the Right Camera and Lenses
Choosing the right camera and lenses is crucial for capturing stunning night photographs. The camera and lenses you select will have a significant impact on the quality of your images. Here are some factors to consider when choosing your equipment:
- Sensor Size: The sensor size of your camera will affect the amount of light it can capture. Full-frame cameras tend to perform better in low-light situations than crop or APS-C sensors. However, the lens you choose can also play a significant role in gathering light.
- Low-Light Performance: Look for a camera with good low-light performance. Higher ISO settings, faster shutter speeds, and wider apertures are all beneficial for low-light photography. Some cameras have specialized features like “night mode” or “low-light mode” that can help capture better images in dark environments.
- Autofocus Ability: Fast and accurate autofocus is essential for night photography. Many cameras have difficulty focusing in low-light situations, so look for models with advanced autofocus systems or manual focus options.
- Weather Resistance: If you plan to shoot night photography in inclement weather, look for a camera with weather-sealing features. This will protect your equipment from moisture, dust, and other elements.
In addition to these factors, consider your budget and personal preferences when selecting your camera and lenses. Some photographers prefer mirrorless cameras for their compact size and autofocus capabilities, while others opt for DSLRs for their durability and battery life. Research and compare different models to find the best equipment for your needs and budget.
Selecting the Right Settings for Night Photography
Night photography can be a challenging task, but with the right equipment and settings, it can also be a rewarding experience. The key to capturing stunning night photos is to select the right settings for your camera. In this section, we will discuss the camera settings that you need to adjust to capture the best night photos.
Adjusting Your Camera Settings
ISO
ISO is the light sensitivity of your camera’s sensor. In low light conditions, you need to increase the ISO to capture more light. However, increasing the ISO also increases the noise in your photos. Therefore, it is essential to find the right balance between ISO and noise. A good starting point is to set the ISO to 800 and adjust it based on the available light.
Shutter Speed
Shutter speed is the length of time that the camera’s shutter is open. In night photography, you need to use a slower shutter speed to capture more light. However, using a slower shutter speed also increases the risk of camera shake, which can result in a blurry photo. Therefore, it is essential to use a tripod or other stabilizing device to keep the camera steady. A good starting point is to use a shutter speed of 15 seconds or slower.
Aperture
Aperture is the size of the camera’s aperture, which controls the amount of light that enters the camera. In night photography, you need to use a larger aperture to allow more light into the camera. However, using a larger aperture also decreases the depth of field, which can result in a less sharp photo. Therefore, it is essential to find the right balance between aperture and depth of field. A good starting point is to use an aperture of f/2.8 or wider.
White Balance
White balance is the color temperature of your photos. In night photography, the color temperature can vary depending on the ambient light sources. Therefore, it is essential to adjust the white balance to ensure that your photos look natural. A good starting point is to use the auto white balance setting or the cloudy white balance setting.
Focusing
Focusing is critical in night photography, as the lack of light can make it difficult to achieve accurate focus. Therefore, it is essential to use a focusing aid, such as a focus lamp or a remote shutter release, to ensure that your photos are in focus. A good starting point is to use a single autofocus point and adjust the focus manually based on the ambient light sources.
Essential Accessories for Night Photography
Night photography requires a set of specialized equipment to capture the best images possible. In this section, we will discuss the essential accessories for night photography.
Tripod
A tripod is one of the most important accessories for night photography. It provides stability and helps to minimize camera shake, which is essential when taking long exposures at night. A sturdy tripod will allow you to take photos with a slower shutter speed, which will help to capture more light and create a better image.
Importance of a Sturdy Tripod
A sturdy tripod is crucial for night photography because it provides stability and allows you to take longer exposures without the risk of camera shake. When shooting at night, the exposure times are usually longer, and even the slightest movement can result in a blurry image. A tripod helps to eliminate camera shake and ensures that your images are sharp and well-focused.
Choosing the Right Tripod
When choosing a tripod for night photography, there are several factors to consider. The most important factor is the weight capacity of the tripod. It should be able to support the weight of your camera and lens combination. Additionally, you should consider the height of the tripod, as you may need to shoot from a low angle or a high angle depending on the scene. Finally, you should consider the weight and portability of the tripod, as you may need to carry it around for extended periods.
Remote Shutter Release
A remote shutter release is another essential accessory for night photography. It allows you to trigger the camera’s shutter without touching it, which helps to minimize camera shake and reduce the risk of blurry images. A remote shutter release is particularly useful when shooting long exposures at night, as it allows you to keep your hands away from the camera and avoid any accidental movements.
Why You Need It
A remote shutter release is essential for night photography because it helps to minimize camera shake and reduce the risk of blurry images. When shooting at night, the exposure times are usually longer, and even the slightest movement can result in a blurry image. A remote shutter release allows you to trigger the camera’s shutter without touching it, which helps to minimize camera shake and reduce the risk of blurry images.
Types of Remote Shutter Releases
There are two types of remote shutter releases: wired and wireless. A wired remote shutter release is connected to the camera’s external flash synch terminal, while a wireless remote shutter release uses radio frequencies to communicate with the camera. Both types of remote shutter releases are useful for night photography, and the choice between them depends on personal preference and the specific shooting conditions.
Wireless vs. Cable-based
Wireless remote shutter releases are more convenient than cable-based remote shutter releases because they do not require a physical connection between the camera and the remote shutter release. Wireless remote shutter releases use radio frequencies to communicate with the camera, which allows for greater flexibility and mobility. Cable-based remote shutter releases, on the other hand, are more limited in their range and require a physical connection between the camera and the remote shutter release.
Wired vs. Wireless
The choice between a wired and wireless remote shutter release depends on personal preference and the specific shooting conditions. Wired remote shutter releases are more reliable and provide a more stable connection, but they are also more limited in their range and require a physical connection between the camera and the remote shutter release. Wireless remote shutter releases are more convenient and provide greater flexibility, but they may be less reliable and more susceptible to interference.
Choosing the Right Remote Shutter Release
When choosing a remote shutter release for night photography, there are several factors to consider. The most important factor is the range of the remote shutter release, as you may need to
Capturing the Perfect Night Photography Shots
Composition Techniques for Night Photography
Composition is a crucial aspect of night photography, as it helps to create visually appealing images that capture the essence of the night. There are several composition techniques that can be used to enhance the visual impact of night photographs.
Balancing Light and Darkness
One of the biggest challenges of night photography is balancing the light and darkness in the scene. The key to achieving this balance is to experiment with different exposure settings, such as aperture, shutter speed, and ISO, to create an image that captures both the bright and dark elements of the scene.
Rule of Thirds
The rule of thirds is a fundamental principle of composition that can be used to create more dynamic and visually appealing images. In night photography, the rule of thirds can be used to position the main subject or key elements of the scene along the horizontal or vertical gridlines that divide the image into thirds. This helps to create a sense of balance and harmony in the image.
Leading Lines
Leading lines are another powerful composition technique that can be used in night photography. Leading lines are lines or shapes that lead the viewer’s eye through the image, creating a sense of depth and dimension. This can be achieved by using a road, a path, a building, or any other element that leads the viewer’s eye to the main subject or key elements of the scene.
Negative Space
Negative space is the empty space around the main subject or key elements of the scene. In night photography, negative space can be used to create a sense of scale and proportion, as well as to emphasize the main subject or key elements of the scene. It can also be used to create a sense of calm and tranquility, as well as to draw the viewer’s eye to the main subject or key elements of the scene.
Framing Your Shot
Framing is another important aspect of composition in night photography. The way you frame your shot can have a significant impact on the overall visual impact of the image. Here are some framing techniques that can be used in night photography:
Experimenting with Different Perspectives
Experimenting with different perspectives is a great way to add interest and creativity to your night photographs. Instead of shooting from a traditional standing position, try shooting from a low angle, a high angle, or even a unique angle to create a more dynamic and interesting image.
Using Foreground Interest
Using foreground interest is another composition technique that can be used in night photography. Foreground interest can be used to add depth and dimension to the image, as well as to create a sense of scale and proportion. This can be achieved by including objects in the foreground, such as buildings, trees, or people, that lead the viewer’s eye to the main subject or key elements of the scene.
Experimenting with Depth of Field
Depth of field is the range of distance in an image that appears in focus. In night photography, experimenting with depth of field can be used to create a sense of depth and dimension in the image. This can be achieved by using a shallow depth of field, which blurs the background and emphasizes the main subject or key elements of the scene, or by using a deep depth of field, which keeps the entire image in focus.
Experimenting with Different Night Photography Techniques
Capturing the perfect night photography shots requires experimentation with different techniques. This section will delve into various night photography techniques that can help you capture stunning images in low light conditions.
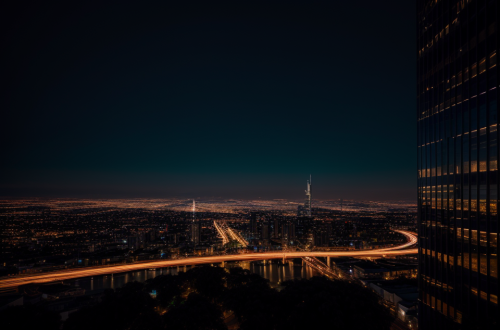
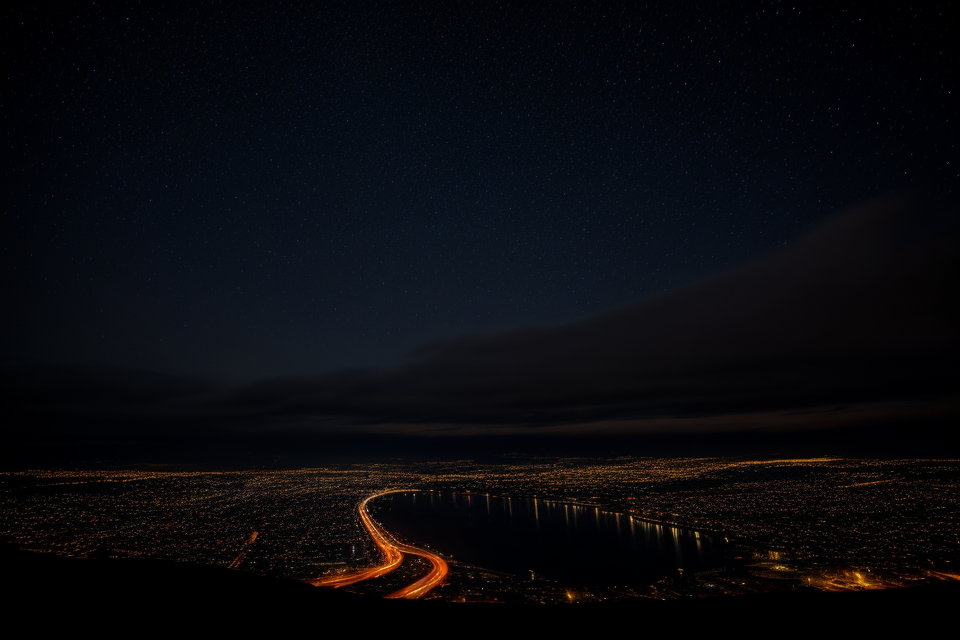
Long Exposure Techniques
What is Long Exposure?
Long exposure is a technique used in night photography where the camera’s shutter is left open for an extended period, allowing more light to enter the camera sensor. This technique is useful for capturing the movement of stars, the lights of cars, and other moving objects in the night scene.
Tips for Long Exposure Night Photography
- Use a tripod to keep the camera steady during the long exposure.
- Use a remote shutter release or the camera’s self-timer to avoid camera shake when pressing the shutter button.
- Experiment with different shutter speeds to achieve the desired effect.
- Use a narrow aperture to increase the depth of field and ensure the entire scene is in focus.
- Use the lowest ISO setting possible to minimize noise in the image.
Capturing Light Trails
Light trails are a popular subject in night photography, and long exposure techniques can help capture them effectively. To capture light trails, you need to use a long exposure and pan the camera slowly while capturing the image. This will create a trail of lights in the image, which can be very captivating.
Experimenting with Motion Blur
Motion blur can be used to create a sense of movement in night photography. To achieve motion blur, you need to use a slower shutter speed and pan the camera slowly while capturing the image. This will create a blurred effect on the moving objects in the image, creating a sense of motion.
Star Trails
What are Star Trails?
Star trails are a unique phenomenon in night photography where the stars appear as streaks of light in the image. This effect is created by taking multiple long exposure shots and combining them to create a single image.
Tips for Capturing Star Trails
- Use a sturdy tripod to keep the camera steady during the long exposure.
- Use a narrow aperture to increase the depth of field and ensure the entire scene is in focus.
- Use the lowest ISO setting possible to minimize noise in the image.
- Use a star tracker app to help you frame the stars correctly.
Light Painting
What is Light Painting?
Light painting is a technique used in night photography where you add light to a dark scene to create a unique image. This technique involves using a flashlight, glow sticks, or other light sources to create patterns and shapes in the dark.
Tips for Light Painting
- Experiment with different light sources and patterns to create unique images.
By experimenting with these different night photography techniques, you can capture stunning images that showcase the beauty of the night.
Editing Your Night Photography Shots
Importance of Post-Processing
Post-processing is a crucial step in night photography that allows you to enhance and bring out the best in your images. It can help you to correct any issues that may have occurred during the shooting process, such as poor exposure or color casts, and can also be used to add creative effects and enhance the overall aesthetic of your images.
Adjusting Exposure
One of the most important aspects of post-processing is adjusting the exposure of your images. This can help to bring out the details in the shadows and highlights, and can also help to reduce noise in the image. When adjusting the exposure, it’s important to be careful not to overexpose or underexpose your images, as this can result in a loss of detail and a washed-out or muddy look.
Correcting Colors
Another important aspect of post-processing is correcting the colors in your images. This can involve adjusting the white balance, which can help to remove any color casts that may have occurred during the shooting process. It can also involve adjusting the saturation and vibrance of the colors in the image, which can help to enhance their richness and depth.
Enhancing Details
Post-processing can also be used to enhance the details in your images. This can involve adjusting the contrast and clarity, which can help to bring out the details in the shadows and highlights. It can also involve using techniques such as sharpening and noise reduction, which can help to enhance the overall sharpness and clarity of the image.
Adding Filters and Effects
Finally, post-processing can also be used to add creative filters and effects to your images. This can include adding color filters, adding textures, or using special effects such as light leaks or lens flares. These techniques can help to add a unique and artistic touch to your images, and can help to enhance the overall aesthetic of your night photography shots.
Sharing Your Night Photography Work
Social Media Platforms for Photographers
Social media platforms offer a great way to share your night photography work with a wider audience. Some popular platforms for photographers include:
- Instagram: With over 1 billion active users, Instagram is a great platform to share your night photography work. You can use hashtags to make your posts discoverable by other users, and you can also join Instagram photography communities to connect with other photographers.
- Facebook: Facebook is another popular platform for sharing your night photography work. You can create a Facebook page dedicated to your photography, and share your work with your friends and followers.
- Twitter: Twitter is a great platform for sharing quick updates and behind-the-scenes glimpses of your night photography work. You can use hashtags to make your tweets discoverable by other users, and you can also join Twitter photography communities to connect with other photographers.
- Flickr: Flickr is a popular platform for photographers to share their work. You can join photography groups on Flickr to connect with other photographers, and you can also use Flickr’s advanced search feature to find photographers who share similar interests.
- 500px: 500px is a platform for photographers to share their work and connect with other photographers. You can join photography groups on 500px to connect with other photographers, and you can also use 500px’s discovery feature to find photographers who share similar interests.
- Pinterest: Pinterest is a platform for discovering and sharing images. You can create boards on Pinterest dedicated to your night photography work, and share your work with other users.
- LinkedIn: LinkedIn is a professional networking platform that can be used to share your night photography work with other professionals in your industry. You can join LinkedIn groups dedicated to photography, and share your work with other members of the group.
Sharing Your Work Locally
Sharing your night photography work locally can be a great way to connect with other photographers and gain exposure for your work. Some ways to share your work locally include:
- Art Galleries: Many art galleries host photography exhibitions, and may be interested in showcasing your night photography work.
- Local Photography Clubs: Joining a local photography club can be a great way to connect with other photographers and share your work. Many photography clubs host events and exhibitions, and may be interested in showcasing your night photography work.
- Community Exhibitions: Many communities host photography exhibitions, and may be interested in showcasing your night photography work. These exhibitions can be a great way to gain exposure for your work and connect with other photographers in your community.
- Contests and Competitions: Participating in photography contests and competitions can be a great way to gain exposure for your night photography work. Many contests and competitions are open to photographers of all skill levels, and can be a great way to showcase your work and connect with other photographers.
FAQs
1. What is night photography?
Night photography is a type of photography that involves capturing images in low light conditions, usually after sunset or during the night. It requires special techniques and equipment to capture the images, including adjusting the camera settings and using a tripod.
2. What equipment do I need for night photography?
To capture good quality night photos, you will need a camera with manual settings, a tripod, and a sturdy camera bag. A wide-angle lens can also be useful for capturing a larger scene, while a long exposure can help capture the stars in the night sky.
3. How do I adjust my camera settings for night photography?
You will need to adjust your camera settings to capture the low light conditions of night photography. This includes increasing the ISO to allow more light into the camera, setting a slower shutter speed to keep the camera open for longer periods of time, and using a smaller aperture to increase the depth of field.
4. What are some tips for taking night photos?
Some tips for taking good night photos include using a tripod to keep the camera steady, using a remote shutter release to avoid camera shake, and scouting out the location beforehand to find the best vantage points. It can also be helpful to bracket your shots, taking multiple photos at different exposures to ensure you get the best shot.
5. How can I capture the stars in my night photos?
To capture the stars in your night photos, you will need to use a longer exposure and a wide-angle lens. It can also be helpful to use a polarizing filter to reduce glare from streetlights and other sources of light. Be sure to use a tripod to keep the camera steady during the longer exposure.