Are you looking to capture stunning close-up shots of flowers, insects, or other tiny details that often go unnoticed? Look no further! Macro photography is the perfect way to bring these miniature wonders to life, and in this guide, we’ll explore the best options for capturing breathtaking macro shots. From lenses to camera settings, we’ll cover everything you need to know to take your macro photography game to the next level. So grab your camera, and let’s dive in!
Understanding Macro Photography
What is Macro Photography?
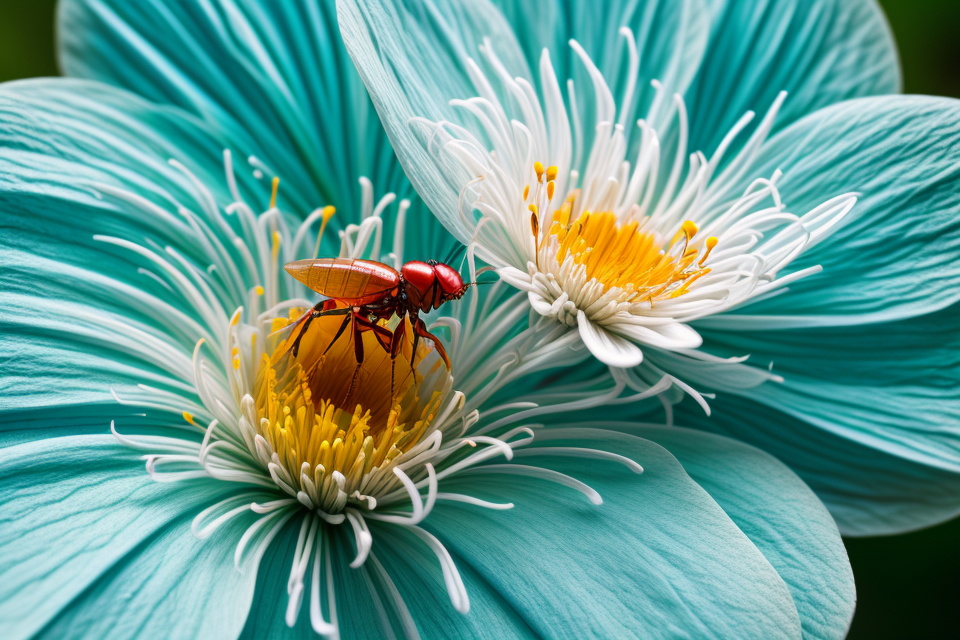
Macro photography is a type of photography that involves capturing close-up images of small objects or subjects. The term “macro” refers to the close-up reproduction of an object that is larger than life size, but not necessarily to a scale of 1:1 or greater.
One of the defining characteristics of macro photography is the use of a specialized lens, often a dedicated macro lens, to achieve a high magnification ratio. This allows photographers to capture images of subjects that are typically too small to be seen with the naked eye, such as insects, flowers, and other small details.
Macro photography is important because it allows photographers to capture details that would otherwise go unnoticed. It can be used to showcase the beauty and complexity of small objects, reveal hidden details, and create abstract images that challenge our perceptions of reality.
In addition to its artistic value, macro photography also has practical applications in fields such as science, medicine, and product photography. It can be used to capture detailed images of microorganisms, cells, and other small specimens, as well as to showcase the details of products and materials.
Overall, macro photography is a powerful tool for capturing the beauty and complexity of the world around us, and is an essential skill for any photographer looking to expand their creative horizons.
How Macro Photography Works
Macro photography is a type of close-up photography that captures small details and intricate patterns that are often overlooked by the naked eye. The goal of macro photography is to magnify the subject to create a larger-than-life image that reveals the beauty and complexity of the subject.
One of the key aspects of macro photography is magnification ratios. This ratio is calculated by dividing the focal length of the lens by the distance from the lens to the subject. A higher magnification ratio means that the subject is being magnified more, resulting in a larger image.
Lenses are a crucial component of macro photography, and there are several types of lenses that can be used for this type of photography. Some lenses are specifically designed for macro photography, while others can be adapted for this purpose. Macro lenses are typically capable of focusing on subjects that are only a few millimeters away from the lens, which allows for incredible detail and clarity in the final image.
In addition to lenses, other equipment such as tripods, flash units, and remote shutter releases can also be useful for macro photography. Tripods can help to stabilize the camera and prevent blur, while flash units can be used to provide additional lighting when shooting in low light conditions. Remote shutter releases can also be helpful for preventing camera shake when taking handheld shots.
Overall, macro photography requires careful planning, attention to detail, and the right equipment to capture stunning images of small subjects. By understanding the basics of how macro photography works, photographers can take their skills to the next level and capture images that reveal the beauty and complexity of the world around us.
Best Options for Macro Photography
1. DSLR Cameras
DSLR (Digital Single-Lens Reflex) cameras are a popular choice for macro photography due to their versatility and high image quality. They offer interchangeable lenses, allowing photographers to choose the best lens for their specific needs. DSLRs also have a mirror mechanism that allows for an optical viewfinder, giving photographers a more accurate representation of their shot.
Overview of DSLR Cameras
DSLR cameras are characterized by their reflex mirror, which directs light from the lens to the optical viewfinder. The mirror lifts up when the camera takes a photo, allowing light to hit the image sensor instead. DSLRs typically have a lower resolution than mirrorless cameras, but they make up for it with their ergonomic design and versatility.
Benefits of using DSLR for macro photography
- High image quality and low noise
- Versatility with interchangeable lenses
- Optical viewfinder with more accurate representation of the shot
- Wide range of DSLR models available
Top DSLR cameras for macro photography
Some of the best DSLR cameras for macro photography include:
- Canon EOS Rebel T7i
- Nikon D7500
- Pentax K-70
- Sony Alpha a6400
- Fujifilm X-T30
These cameras offer a combination of high image quality, autofocus performance, and ergonomics, making them suitable for both beginner and advanced macro photographers.
2. Mirrorless Cameras
Mirrorless cameras have become increasingly popular in recent years due to their compact size, lightweight design, and impressive image quality. When it comes to macro photography, mirrorless cameras offer several advantages over traditional DSLRs.
- Advantages of mirrorless cameras for macro photography
- Shallow depth of field: Mirrorless cameras allow for greater control over depth of field, making it easier to create a blurred background and isolate your subject.
- Faster autofocus: Many mirrorless cameras offer fast and accurate autofocus systems, which are essential for capturing sharp images of small subjects.
- In-body image stabilization: Some mirrorless cameras feature in-body image stabilization (IBIS), which can help you capture sharp images without a tripod, even when shooting handheld.
- Live view: Mirrorless cameras offer a live view mode that allows you to preview the image on the rear screen, making it easier to focus and compose your shots.
- Top mirrorless cameras for macro photography
- Sony Alpha a6100: This compact mirrorless camera offers excellent image quality, fast autofocus, and 4K video recording. It’s a great option for beginner and intermediate macro photographers.
- Fujifilm X-T4: The X-T4 is a versatile mirrorless camera that offers 4K video recording, in-body image stabilization, and a hybrid autofocus system. It’s a great option for both macro and general photography.
- Olympus OM-D E-M1 Mark III: This rugged mirrorless camera features in-body image stabilization, fast autofocus, and a live view mode that makes it easy to compose your shots. It’s a great option for macro photographers who want to shoot in challenging environments.
- Canon EOS M50 Mark II: This affordable mirrorless camera offers excellent image quality, fast autofocus, and 4K video recording. It’s a great option for beginner and intermediate macro photographers on a budget.
3. Smartphone Cameras
Smartphone cameras have become increasingly popular for macro photography due to their convenience, accessibility, and high-quality imaging capabilities. With advancements in camera technology, smartphones now offer features such as high-resolution sensors, optical image stabilization, and manual controls that make them a viable option for macro photography.
One of the primary benefits of using smartphones for macro photography is their portability. Unlike traditional DSLR or mirrorless cameras, smartphones are small, lightweight, and easy to carry around, making them ideal for capturing macro shots on the go. Additionally, many smartphones come with built-in editing software and social media integration, allowing for quick and easy sharing of images.
Some of the top smartphone cameras for macro photography include the iPhone 13 Pro, Samsung Galaxy S21 Ultra, and Google Pixel 6 Pro. These phones offer high-quality imaging sensors, advanced optics, and dedicated macro modes that allow for precise focusing and adjustment of exposure settings. Additionally, they provide manual controls, such as aperture, shutter speed, and ISO, giving users greater creative control over their macro shots.
It is important to note that while smartphone cameras can produce impressive macro shots, they may have limitations in terms of image quality and versatility compared to traditional macro photography equipment. However, for those looking for a convenient and cost-effective option for macro photography, smartphone cameras offer a viable alternative.
4. Macro Lenses
Overview of Macro Lenses
Macro lenses are a type of photography lens that are specifically designed to capture close-up images of small subjects, such as insects, flowers, and other details. These lenses have a very short minimum focusing distance, which allows the photographer to capture highly detailed images of their subject with a shallow depth of field. Macro lenses are typically used with DSLR or mirrorless cameras, but they can also be used with point-and-shoot cameras that have a built-in macro mode.
Benefits of Using Macro Lenses
Macro lenses offer several benefits to photographers who want to capture highly detailed images of small subjects. One of the most significant benefits is the ability to capture images with a shallow depth of field, which can add a sense of depth and dimension to the image. Macro lenses also allow photographers to get very close to their subject, which can help to isolate it from its surroundings and create a more intimate image. Additionally, macro lenses are often more affordable than other types of specialized photography lenses, making them a great option for photographers on a budget.
Top Macro Lenses for Different Camera Types
There are many different macro lenses available on the market, and choosing the right one for your camera can be overwhelming. Here are some of the top macro lenses for different camera types:
Canon
- Canon EF 100mm f/2.8 Macro USM
- Canon EF-S 30mm f/2.8 Macro IS USM
Nikon
- Nikon AF-S Micro Nikkor 60mm f/2.8G ED
- Nikon AF-P DX NIKKOR 40mm f/2.8G
Sony
- Sony FE 90mm f/2.8 Macro G OSS
- Sony FE 50mm f/2.8 Macro
Tamron
- Tamron SP 90mm f/2.8 Di Macro 1:1 VC USD
- Tamron SP 24-70mm f/2.8 Di VC USD G2
These are just a few examples of the many macro lenses available for different camera types. When choosing a macro lens, it’s essential to consider factors such as focal length, minimum focusing distance, and maximum aperture to ensure that it meets your specific needs as a photographer.
5. Diopters and Extension Tubes
Diopters and extension tubes are two popular accessories that can significantly enhance the performance of a macro photography setup. They offer a cost-effective way to increase the magnification power of a lens and enable the capture of stunning close-up shots.
Overview of Diopters and Extension Tubes
Diopters and extension tubes are two separate accessories that work together to increase the magnification power of a lens. Diopters are simple glass or plastic elements that screw onto the front of a lens and can increase its focal length. Extension tubes are hollow tubes that fit between the camera body and the lens, allowing the lens to focus closer to the subject.
Benefits of Using Diopters and Extension Tubes
Using diopters and extension tubes can offer several benefits to macro photographers. They can significantly increase the magnification power of a lens, enabling the capture of high-quality close-up shots. They can also reduce the overall cost of a macro photography setup compared to purchasing a dedicated macro lens.
Top Diopters and Extension Tubes for Macro Photography
There are several diopters and extension tubes available on the market that are well-suited for macro photography. Some of the top options include:
Diopters
- B+W 400C Circular Polarizer: This diopter offers a +1.0 stop filter factor and is compatible with most lenses.
- Tiffen Digital DIT Mini II: This diopter offers a +1.0 stop filter factor and is designed for use with DSLRs and mirrorless cameras.
- Hoya HD Digital Circular Polarizer: This diopter offers a +1.0 stop filter factor and is compatible with most lenses.
Extension Tubes
- Canon EF 12II Extension Tube: This extension tube is designed for use with Canon EF-mount lenses and offers 12mm of additional extension.
- Kenko Teleplus AT-800AF Auto Focus AF Extension Tube: This extension tube is designed for use with Nikon AF-S and AF-I lenses and offers 800mm of additional extension.
- Jupiter-9 Extension Tube Set: This set includes three extension tubes with lengths of 10mm, 16mm, and 21mm, making it suitable for a wide range of lenses.
By using diopters and extension tubes, macro photographers can achieve stunning close-up shots without breaking the bank.
6. Reverse Lens Technique
Overview of Reverse Lens Technique
Macro photography is an exciting and rewarding pursuit that requires both technical skill and creative vision. One of the most effective techniques for achieving extreme close-ups is the reverse lens technique. This method involves mounting a lens backward on the camera to achieve a magnified image.
Benefits of Using Reverse Lens Technique
The reverse lens technique offers several advantages over other macro photography methods. For one, it allows for a much closer focusing distance, which means that you can get much larger images of your subject. Additionally, because the lens is mounted backward, it is less prone to vibration and image stabilization issues, making it easier to capture sharp images.
Top Reverse Lens Techniques for Macro Photography
There are several different reverse lens techniques that you can use for macro photography, each with its own advantages and disadvantages. Some of the most popular include:
- The Bellows Extension Technique: This technique involves using an extension tube to mount the lens backward on the camera. This is a simple and cost-effective way to achieve close-up shots, but it can be challenging to get precise focus.
- The Lens Reversal Technique: This technique involves removing the lens from the camera and mounting it backward on a lens mount. This method offers more precise focus control, but it can be more complex to set up.
- The Reverse Mount Technique: This technique involves using a reversed mount adapter to mount the lens backward on the camera. This method offers precise focus control and is relatively easy to set up, but it can be more expensive than other methods.
Overall, the reverse lens technique is a powerful tool for macro photography that offers several advantages over other methods. By understanding the different techniques and their advantages and disadvantages, you can choose the best approach for your specific needs and achieve stunning close-up shots of your subjects.
Tips for Macro Photography
Choosing the Right Camera and Lens
Choosing the right camera and lens is crucial for achieving optimal results in macro photography. There are several factors to consider when selecting the equipment for this type of photography. In this section, we will discuss the most important factors and provide recommendations for different budgets.
Factors to Consider
When selecting a camera and lens for macro photography, consider the following factors:
- Resolution: A higher resolution is essential for capturing detailed images of small subjects.
- Sensor size: A larger sensor will result in better image quality and more significant dynamic range.
- Autofocus performance: A camera with fast and accurate autofocus is essential for capturing sharp images.
- Weather sealing: Weather sealing is essential for outdoor macro photography, as it protects the camera and lens from dust, moisture, and other elements.
- Image stabilization: Image stabilization is useful for capturing sharp images handheld, which can be particularly helpful when shooting macro photography.
Recommendations for Different Budgets
There are several camera and lens combinations that can be used for macro photography, ranging from budget-friendly options to high-end equipment. Here are some recommendations for different budgets:
- Budget: Nikon D5600 with Nikon 60mm f/2.8G Macro
- Mid-range: Canon EOS 7D Mark II with Canon EF-S 100mm f/2.8 Macro USM
- High-end: Sony A7R IV with Sony FE 90mm f/2.8 Macro G OSS
In conclusion, choosing the right camera and lens for macro photography is crucial for achieving optimal results. Consider the factors discussed in this section, and choose a camera and lens combination that fits your budget and meets your specific needs.
Composition and Lighting
Composition is a crucial aspect of macro photography, as it determines the visual impact and aesthetic appeal of the final image. When composing a macro shot, it’s important to consider the following tips:
- Framing: Frame your subject using the rule of thirds or the golden ratio, which can create a more visually appealing composition.
- Depth of Field: Shallow depth of field can add a sense of drama and draw attention to your subject. A shallow depth of field can be achieved by using a low f-stop, a long focal length, or by getting closer to your subject.
- Symmetry: Look for symmetrical patterns or shapes in your subject, which can create a sense of balance and harmony in your image.
- Negative Space: Use negative space to create a sense of scale and proportion in your image.
Lighting is also an essential element of macro photography, as it can enhance the details and textures of your subject. Some best lighting techniques for macro photography are:
- Natural Light: Natural light is the best light source for macro photography, as it can create vibrant colors and contrast. Try to position your subject near a window or outside on a sunny day.
- Artificial Light: If you’re shooting indoors or in low light conditions, artificial light can be used to light your subject. LED lights or flash units are ideal for macro photography, as they provide a high intensity light source that can be directed specifically at your subject.
- Reflectors: Reflectors can be used to bounce light onto your subject and create a more even lighting effect. Silver or white reflectors are ideal for macro photography, as they can enhance the details and textures of your subject.
In conclusion, composition and lighting are essential elements of macro photography that can enhance the visual impact and aesthetic appeal of your images. By considering these tips and techniques, you can create stunning macro shots that capture the beauty and intricacy of your subject.
Focusing and Shutter Speed
When it comes to macro photography, proper focusing and shutter speed are crucial for capturing sharp and well-exposed images. Here are some techniques and concepts to keep in mind when focusing and adjusting your shutter speed for macro photography.
Techniques for Focusing
Manual focusing is the most common method used in macro photography, as it allows for greater control over the focus. To manually focus, you will need to switch your camera to manual focus mode and use the focus ring on your lens to adjust the focus. It’s important to focus carefully, as even small adjustments can make a big difference in the sharpness of your image.
Another technique for focusing is to use a focus stacking method, which involves taking multiple images of the same subject at different focus points and then combining them in post-processing to create a single, sharp image. This can be a useful technique for subjects with a lot of depth, such as flowers or insects with intricate patterns.
Understanding Shutter Speed and ISO
Shutter speed and ISO are two important factors to consider when adjusting your camera settings for macro photography. A slower shutter speed can result in motion blur, which can be useful for creating a sense of movement in your images. However, it’s important to keep your shutter speed fast enough to avoid camera shake and image blur.
ISO is another important setting to consider, as it can affect the sensitivity of your camera’s sensor to light. A higher ISO setting can result in more noise in your images, but it can also allow you to use a faster shutter speed or a smaller aperture, which can help you achieve a greater depth of field.
In general, it’s best to use a tripod to help keep your camera steady and avoid camera shake, especially when using slower shutter speeds or lower ISO settings. A tripod can also help you achieve more precise and consistent framing and composition.
Overall, proper focusing and shutter speed are crucial for capturing sharp and well-exposed images in macro photography. By using manual focusing techniques and understanding the relationship between shutter speed, ISO, and camera stability, you can take your macro photography to the next level.
Editing and Enhancing Macro Photographs
Editing and enhancing macro photographs is an essential step in producing high-quality images. The right editing techniques can bring out the best in your photographs, highlighting details and improving overall composition. Here are some tips for editing and enhancing macro photographs:
Overview of editing software
There are many editing software options available for macro photographers, including Adobe Photoshop, Lightroom, and GIMP. Each software has its own strengths and weaknesses, so it’s important to choose the one that best suits your needs.
Adobe Photoshop is a powerful and versatile software that offers a wide range of tools for editing and enhancing photographs. It’s particularly well-suited for working with macro photographs, as it offers features such as layers, selection tools, and adjustment layers that make it easy to edit and enhance fine details.
Lightroom is another popular editing software that’s particularly well-suited for organizing and editing large collections of photographs. It offers a range of tools for adjusting exposure, color, and contrast, as well as tools for cropping and straightening images.
GIMP is a free and open-source software that offers many of the same features as Photoshop. It’s a good option for those on a budget or who prefer a more customizable editing experience.
Tips for editing macro photographs
Once you’ve chosen your editing software, here are some tips for editing and enhancing your macro photographs:
- Start with basic adjustments: Begin by making basic adjustments to your photographs, such as adjusting exposure, contrast, and color balance. These adjustments can help bring out the best in your photographs and create a more cohesive look.
- Use layers and masks: Layers and masks are powerful tools for editing and enhancing macro photographs. Use them to selectively adjust and enhance specific areas of your photographs, such as adding contrast or brightness to specific areas of an image.
- Look for patterns and textures: Macro photographs often feature intricate patterns and textures that can be highlighted through editing. Look for ways to bring out these details and enhance them in your photographs.
- Experiment with effects: Effects such as sepia tones, black and white, or vintage filters can add depth and interest to your macro photographs. Experiment with different effects to see what works best for your images.
Best practices for enhancing macro photographs
Here are some best practices for enhancing your macro photographs:
- Start with high-quality images: The best editing techniques can only do so much. Start with high-quality images that are well-composed and in focus to ensure the best results.
- Use non-destructive editing techniques: Non-destructive editing techniques allow you to make changes to your photographs without permanently altering the original image. This is particularly important for macro photographs, as you may want to make further adjustments or enhancements in the future.
- Experiment and have fun: Editing and enhancing macro photographs can be a creative and rewarding process. Don’t be afraid to experiment and try new techniques to find the best results for your images.
FAQs
1. What is macro photography?
Macro photography is a type of photography that captures extremely close-up images of small subjects, such as insects, flowers, and other tiny objects. It requires specialized equipment and techniques to achieve sharp and detailed images.
2. What type of camera is best for macro photography?
DSLR (Digital Single-Lens Reflex) cameras are considered the best option for macro photography due to their ability to use a shallow depth of field and adjust the aperture, shutter speed, and ISO settings. However, mirrorless cameras and even smartphones with good macro capabilities can also produce excellent results.
3. What lens should I use for macro photography?
A dedicated macro lens is the best option for macro photography, as it is specifically designed for close-up shooting. These lenses typically have a minimum focusing distance of around 1 cm and a maximum reproduction ratio of 1:1, which means that the subject is displayed life-size on the camera sensor. However, a good quality zoom lens with a maximum reproduction ratio of 1:2 or 1:3 can also produce good results.
4. How do I focus accurately for macro photography?
Manual focusing is usually recommended for macro photography, as autofocus may struggle to lock onto such small subjects. It is important to use a tripod or other stable surface to support the camera, and to use live view mode or the optical viewfinder to manually adjust the focus. Additionally, some cameras have a focus stacking feature that can help to ensure sharpness throughout the entire image.
5. What lighting equipment do I need for macro photography?
For macro photography, natural light is often the best option, as it provides soft and diffused light that is ideal for bringing out the details of small subjects. However, external flash units or LED lights can also be used to provide additional lighting, especially when shooting in low light conditions or in the field. It is important to use diffusers or gels to control the light and avoid harsh shadows.
6. How do I compose my macro photographs?
Composition is key in macro photography, as it can help to create visually appealing images that showcase the details and uniqueness of small subjects. Consider the rule of thirds, leading lines, and negative space to create interesting and dynamic compositions. Additionally, experiment with different angles and perspectives to find the most compelling shot.
7. What are some tips for shooting macro photography in the field?
When shooting macro photography in the field, it is important to consider the environment and the subject’s behavior. Look for interesting patterns, textures, and colors that can make for striking images. Use a tripod or other stable surface to support the camera and avoid camera shake. And, consider using a polarizing filter to reduce glare and enhance colors.
8. How do I edit my macro photographs?
Editing is an important step in the macro photography workflow, as it can help to enhance the details and colors of the image. Use photo editing software to adjust the exposure, contrast, and saturation, and to remove any distracting elements or unwanted features. Additionally, consider adding a vignette or a frame to create a more polished and professional-looking image.


