Are you ready to embark on a journey through the world of film photography? With its unique textures, colors, and imperfections, film offers a timeless and artistic medium for capturing memories. But what do you need to get started? In this comprehensive guide, we’ll explore the essentials of film photography, from the equipment you’ll need to the techniques that will help you create stunning images. Whether you’re a seasoned pro or a beginner just starting out, this guide has something for everyone. So grab your camera, some film, and let’s dive in!
The Basics of Film Photography
Understanding Film Types
When it comes to film photography, understanding the different types of film available is crucial to achieving the desired results. There are several factors to consider when choosing a film, including color versus black and white, slide film versus reversal film, and ISO ratings.
Color vs. Black and White
The first decision to make when choosing a film is whether to use color or black and white film. Color film captures a wider range of colors and tones, making it ideal for capturing realistic images. Black and white film, on the other hand, is better suited for capturing mood and conveying emotions through the use of contrast and texture.
Slide Film vs. Reversal Film
Another important consideration is whether to use slide film or reversal film. Slide film is processed using the E-6 process and produces transparencies that can be projected using a slide projector. Reversal film, on the other hand, is processed using the C-41 process and produces negatives that can be printed on photographic paper.
ISO Ratings and Their Impact on Exposure
ISO ratings are a measure of a film’s sensitivity to light. A higher ISO rating means that the film is more sensitive to light, which is useful in low light conditions. However, a higher ISO rating also means that the film will be more prone to grain, which can affect the overall quality of the image. Understanding the impact of ISO ratings on exposure is crucial to achieving the desired results in film photography.
Choosing the Right Camera
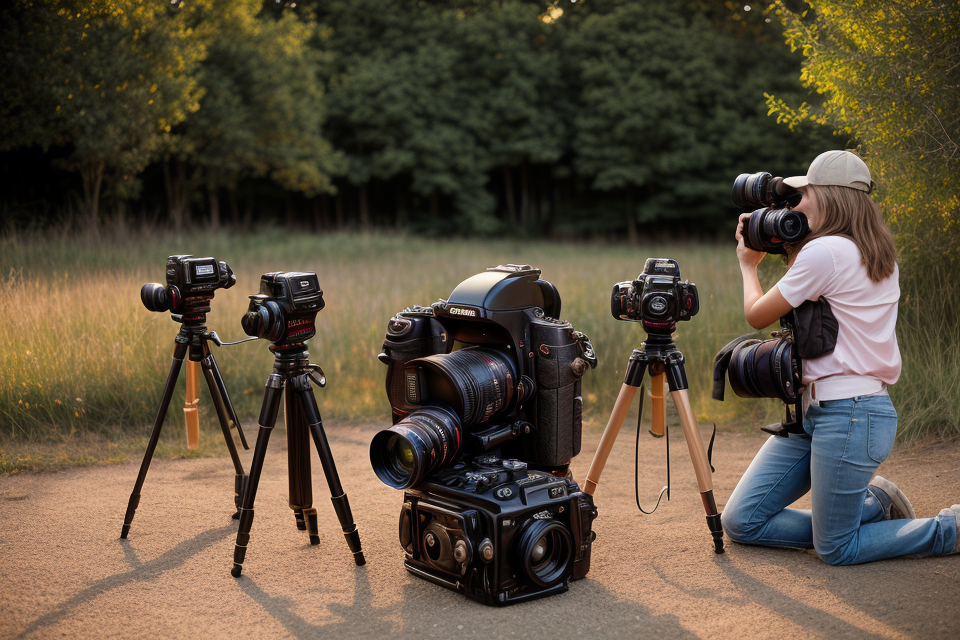
Choosing the right camera is an essential aspect of film photography. The camera you select will play a crucial role in determining the quality of your photographs and the level of control you have over your shots. There are several factors to consider when selecting a film camera, including the type of camera, brand, and model, as well as any necessary accessories.
Analog vs. Digital Cameras
One of the first decisions you need to make when choosing a film camera is whether to go with an analog or digital camera. Analog cameras use film to capture images, while digital cameras use electronic sensors. Analog cameras are known for their unique aesthetic and are often preferred by photographers who enjoy the tactile experience of using a physical camera. Digital cameras, on the other hand, offer greater convenience and versatility, as well as the ability to instantly review and edit your images.
Film Camera Brands and Models
There are numerous film camera brands and models available on the market, each with its own unique features and capabilities. Some of the most popular film camera brands include Leica, Canon, Nikon, and Pentax. These brands offer a range of models at different price points, from entry-level to professional-grade. It’s essential to research and compare different brands and models to find the one that best suits your needs and budget.
Accessories for Film Photography
In addition to the camera itself, there are several accessories that are essential for film photography. These include lenses, filters, and film. Lenses are an important consideration, as they can significantly impact the quality of your images. It’s important to choose lenses that are compatible with your camera and film. Filters are also crucial for protecting your lens and adjusting the exposure of your shots. Finally, film is a key component of film photography, and there are many different types available, each with its own unique characteristics and color profiles.
Film Loading and Unloading
Film loading and unloading may seem like a trivial task, but it is crucial to ensure the longevity of your film and maintain the quality of your photographs. In this section, we will provide a step-by-step guide to properly loading and unloading film in your camera.
Step-by-Step Guide to Loading Film
- Open the camera back and remove the film cassette if it is already inside.
- Hold the cassette by the edges and remove the leader, which is the thin plastic strip attached to the start of the film.
- Insert the film into the camera, making sure that the sprocket holes (the small indentations on the side of the film) face the right side of the camera.
- Close the camera back and wind the film to the first frame.
- Frame your shot and take the first photograph.
It is essential to load the film correctly to prevent light leaks, which can ruin your photographs. Double-check that the film is loaded correctly, and the leader is removed before taking your first shot.
Recommended Film Speed for Different Scenes
Choosing the right film speed is crucial to achieving the desired look and feel in your photographs. The film speed, measured in ISO, determines how sensitive the film is to light.
For outdoor scenes, a lower ISO (e.g., ISO 100 or 200) is recommended to capture a broader range of tones and colors. A higher ISO (e.g., ISO 400 or 800) is suitable for low-light situations or when you need to capture fast-moving subjects.
Tips for Proper Film Handling
To ensure the best results from your film photographs, follow these tips for proper film handling:
- Store your film in a cool, dry place, away from direct sunlight.
- Handle the film by the edges only, avoiding touching the emulsion (the photographic layer) with your fingers.
- Load and unload the film in a dark room or with the camera’s back open and facing downwards.
- Avoid subjecting your film to extreme temperatures, as this can cause the film to become brittle or lose its sensitivity.
By following these guidelines, you can ensure that your film photographs are of the highest quality and will last for years to come.
Composition and Capture Techniques
The Rule of Thirds
Understanding the Basics of Composition
In film photography, composition plays a crucial role in creating stunning images. The rule of thirds is a fundamental principle that guides photographers in capturing visually appealing frames. This technique involves dividing the image into three equal parts vertically and horizontally, creating a grid of nine equal parts.
Using the Rule of Thirds for Better Frames
The rule of thirds encourages photographers to place the subject of the image at one of the intersection points of the grid. This creates a more dynamic and visually pleasing image compared to placing the subject in the center of the frame. Additionally, the rule of thirds also suggests placing the horizon line one-third of the way up or down the frame, depending on the subject matter.
Examples of the Rule of Thirds in Practice
To better understand the rule of thirds, let’s examine some examples of how it can be applied in practice.
- Landscape Photography: In landscape photography, the rule of thirds encourages photographers to place the horizon line one-third of the way up or down the frame, depending on the composition. This technique can create a more dynamic and visually pleasing image by avoiding the traditional centering of the horizon line.
- Portrait Photography: In portrait photography, the rule of thirds can be applied by placing the subject at one of the intersection points of the grid. This creates a more visually pleasing composition and draws the viewer’s attention to the subject.
- Still Life Photography: In still life photography, the rule of thirds can be used to create a more dynamic and visually pleasing arrangement of objects within the frame. By placing objects at the intersection points of the grid, photographers can create a more interesting and balanced composition.
By understanding and applying the rule of thirds, photographers can create more dynamic and visually pleasing images in various genres of film photography.
Aperture and Shutter Speed
How Aperture and Shutter Speed Affect Exposure
Aperture and shutter speed are two of the most important elements of photography, as they directly affect the exposure of an image. Aperture refers to the size of the camera’s aperture, which determines the amount of light that enters the camera. A larger aperture (a smaller number) allows more light to enter the camera, while a smaller aperture (a larger number) allows less light to enter.
Shutter speed, on the other hand, refers to the length of time that the camera’s shutter is open. A longer shutter speed allows more light to enter the camera, while a shorter shutter speed allows less light to enter.
Both aperture and shutter speed are measured in units of time, with aperture measured in fractions of a second (e.g. 1/60th of a second) and shutter speed measured in full seconds (e.g. 1/1000th of a second).
Tips for Balancing Aperture and Shutter Speed
When shooting with film, it’s important to balance aperture and shutter speed in order to achieve the desired exposure. This can be a challenge, as a larger aperture requires a faster shutter speed to avoid overexposure, while a smaller aperture requires a slower shutter speed to avoid underexposure.
One useful tip is to use the “Sunny 16 Rule” as a starting point. This rule states that, on a sunny day with an ISO of 100, a shutter speed of 1/1000th of a second and an aperture of f/16 will give a correct exposure. From there, adjust the aperture and shutter speed as needed to achieve the desired exposure.
Another tip is to use a light meter to measure the light in a scene and adjust the aperture and shutter speed accordingly. This can be especially useful when shooting in manual mode, as it allows the photographer to have complete control over the exposure.
Examples of Aperture and Shutter Speed in Practice
To illustrate the importance of aperture and shutter speed, let’s look at a few examples of how they affect exposure.
In the first example, we have a scene with a bright sun and a dark foreground. To achieve a correct exposure, we’ll need to use a smaller aperture (a larger number) and a faster shutter speed. This will ensure that the bright sun is not overexposed, while also allowing enough light to reach the dark foreground.
In the second example, we have a scene with a dimly lit interior. To achieve a correct exposure, we’ll need to use a larger aperture (a smaller number) and a slower shutter speed. This will allow more light to enter the camera, while also avoiding overexposure in the dimly lit interior.
By understanding how aperture and shutter speed affect exposure, and by using the tips and examples above, photographers can achieve the desired exposure in a wide range of shooting conditions.
Exposure Modes
Understanding the Different Exposure Modes
In film photography, exposure modes play a crucial role in determining the final output of an image. The three primary exposure modes used in film photography are Program mode, Aperture Priority, and Manual mode. Each mode has its unique characteristics and is designed to suit different shooting scenarios.
When to Use Program Mode, Aperture Priority, and Manual Mode
Program Mode
Program mode is the fully automatic mode that allows the camera to control aperture, shutter speed, and ISO settings. This mode is ideal for beginners who are still learning the basics of photography or for situations where there is limited time to adjust settings.
Aperture Priority
Aperture Priority mode allows the user to control the aperture setting while the camera automatically selects the appropriate shutter speed and ISO. This mode is useful when the photographer wants to control the depth of field in an image.
Manual Mode
Manual mode gives the user complete control over the aperture, shutter speed, and ISO settings. This mode is suitable for experienced photographers who want to have full control over the exposure settings to achieve a specific creative effect.
Examples of Exposure Modes in Practice
In practice, exposure modes can make a significant difference in the final output of an image. For example, when shooting a landscape in bright daylight, using Aperture Priority mode can help achieve a shallow depth of field and create a more dramatic image. On the other hand, when shooting a fast-moving subject, using Shutter Priority mode can help capture the motion and freeze the action.
Understanding the different exposure modes and knowing when to use them is essential for achieving the desired exposure and creative effect in film photography.
Developing and Printing Film
Darkroom Basics
The darkroom is a vital component of film photography, serving as the laboratory where photographers process and print their negatives. Mastering the basics of the darkroom is essential for photographers looking to create high-quality prints from their negatives.
Setting Up a Darkroom
A darkroom should be completely dark, with no windows or external light sources. The room should be equipped with a safe light source, which is a low-intensity light used for loading film and working with chemicals. The safe light source can be either a dedicated darkroom light or a red light bulb, which produces no ultraviolet light that can cause chemicals to degrade.
The darkroom should also be equipped with a workspace, which should be well-lit for working with negatives and prints. The workspace should be equipped with a enlarger, which is a machine used to project the image onto paper, and a print washer, which is used to wash the prints after they have been exposed to the chemicals.
Basic Darkroom Techniques
- Loading Film: Loading film is the first step in the darkroom process. The film should be wound onto a reel and loaded into the film processor. The film processor is a machine that is used to develop the film, and it is important to follow the manufacturer’s instructions when using it.
- Processing Film: After the film has been loaded into the processor, it is time to process the film. This involves using a developer solution to bring out the image on the film. The developer solution is mixed according to the manufacturer’s instructions and is added to the film processor. The film is then processed for the amount of time recommended by the manufacturer.
- Washing Film: After the film has been processed, it is time to wash it. The film is placed in a film washer, which uses water to remove the excess chemicals from the film. The film is then dried with a dryer or allowed to air dry.
- Printing: Once the film has been processed and washed, it is time to print the images. The film is loaded onto the enlarger, and the image is projected onto paper. The paper is then exposed to the image for the amount of time recommended by the manufacturer.
Common Darkroom Mistakes to Avoid
- Not following the manufacturer’s instructions when using the film processor or other equipment.
- Overexposing the film, which can cause it to become too dense and lose detail.
- Underexposing the film, which can cause it to become too light and lose detail.
- Not washing the film properly, which can cause it to become stained or damaged.
- Not using the correct chemicals or solutions when processing the film, which can cause it to become damaged or stained.
Film Processing Steps
Processing film is an essential part of film photography that involves a series of steps to develop the latent image on the film into a visible image. The following are the steps involved in processing film:
Step-by-Step Guide to Film Processing
- Pre-Wash: The first step in film processing is to remove any dust or dirt on the film surface. This is done by using a pre-wash solution that is poured onto the film and then carefully poured off.
- Film Development: The film is then placed in a developer solution, which reacts with the silver halide crystals in the film emulsion to form a visible image. The developer solution contains a mixture of chemicals that promote the development process.
- Fixing: After the film has been developed, it is then placed in a fixing solution that stops the development process and sets the image permanently. The fixing solution contains a mixture of chemicals that convert the remaining silver halide crystals into silver, thereby producing a stable image.
- Washing: The film is then washed in a clear water solution to remove any remaining chemicals and dust particles. This step ensures that the film is completely clean and ready for printing.
- Drying: The film is then dried, either by air drying or by using a film dryer. This step ensures that the film is completely dry and ready for scanning or printing.
It is important to note that the temperature and time for each step in the film processing process can vary depending on the film type and developer used. It is essential to follow the manufacturer’s instructions for the specific film and developer being used to ensure optimal results. Additionally, it is crucial to handle the film with care throughout the processing process to avoid any damage to the film emulsion.
Printing and Enlarging Techniques
Printing and enlarging techniques are essential components of film photography. These techniques allow photographers to create large prints from their negatives, producing stunning images that showcase the unique characteristics of film. In this section, we will explore the key concepts and techniques involved in printing and enlarging film photographs.
Understanding Printing and Enlarging Techniques
Printing and enlarging techniques involve the process of transferring the image from a negative to a print. This is achieved by exposing a light-sensitive paper to the negative, resulting in an image that is the reverse of the original. The size of the print is determined by the enlarger, which projects the image onto the paper. The process of printing and enlarging involves a series of steps, including preparing the negative, selecting the appropriate paper and chemicals, and setting up the enlarger.
Choosing the Right Paper and Chemicals
Choosing the right paper and chemicals is crucial to achieving high-quality prints. Different papers have different characteristics, such as texture, contrast, and color saturation, which can affect the final result. Photographers must choose the paper that best suits their desired aesthetic and the subject matter of their photographs. Chemicals, such as developers and fixers, are also essential for creating high-quality prints. These chemicals are used to develop the film and fix the image on the paper, ensuring that it is stable and will not fade over time.
Tips for Creating High-Quality Prints
Creating high-quality prints requires attention to detail and a thorough understanding of the printing and enlarging process. Here are some tips for achieving the best results:
- Use the appropriate paper for the subject matter and desired aesthetic.
- Use high-quality chemicals to ensure the stability and longevity of the print.
- Pay attention to the exposure time and temperature when printing.
- Use a high-quality enlarger to ensure sharpness and clarity.
- Consider using special effects, such as split toning or duotone printing, to enhance the final result.
In conclusion, printing and enlarging techniques are essential components of film photography. By understanding the process and choosing the right paper and chemicals, photographers can create high-quality prints that showcase the unique characteristics of film.
Tips for Shooting and Editing Film
Shooting Film in Different Lighting Conditions
When it comes to film photography, the right equipment and techniques can make all the difference in capturing the perfect shot. Here are some tips for shooting film in different lighting conditions:
Tips for Shooting in Low Light
Shooting in low light can be challenging, but with the right equipment and techniques, it’s possible to capture stunning images. Here are some tips for shooting in low light:
- Use a tripod: A tripod can help stabilize your camera and keep it steady in low light conditions.
- Use a wider aperture: A wider aperture allows more light into the camera, which can help create a brighter image.
- Use a higher ISO: A higher ISO setting can help increase the sensitivity of the camera’s sensor, allowing for better low light performance.
- Use a faster shutter speed: A faster shutter speed can help reduce camera shake and blur in low light conditions.
Tips for Shooting in High Contrast Scenes
High contrast scenes can be difficult to capture, but with the right techniques, it’s possible to create stunning images. Here are some tips for shooting in high contrast scenes:
- Use a polarizing filter: A polarizing filter can help reduce glare and reflections, which can help make the scene appear more natural.
- Use a graduated neutral density filter: A graduated neutral density filter can help balance the exposure between the bright and dark areas of the scene.
- Use a higher ISO: A higher ISO setting can help increase the sensitivity of the camera’s sensor, allowing for better performance in high contrast scenes.
- Use spot metering: Spot metering can help ensure that the correct exposure is achieved for the highlights and shadows in the scene.
Tips for Shooting in Backlit Scenes
Backlit scenes can be challenging to capture, but with the right techniques, it’s possible to create stunning images. Here are some tips for shooting in backlit scenes:
- Use a smaller aperture: A smaller aperture can help reduce the amount of light entering the camera, which can help create a darker exposure for the highlights in the scene.
- Use a higher ISO: A higher ISO setting can help increase the sensitivity of the camera’s sensor, allowing for better performance in backlit scenes.
Film Editing Techniques
When it comes to editing film photographs, there are a few key techniques that you’ll want to keep in mind. Here are some tips for choosing the right film edits, using basic film editing software, and other helpful tips for editing your film photographs.
Choosing the Right Film Edits
When it comes to choosing the right film edits, it’s important to consider the mood and tone of the photograph. Different films have different characteristics, such as color saturation, contrast, and grain, that can affect the overall look and feel of the photograph.
For example, if you’re looking for a more dramatic, high-contrast look, you might choose a black and white film with high contrast. On the other hand, if you’re looking for a more subtle, natural look, you might choose a color film with low contrast.
Basic Film Editing Software
There are a variety of basic film editing software options available, each with its own unique features and capabilities. Some popular options include Adobe Lightroom, Capture One, and Luminar.
When choosing a film editing software, it’s important to consider your specific needs and preferences. Some software may be better suited for certain types of film or editing styles, so it’s important to do your research and try out different options before making a decision.
Tips for Editing Film Photographs
When editing film photographs, it’s important to keep in mind the unique characteristics of film. Unlike digital photographs, film has a certain amount of grain and texture that can add depth and character to the image.
One helpful tip is to start with a basic edit and make small adjustments as needed. This can help you maintain the unique qualities of the film while still achieving the desired look and feel.
Another important tip is to experiment with different editing techniques, such as curves adjustments, split toning, and color grading. These techniques can help you fine-tune the look and feel of the photograph, and can be a great way to achieve a unique, personal style.
Overall, film editing can be a fun and rewarding process, and with the right techniques and software, you can achieve stunning results. By choosing the right film edits, using basic film editing software, and experimenting with different techniques, you can create beautiful, timeless photographs that will stand the test of time.
Scanning and Digitizing Film
Scanning and digitizing film photographs is an essential step in the process of bringing your film images into the digital realm. This section will provide an overview of the basics of film scanning and the considerations involved in choosing the right film scanner for your needs.
Understanding Film Scanning
Film scanning is the process of converting a film image into a digital format. This can be done using a film scanner, a scanning attachment for a camera, or even a scanning service. Film scanning allows you to preserve your film photographs in a digital format, making them easier to share, edit, and store.
Choosing the Right Film Scanner
There are several options available when it comes to choosing a film scanner. Some of the factors to consider when selecting a film scanner include:
- Resolution: The resolution of the scanner will determine the level of detail in the digital image. Higher resolution scanners will produce more detailed images, but may also be more expensive.
- Film type: Different film scanners are designed to work with specific types of film. Make sure to choose a scanner that is compatible with the film you are using.
- Features: Some film scanners come with additional features such as built-in editing software or the ability to scan multiple film formats. Consider what features are important to you and choose a scanner that meets your needs.
Tips for Digitizing Film Photographs
Once you have chosen a film scanner, there are a few tips to keep in mind when digitizing your film photographs:
- Use the highest resolution setting possible: This will ensure that your digital images are as detailed as possible.
- Adjust the scanner settings for the best results: Different film types and scan settings can produce different results. Experiment with different settings to find the best look for your images.
- Edit your digital images: After scanning your film photographs, you may want to edit the digital images to enhance the colors, contrast, or other elements of the image. There are many software options available for editing digital images, including Adobe Photoshop and Lightroom.
Overall, scanning and digitizing film photographs is an essential step in the film photography process. By understanding the basics of film scanning and choosing the right film scanner for your needs, you can preserve your film images in a digital format and make them easier to edit and share.
Film Photography for Different Genres
Landscape Photography
Landscape photography is a popular genre in film photography that captures the beauty of nature, from sweeping vistas to intimate close-ups. Whether you’re a beginner or an experienced photographer, mastering the art of landscape photography requires a combination of the right equipment, camera settings, and techniques. In this section, we’ll delve into the essential elements of landscape photography and provide tips for capturing stunning images.
Choosing the Right Camera Settings
One of the most critical aspects of landscape photography is choosing the right camera settings. This includes selecting the appropriate aperture, shutter speed, and ISO. Generally, a small aperture (higher f-stop number) is recommended for landscape photography to ensure a deep depth of field, which allows you to capture a sharp foreground, midground, and background. A slower shutter speed (1/15 to 1 second) is also ideal for capturing motion in moving elements such as waterfalls, rivers, or clouds. Lastly, a low ISO (100-400) is recommended to minimize noise and maintain image quality.
Tips for Capturing Stunning Landscapes
- Scout the location: Before arriving at your desired location, research and scout the area to identify the best viewpoints, vantage points, and compositions.
- Use a tripod: To ensure sharpness and stability, use a tripod to eliminate camera shake and enable longer exposures.
- Consider the weather: The weather can significantly impact your landscape photography. Choose the right time of day (golden hour or blue hour) and consider the weather conditions, such as cloud cover or wind direction.
- Look for unique perspectives: Experiment with different angles and perspectives to create unique and captivating images.
- Utilize leading lines and patterns: Look for leading lines, such as roads, trails, or rivers, and patterns in the landscape to create a sense of depth and interest.
Editing and Enhancing Landscape Photographs
After capturing your landscape photographs, it’s essential to edit and enhance them to bring out their full potential. This includes adjusting the exposure, contrast, colors, and sharpness. Digital darkroom tools such as Adobe Lightroom and Photoshop offer a wide range of adjustment layers and filters to refine your images. Some essential editing techniques include:
- Adjusting exposure and contrast: Use adjustment layers to recover lost details in the shadows and highlights and enhance the overall contrast.
- Balancing colors: Adjust the color balance to create a more natural or dramatic look, depending on your personal style.
- Sharpening: Apply sharpening filters to enhance the details and textures in the image, providing a more vibrant and realistic appearance.
By following these guidelines and techniques, you’ll be well on your way to capturing stunning landscape photographs with film. Remember to experiment, practice, and stay patient, as film photography requires a different approach and mindset compared to digital photography.
Portrait Photography
Portrait photography is a popular genre in film photography that captures the essence of an individual’s personality, mood, and character. To achieve stunning and flattering portraits, it is essential to consider the camera settings, composition, lighting, and post-processing techniques. In this section, we will discuss the essential elements of portrait photography and how to capture stunning portraits using film cameras.
The first step in capturing stunning portraits is to choose the right camera settings. When shooting with film, it is essential to consider the ISO, shutter speed, and aperture settings. A lower ISO setting (100-400) is recommended for portrait photography to achieve a high level of detail and reduce noise. A narrow aperture (f/8 to f/16) is ideal for achieving a shallow depth of field, which helps to create a pleasing background blur and keep the subject sharp. A balanced shutter speed is also essential to avoid camera shake and motion blur.
Tips for Capturing Flattering Portraits
In addition to the camera settings, the composition and lighting play a crucial role in capturing flattering portraits. The rule of thirds is a helpful guideline for composing portraits, which involves placing the subject at one of the intersection points of the grid. The subject’s eyes should be at the focal point of the composition, and the background should be kept simple and uncluttered.
Lighting is also critical in portrait photography, and there are several lighting techniques that can be used to achieve a flattering look. Natural light is often the best light source for portraits, but it can be challenging to work with during certain times of the day. Reflectors and diffusers can be used to bounce light back onto the subject’s face, while fill-in flash can be used to reduce harsh shadows.
Editing and Enhancing Portrait Photographs
After capturing the photograph, it is essential to edit and enhance the image to achieve the desired look. Film photographs have a unique look and feel, and digital editing can help to enhance the image’s colors, contrast, and sharpness. Basic editing techniques such as adjusting the exposure, contrast, and color balance can help to improve the overall look of the image. Additionally, retouching techniques such as removing blemishes, wrinkles, and other imperfections can help to create a more flattering portrait.
In conclusion, capturing stunning portraits using film photography requires careful consideration of camera settings, composition, lighting, and post-processing techniques. By following these essential elements, photographers can create beautiful and flattering portraits that capture the essence of their subjects.
Street Photography
Choosing the Right Camera Settings
When it comes to street photography, choosing the right camera settings is crucial to capturing the perfect shot. The most important setting to consider is the aperture. A wider aperture (such as f/2.8 or f/4) is ideal for shooting in low light conditions or for creating a shallow depth of field. On the other hand, a narrower aperture (such as f/11 or f/16) is better for capturing a deeper depth of field and more detail in the scene. Additionally, shooting in manual mode can give you more control over your shots and allow you to adjust settings quickly based on the lighting conditions.
Tips for Capturing Authentic Street Scenes
To capture authentic street scenes, it’s important to be mindful of your surroundings and blend in with the environment. Look for interesting patterns, colors, and textures to add visual interest to your shots. Pay attention to the lighting and try to shoot during the golden hour or on overcast days for softer, more flattering light. Finally, don’t be afraid to get up close and personal with your subjects – getting in close can add a sense of intimacy and help tell a story.
Editing and Enhancing Street Photographs
Editing is an important part of the street photography process, as it allows you to enhance your shots and bring out the best in them. Start by adjusting the exposure, contrast, and saturation to improve the overall look of your images. Then, use techniques like dodging and burning to add contrast and draw attention to specific areas of the photo. Finally, consider adding grain or film simulation effects to give your images a more vintage look.
In summary, when it comes to street photography, it’s important to choose the right camera settings, be mindful of your surroundings, and edit your shots to bring out the best in them. With these tips in mind, you’ll be well on your way to capturing authentic and stunning street scenes.
Fine Art Photography
When it comes to fine art photography, the medium itself plays a significant role in creating a unique visual language. To achieve this, photographers need to carefully consider the type of film they choose for their projects. Each film type has its own characteristics, such as color rendition, grain, and tonal range, which can greatly affect the final outcome of the image. For example, black and white film provides a more classic and timeless look, while color film can add depth and vibrancy to a scene. It’s important to experiment with different film types to find the one that best suits the intended mood and message of the image.
Creating abstract and expressive images is also an essential aspect of fine art photography. This can be achieved by playing with composition, experimenting with multiple exposures, and manipulating the film during the developing process. By using these techniques, photographers can create images that are both visually striking and emotionally evocative.
Editing and enhancing fine art photographs is also an important step in the creative process. This can include adjusting the contrast and tonality of the image, adding textures and layers, and even altering the colors to create a more dreamlike or surreal effect. It’s important to remember that editing should be seen as an extension of the creative process, rather than a mere technical step. By approaching editing with an artistic mindset, photographers can create images that are truly unique and captivating.
FAQs
1. What equipment do I need to start film photography?
To start film photography, you will need a film camera, a roll of film, and a way to process the film after you have taken the photographs. There are many different types of film cameras available, ranging from simple point-and-shoot models to more advanced SLR (single-lens reflex) cameras. Some cameras are specifically designed for film photography, while others can be used for both film and digital photography.
2. What type of film should I use for film photography?
There are many different types of film available for film photography, each with its own unique characteristics and properties. Some common types of film include color film, black and white film, and infrared film. The type of film you choose will depend on the effect you want to achieve and the conditions in which you will be shooting.
3. How do I load the film into my camera?
Loading film into your camera is a simple process, but it is important to follow the correct procedure to ensure that the film is properly loaded and that there are no mistakes that could ruin the film. The specific steps for loading film will vary depending on the type of camera you are using, but in general, you will need to open the back of the camera, remove the leader (the end of the film), and wind the film onto the spool inside the camera.
4. How do I adjust the settings on my film camera?
The settings on a film camera are typically adjusted using dials or buttons on the camera body. The specific settings you will need to adjust will depend on the type of camera you are using and the conditions in which you will be shooting. Common settings include aperture, shutter speed, and ISO. It is important to understand how these settings affect the exposure of your photographs and to adjust them accordingly.
5. How do I process the film after I have taken the photographs?
Processing the film after you have taken the photographs is an important step in film photography. There are several options for processing film, including sending it out to a lab to be processed, using a film developing kit to process the film at home, or using an instant film camera that develops the film as you take the photographs. The specific method you choose will depend on your preferences and the type of film you are using.


