Photography is an exciting and rewarding hobby that can be enjoyed by anyone, regardless of experience. Whether you’re looking to capture stunning landscapes, portraits, or everyday moments, getting started in photography is easier than you might think. This comprehensive guide will provide you with all the information you need to know to get started in photography, from understanding the basics of camera settings to developing your own unique style. So, put on your creative hat, grab your camera, and let’s dive into the world of photography!
What is Photography?
Definition and Basics
Photography is the art and science of capturing and creating images using light-sensitive cameras or digital sensors. It is a method of recording visual information through the use of light, color, and composition.
The basics of photography include understanding the fundamental principles of light, exposure, composition, and camera settings. These elements work together to create an image that tells a story or captures a moment in time.
Light is the most important element in photography, as it determines the mood, tone, and overall look of an image. The quality and direction of light can greatly affect the exposure and composition of a photograph.
Exposure is the amount of light that enters the camera and is recorded on the image sensor. It is measured in units of time (seconds or minutes) and aperture (f-stops). A proper exposure ensures that the image is not too dark or too light, and that the details are accurately captured.
Composition is the arrangement of visual elements within a photograph, including the placement of subjects, the use of negative space, and the application of visual weight. A well-composed image draws the viewer’s eye to the subject and creates a sense of balance and harmony.
Camera settings, such as ISO, shutter speed, and aperture, also play a crucial role in photography. These settings determine the sensitivity of the camera’s image sensor, the duration of the exposure, and the size of the aperture, respectively. Understanding how to adjust these settings to achieve the desired effect is an essential skill for any photographer.
Overall, the definition and basics of photography provide a foundation for understanding the art and science of image-making. By mastering these fundamental principles, beginners can progress towards creating stunning and meaningful photographs.
Types of Photography
Photography is an art and a science that involves capturing light and creating images. It has many different forms and styles, each with its own unique characteristics and techniques. Understanding the different types of photography can help beginners decide which area they would like to focus on and develop their skills in.
Here are some of the most common types of photography:
- Portrait Photography: This type of photography involves capturing portraits of people, whether it be for professional purposes or for personal use. Portrait photographers use lighting, composition, and posing techniques to create flattering and compelling images of their subjects.
- Landscape Photography: Landscape photography captures the beauty of nature, including mountains, forests, beaches, and other natural landscapes. Landscape photographers use a variety of techniques, such as long exposures and wide-angle lenses, to capture the mood and feeling of a particular location.
- Wildlife Photography: Wildlife photography captures the beauty and diversity of the animal kingdom. Wildlife photographers use specialized equipment, such as telephoto lenses and remote camera traps, to capture images of animals in their natural habitats.
- Street Photography: Street photography captures the energy and movement of urban life. Street photographers use candid shots and composition techniques to capture interesting moments and scenes on the streets.
- Fine Art Photography: Fine art photography is a type of photography that is created to express an artist’s vision and creativity. Fine art photographers use a variety of techniques and mediums to create images that are meant to be appreciated for their aesthetic value.
- Documentary Photography: Documentary photography captures real-life events and stories, often with the goal of raising awareness or bringing attention to a particular issue. Documentary photographers use a variety of techniques, such as journalistic and social documentary styles, to capture powerful and impactful images.
These are just a few examples of the many different types of photography that exist. Understanding the different types of photography can help beginners determine which area they would like to focus on and develop their skills in.
Why Photography is a Great Hobby
Photography is not just a means of capturing images, but it is also a hobby that offers numerous benefits. It allows individuals to express their creativity, explore new places, and document memories. Here are some reasons why photography is a great hobby:
- Exploration: Photography provides an opportunity to explore new places and discover hidden gems. Whether it’s capturing the beauty of nature or the architecture of a city, photography encourages individuals to venture out and see the world from a different perspective.
- Creativity: Photography is a medium that allows individuals to express their creativity in various ways. From composition to lighting, there are endless possibilities for creative expression. It also encourages individuals to think outside the box and experiment with different techniques.
- Documentation: Photography is a great way to document memories and preserve them for the future. Whether it’s capturing a special moment or a milestone event, photography allows individuals to look back on these memories and cherish them forever.
- Therapeutic Benefits: Photography has been shown to have therapeutic benefits. It can help individuals deal with stress, anxiety, and depression. The act of taking photographs can be a form of meditation, allowing individuals to focus on the present moment and find peace in the process.
- Social Interaction: Photography also provides an opportunity for social interaction. Whether it’s joining a photography club or attending a photography workshop, individuals can connect with like-minded people and share their passion for photography.
Overall, photography is a great hobby that offers numerous benefits. It encourages individuals to explore new places, express their creativity, document memories, and even provide therapeutic benefits. Whether you’re a beginner or an experienced photographer, there’s always something new to learn and discover in the world of photography.
Essential Photography Equipment for Beginners
Photography is a great hobby that offers numerous benefits, including exploration, creativity, documentation, and therapeutic benefits. To get started in photography, it is important to choose the right camera, lens, tripod, and bag or case. Additionally, it is important to understand the different types of photography and the essential photography techniques, such as composition, exposure, and lighting. Lastly, it is important to practice regularly, learn from others, and enjoy the process of learning and growing as a photographer.
Camera
When it comes to photography, the camera is the most important piece of equipment that you will need. It is the tool that will capture the images that you want to create, so it is important to choose the right one for your needs.
Here are some key factors to consider when choosing a camera as a beginner:
- Budget: How much are you willing to spend on a camera? There are many options available at different price points, so it is important to set a budget before you start shopping.
- Type of Camera: Do you want a DSLR (Digital Single-Lens Reflex) camera or a mirrorless camera? DSLRs are more popular and well-known, but mirrorless cameras are becoming increasingly popular due to their smaller size and weight.
- Features: What features do you need in a camera? Do you need a built-in flash, Wi-Fi connectivity, or a high-resolution sensor? Consider what features are important to you and what you will be using the camera for.
- Brand: Which brand do you prefer? Some people have a preference for certain camera brands, while others are more open to trying different brands. Do some research and read reviews to find a brand that you trust.
Once you have considered these factors, you can start to narrow down your options and find a camera that fits your needs. Some popular camera brands for beginners include Canon, Nikon, Sony, and Fujifilm. It is also a good idea to read reviews and ask for recommendations from other photographers to help you make a decision.
Remember, the camera is just one piece of equipment that you will need for photography. It is important to also invest in lenses, a tripod, and other accessories to help you take high-quality photos. But, don’t let the cost of equipment discourage you from getting started. You can always upgrade as you become more experienced and your skills improve. The most important thing is to have fun and enjoy the process of learning and growing as a photographer.
Lens
A lens is an essential piece of equipment for any photographer, whether they are a beginner or an experienced professional. The lens is responsible for capturing the image and focusing it onto the camera’s sensor or film. When starting out in photography, it is important to invest in a good quality lens that will allow you to capture clear and sharp images.
One of the most popular types of lenses for beginners is a standard zoom lens, which offers a wide range of focal lengths and is versatile enough to handle most shooting situations. A standard zoom lens typically has a range of around 18-55mm, which is ideal for shooting landscapes, portraits, and general photography.
Another type of lens that is worth considering for beginners is a prime lens. Prime lenses offer a fixed focal length, which means that they are not zoomable. However, they tend to be sharper and have better image quality than zoom lenses. Prime lenses are ideal for shooting in low light conditions or for taking portraits and street photography.
When purchasing a lens, it is important to consider the camera body that you have. Some lenses are designed to work with specific camera brands or models, so it is important to ensure that the lens you choose is compatible with your camera. Additionally, you should consider the size and weight of the lens, as well as the price, when making your decision.
In conclusion, a lens is an essential piece of equipment for any photographer, and it is important to invest in a good quality lens that will allow you to capture clear and sharp images. When starting out in photography, it is recommended to consider a standard zoom lens or a prime lens, depending on your shooting needs. Remember to consider the compatibility with your camera body, size, weight, and price when making your decision.
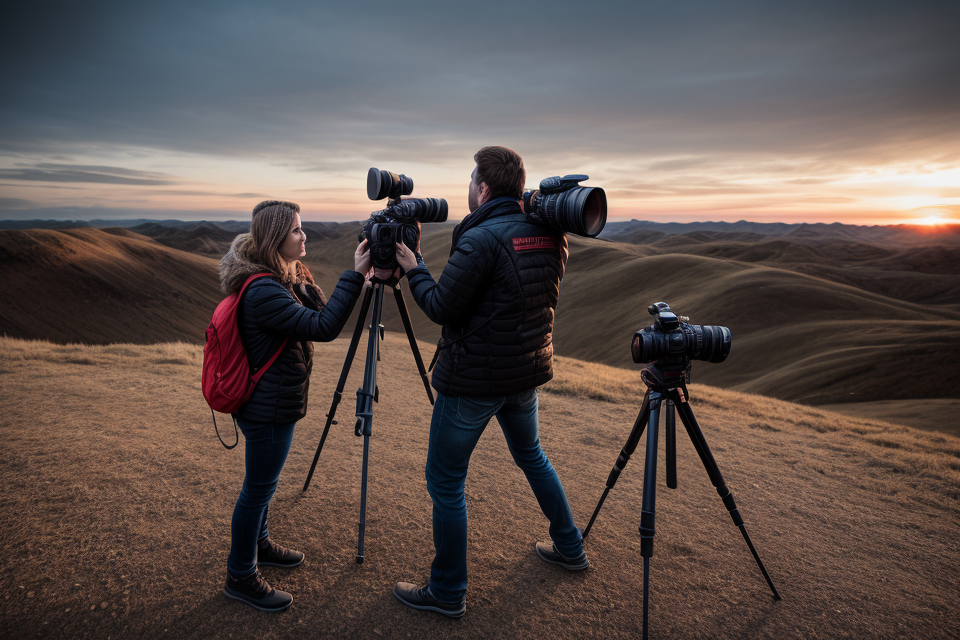
Tripod
A tripod is an essential piece of equipment for any photographer, regardless of their skill level or the type of photography they specialize in. It is designed to provide stability and support for the camera, allowing the photographer to capture sharp and well-composed images, even in challenging conditions.
Here are some key features to consider when choosing a tripod:
- Height: The tripod should be tall enough to allow the photographer to position the camera at the desired height, whether it’s for landscape photography or to capture a specific subject from a low angle.
- Weight capacity: Consider the weight of the camera and lens that will be used, and choose a tripod that can support that weight without feeling flimsy or unstable.
- Leg type: Tripods can have either three or four legs, and each type has its own advantages. Three-legged tripods are more compact and easier to transport, while four-legged tripods are generally more stable and versatile.
- Leg locks: Look for tripods with strong and reliable leg locks that can be easily adjusted without slipping or wobbling.
- Center column: Some tripods have a center column that can be extended or retracted to provide additional height or stability. This feature can be especially useful when shooting in tight spaces or when using a long lens.
- Head: The tripod head is the component that attaches to the camera, and it can have a significant impact on the overall stability and maneuverability of the tripod. Choose a head that is compatible with your camera and provides the necessary range of motion for your shooting style.
Overall, investing in a high-quality tripod is a wise decision for any photographer. It will provide a solid foundation for your camera, allowing you to capture sharper images and experiment with different compositions and techniques.
Lighting
When it comes to photography, lighting is one of the most important factors to consider. It can make or break an image, and it’s essential to understand how to use light to create the desired mood and effect. Here are some essential lighting techniques for beginners:
- Natural Light
Natural light is the most basic and versatile light source for photography. It can be used to create soft, diffused light or harsh, contrasty light, depending on the time of day and the location of the shoot. To make the most of natural light, try to find a location with a lot of windows or outdoor areas that provide ample light. - Artificial Light
Artificial light can be used to supplement natural light or create lighting effects that would be impossible with natural light alone. There are several types of artificial light sources, including flash, strobes, and continuous lights. Flash is great for adding a pop of light to an image, while strobes and continuous lights are better for creating more complex lighting setups. - Direction and Intensity
Once you have a light source, it’s important to control the direction and intensity of the light. You can use light modifiers like softboxes, diffusers, and reflectors to shape the light and control its intensity. Softboxes are great for creating soft, diffused light, while reflectors can be used to bounce light back onto a subject. - Experimentation
The key to successful lighting is experimentation. Try different lighting setups and see what works best for your subject and the mood you want to create. Don’t be afraid to experiment with different light sources, modifiers, and locations. The more you practice, the better you’ll become at using light to create stunning images.
Memory Card and Battery
A memory card and battery are essential components of any camera. A memory card stores the images that you capture, while the battery powers the camera. It is important to choose the right memory card and battery for your camera to ensure that you can take photos without interruption.
Choosing the Right Memory Card
When choosing a memory card, it is important to consider the capacity, speed, and compatibility with your camera. The capacity of a memory card is measured in gigabytes (GB) and the speed is measured in megabytes per second (MB/s). It is recommended to choose a memory card with a capacity of at least 8GB and a speed of at least 10MB/s. Some cameras may also require a specific type of memory card, such as SD or CF, so it is important to check the camera’s specifications before purchasing a memory card.
Choosing the Right Battery
When choosing a battery for your camera, it is important to consider the type and capacity. Most cameras use Lithium-Ion batteries, which are rechargeable and have a high energy density. It is important to choose a battery with a capacity that matches your shooting needs. If you plan to shoot for an extended period of time, it may be worth investing in an additional battery or two to ensure that you can continue shooting without interruption.
Tips for Extending Battery Life
To extend the battery life of your camera, there are several tips that you can follow. First, turn off your camera when you are not using it to conserve power. Second, use the camera’s power-saving modes when possible. Third, consider purchasing a battery grip, which can provide additional power and improve handling of the camera. Finally, avoid using the camera’s flash, as it can quickly drain the battery.
By following these tips, you can ensure that you have a reliable and long-lasting battery for your camera, allowing you to continue taking photos without interruption.
Bag or Case
A bag or case is an essential piece of equipment for any photographer, as it provides a safe and convenient way to transport and store your camera and other photography gear. Here are some factors to consider when choosing a bag or case:
Type of Bag or Case
There are several types of bags or cases to choose from, including:
- Backpacks: These are a popular choice for photographers who want to keep their hands free while shooting. They typically have a compartment for the camera and lenses, as well as additional pockets for accessories and personal items.
- Messenger bags: These are a great option for those who want a more casual and stylish look. They usually have a single compartment for the camera and lenses, and may also have pockets for small accessories.
- Shoulder bags: These are a good choice for those who want a bag that is easy to carry and can be worn on one shoulder. They typically have a compartment for the camera and lenses, as well as additional pockets for accessories.
Size and Capacity
It’s important to choose a bag or case that is the right size and capacity for your needs. Consider the number and type of lenses you plan to carry, as well as any other equipment or personal items you want to bring with you.
Durability and Protection
Your bag or case should be durable and provide adequate protection for your gear. Look for features such as sturdy materials, reinforced stitching, and padding to protect your camera and lenses from bumps and bruises.
Comfort and Convenience
Finally, consider the comfort and convenience of the bag or case. Look for features such as adjustable straps, comfortable shoulder pads, and easy-to-access pockets to make carrying and accessing your gear a breeze.
Accessories
- Tripod: A tripod is an essential accessory for any photographer, as it allows for long exposures and sharp images in low light conditions. It also helps to keep the camera steady during portrait and landscape photography.
- Camera strap: A camera strap is a must-have accessory for photographers who like to carry their camera around with them. It allows for easy access to the camera and keeps it secure while on the move.
- Memory cards: Memory cards are essential for storing photos, and it’s important to have a few spare cards on hand in case of emergencies. It’s recommended to have at least two or three high-capacity cards.
- Lens cleaning kit: A lens cleaning kit is essential for keeping the camera lenses clean and free from dust and smudges. It typically includes a lens pen, microfiber cloth, and cleaning solution.
- Battery pack: Camera batteries can drain quickly, especially when shooting for extended periods. A battery pack is a great accessory to have as it allows for continuous shooting without having to worry about battery life.
- External flash: An external flash is a great accessory for improving the quality of images in low light conditions. It can be used to create more dramatic lighting effects and add more depth to portraits.
- Filter kit: A filter kit is essential for protecting the camera lenses and improving the quality of images. It typically includes a UV filter, polarizing filter, and neutral density filter.
- Remote shutter release: A remote shutter release is a useful accessory for avoiding camera shake when taking photos. It allows the photographer to trigger the camera’s shutter from a distance, eliminating the need to touch the camera.
- Backpack: A backpack is a great accessory for carrying camera equipment and other essentials while on the move. It should be comfortable to wear and have plenty of compartments for organizing gear.
Learning Photography Techniques
Composition
Composition is a crucial aspect of photography that refers to the way elements are arranged within the frame of a photograph. It encompasses various principles and techniques that help photographers create visually appealing and impactful images. In this section, we will discuss some key composition rules and principles that beginners should keep in mind while taking photographs.
- Rule of Thirds
The rule of thirds is a fundamental principle in photography that suggests dividing the frame into thirds vertically and horizontally, creating nine equal parts. Important elements of the image, such as the subject, should be placed at the intersection points or along the lines, creating a more dynamic and visually pleasing composition. - Leading Lines
Leading lines are lines or shapes in the image that lead the viewer’s eye towards the main subject or the point of interest. These can be anything from a road, a path, a diagonal line, or even a natural element like a tree branch. By using leading lines, photographers can create a sense of depth and guide the viewer’s attention to the focal point of the image. - Symmetry and Patterns
Symmetry and patterns can add a sense of balance and harmony to an image. Finding and utilizing these elements in the scene can create a visually appealing composition. It could be something as simple as a reflection in water, a repeating pattern in architecture, or the symmetry of a flower. - Depth of Field
Depth of field refers to the range of distance in an image that appears in focus. A shallow depth of field, where only a small portion of the image is in focus, can create a sense of depth and draw attention to the main subject. On the other hand, a deep depth of field, where most of the image is in focus, can create a sense of space and make the image feel more expansive. - Framing
Framing is the technique of using elements in the scene to enclose or frame the main subject. This can be done by utilizing natural elements like trees, rocks, or architectural features. Framing can help draw attention to the subject and create a more dynamic composition. - Negative Space
Negative space refers to the empty areas around the subject in an image. Using negative space can create a more minimalist and simplistic composition, allowing the subject to stand out and draw attention. It can also provide a sense of calmness and serenity to the image. - Color Theory
Color theory is an essential aspect of composition in photography. Using complementary colors, contrasting colors, or analogous colors can help create a visually appealing composition. Additionally, considering the mood and emotion that certain colors evoke can help photographers convey their intended message or feeling in the image.
By understanding and applying these composition principles, beginners can take their photography skills to the next level and create more visually impactful and appealing images.
Exposure
Exposure is one of the most important concepts in photography, and it refers to the amount of light that is captured by the camera’s sensor. It is determined by three factors: aperture, shutter speed, and ISO.
- Aperture: This is the size of the camera’s aperture, which determines the amount of light that enters the camera. A larger aperture (a smaller number) allows more light in, while a smaller aperture (a larger number) allows less light in.
- Shutter speed: This is the length of time that the camera’s shutter is open, and it determines how much light is captured. A slower shutter speed allows more light in, while a faster shutter speed allows less light in.
- ISO: This is the sensitivity of the camera’s sensor to light, and it determines how much light is captured. A higher ISO setting makes the sensor more sensitive to light, which allows for shooting in low light conditions, but it can also result in more noise in the image.
Understanding how to control these three factors is crucial for achieving the desired exposure in any given situation. It is important to experiment with different combinations of aperture, shutter speed, and ISO to find the right balance for the desired effect.
Focus
One of the most fundamental aspects of photography is focus. The focus of a photograph refers to the point at which the camera lens is directed, and it is crucial to getting a sharp and clear image. Here are some key points to keep in mind when it comes to focus in photography:
- Understanding Autofocus: Most modern cameras have an autofocus feature, which automatically determines the point of focus based on a variety of factors such as contrast and color. However, it’s important to understand how to manually adjust the focus if needed.
- Manual Focus: Some photographers prefer to manually adjust the focus of their shots, which allows for greater control over the final image. This can be done by adjusting the focus ring on the lens or by using the focus point selector on the camera.
- Depth of Field: The depth of field refers to the area of the image that is in focus, from nearest to farthest. A shallow depth of field, where only a small portion of the image is in focus, can create a more dramatic effect, while a deeper depth of field, where more of the image is in focus, can result in a more straightforward, documentary-style image.
- Hyperfocal Distance: This is a technique used to ensure that the greatest amount of the image is in focus, from the nearest point to infinity. It involves calculating the distance at which the lens should be set to achieve this, based on the aperture, focal length, and other factors.
- Tips for Sharp Focus: To ensure that your images are sharp, it’s important to use a tripod to keep the camera steady, use the lowest ISO setting possible, and use the mirror lock-up feature (if available) to minimize camera shake. It’s also important to pay attention to the lighting conditions and use a polarizing filter to reduce glare and reflections.
Shutter Speed and Aperture
Shutter speed and aperture are two of the most important concepts in photography. They control the amount of light that enters the camera and how long the camera’s shutter is open.
Shutter speed refers to the length of time that the camera’s shutter is open, and it is measured in seconds or fractions of a second. A slower shutter speed allows more light into the camera, while a faster shutter speed allows less light in. Slower shutter speeds are typically used in low light conditions or to create a sense of motion in an image, while faster shutter speeds are used to freeze fast-moving subjects.
Aperture, on the other hand, refers to the size of the camera’s aperture, which is the opening in the lens through which light passes. Aperture is measured in f-stops, and a larger aperture (a smaller f-stop number) allows more light into the camera, while a smaller aperture (a larger f-stop number) allows less light in. Aperture also has an effect on the depth of field in an image, with a larger aperture resulting in a shallower depth of field and a smaller aperture resulting in a deeper depth of field.
Understanding how to use shutter speed and aperture effectively is crucial for controlling the exposure and creative elements of an image. It is important to experiment with different shutter speeds and apertures to learn how they affect the final image and to develop a personal style.
ISO and White Balance
Understanding ISO
ISO, or International Organization of Standardization, is a crucial element in photography that determines the sensitivity of the camera’s sensor to light. It measures the camera’s ability to capture an image in low light situations, with a higher ISO number indicating greater sensitivity and lower light conditions. However, a higher ISO also increases the noise or grain in the image, which can affect image quality.
Setting the ISO
Setting the ISO depends on the lighting conditions and the desired outcome of the image. In well-lit conditions, a lower ISO, such as 100 or 200, can be used to capture a high-quality image with minimal noise. In low light conditions, a higher ISO, such as 800 or 1600, may be necessary to capture a usable image, but this may result in more noise in the image. It is important to balance the ISO with the shutter speed and aperture to achieve the desired exposure.
Understanding White Balance
White balance, or WB, is the process of adjusting the colors in an image to match the color temperature of the light source. Color temperature is measured in Kelvin (K) and ranges from warm (low K) to cool (high K). Different light sources have different color temperatures, such as sunlight at around 5600K, candlelight at around 1200K, and incandescent light at around 2800K.
Setting the White Balance
Setting the white balance depends on the lighting conditions and the desired outcome of the image. If the light source is known, such as sunlight or incandescent light, the white balance can be set manually. If the light source is unknown or difficult to determine, the camera’s automatic white balance can be used. Alternatively, the white balance can be adjusted in post-processing to achieve the desired color balance.
Metering
Metering is one of the most crucial aspects of photography that helps to determine the exposure of an image. It is the process of measuring the light that enters the camera and determining the appropriate aperture, shutter speed, and ISO settings to achieve the correct exposure. Understanding how to meter effectively is essential for achieving well-exposed images, regardless of the lighting conditions.
There are several metering methods available in modern cameras, including matrix/segment metering, center-weighted metering, and spot metering. Each method has its advantages and disadvantages, and it is essential to understand when to use each one.
Matrix/Segment Metering
Matrix or segment metering is the most commonly used metering method in modern cameras. It measures the light in multiple segments across the scene and calculates the exposure based on the overall brightness and contrast. This method is suitable for most situations and provides a good balance between highlights and shadows.
Center-Weighted Metering
Center-weighted metering gives more weight to the light metered in the center of the frame, making it ideal for portraits or other subjects that are off-center. This method is useful when the subject is backlit or when there is a significant difference in brightness between the subject and the background.
Spot Metering
Spot metering measures the light in a very small area of the scene, typically 1-5% of the total area. This method is useful for high-contrast scenes or when there is a significant difference in brightness between different parts of the scene. It is also useful for metering for HDR photography or when using a graduated neutral density filter.
It is essential to use the appropriate metering method depending on the lighting conditions and the subject matter. By understanding how to meter effectively, you can achieve well-exposed images and have more control over the final result.
Post-Processing
Post-processing is an essential step in the photography workflow that involves enhancing and refining the images you capture. It allows you to adjust and manipulate the exposure, color, and other aspects of your photos to achieve the desired look and feel. Here are some key aspects of post-processing to keep in mind:
- Adjusting exposure: One of the most common adjustments made during post-processing is adjusting the exposure. This can be done to recover details in overexposed or underexposed areas of the image, or to bring out the desired contrast and tone.
- Contrast and brightness: Contrast and brightness adjustments can help enhance the overall look and feel of your images. By adjusting these settings, you can make your photos appear more vibrant, dynamic, or subtle, depending on your preference.
- Color correction: Color correction is a vital aspect of post-processing, especially when dealing with images captured under different lighting conditions. You can adjust the color temperature, saturation, and hue to ensure that your photos look natural and true to life.
- Retouching and removing imperfections: Post-processing also allows you to remove imperfections, such as blemishes, distractions, or unwanted elements in your photos. With the help of retouching tools, you can smooth skin, remove objects, or adjust the composition to create a more polished and professional-looking image.
- Sharpening and noise reduction: Sharpening and noise reduction are two more important aspects of post-processing. Sharpening can help enhance the clarity and detail of your images, while noise reduction can help remove unwanted noise and grain, especially in low-light conditions or high-ISO settings.
By understanding and mastering these key aspects of post-processing, you can elevate your photography skills and produce high-quality images that accurately reflect your creative vision.
Resources for Beginners
Online Tutorials
For those looking to get started in photography, online tutorials can be a valuable resource. There are a plethora of websites and platforms that offer tutorials and courses on photography, catering to various skill levels and interests. These online resources can provide beginners with a solid foundation in photography and help them develop their skills in a convenient and affordable manner.
Some popular online photography tutorials include:
These online tutorials cover a wide range of topics, from the basics of camera operation and composition to more advanced techniques such as lighting and post-processing. They often include step-by-step instructions, interactive exercises, and assignments to help reinforce learning.
One of the advantages of online tutorials is their accessibility. They can be accessed from anywhere, at any time, and on any device. They are also typically more affordable than in-person workshops or classes, making them a great option for those on a budget.
Additionally, online tutorials allow for the opportunity to learn from a variety of experienced photographers and instructors. They provide a wealth of knowledge and insight, and can help beginners avoid common mistakes and pitfalls in their photography journey.
However, it is important to note that online tutorials are not a one-size-fits-all solution. While they can provide a valuable foundation, they cannot replace hands-on experience and practice. It is crucial for beginners to also invest in practical experience by shooting regularly and seeking feedback from others.
In conclusion, online tutorials can be a valuable resource for beginners looking to get started in photography. They provide a convenient and affordable way to learn the basics and develop skills, but should be complemented with practical experience and feedback.
Books
- The Photography Bible: The Definitive Guide to Photography by John Hedge: This comprehensive guide covers everything from the basics of photography to advanced techniques and concepts. It’s a great resource for beginners who want to learn about different photography styles, techniques, and equipment.
- Digital Photography For Dummies by David D. Busch: This book is perfect for those who are new to digital photography. It covers the basics of digital cameras, photography techniques, and editing software. It also includes tips and tricks for taking better photos and understanding the technical aspects of photography.
- Photography: The Complete Guide by David Burnett: This book is a comprehensive guide to photography that covers everything from the basics of photography to advanced techniques and concepts. It includes chapters on composition, lighting, and editing, as well as interviews with professional photographers.
- Photography: A Visual History by Stephen Butler: This book is a great resource for those who want to learn about the history of photography. It covers the evolution of photography from its earliest days to the present, and includes examples of iconic photographs from throughout history.
- The Photographer’s Eye: Composition and Visual Design by Michael Freeman: This book is a great resource for those who want to improve their composition skills. It covers the basics of composition, including the rule of thirds, leading lines, and negative space, as well as more advanced techniques like visual weight and balance.
Overall, these books are great resources for beginners who want to learn about photography. They cover a wide range of topics and concepts, and are written in an easy-to-understand style that is perfect for those who are new to photography. Whether you’re looking to improve your technical skills, composition, or just want to learn more about the history of photography, these books are a great place to start.
Local Photography Clubs
- Photography clubs are a great way to connect with other photographers and learn from their experiences.
- Many photography clubs offer meetings, workshops, and events that cater to photographers of all skill levels.
- By joining a photography club, you can:
- Share your work and receive feedback from others.
- Learn about new techniques and equipment.
- Participate in group outings and photo shoots.
- Attend lectures and presentations by guest speakers.
- To find a local photography club, you can:
- Search online for clubs in your area.
- Ask other photographers for recommendations.
- Check with local camera stores or art centers.
- Attend photography events and meetings to network with other photographers.
- By taking advantage of the resources and opportunities offered by local photography clubs, you can accelerate your learning process and improve your skills as a photographer.
Workshops and Courses
Attending workshops and courses can be an excellent way to kick-start your photography journey. These educational opportunities provide hands-on experience, personalized guidance, and a chance to network with fellow enthusiasts. Here are some aspects to consider when exploring workshops and courses:
In-person Workshops
- One-on-One Instruction: In-person workshops often provide personalized attention, enabling you to receive tailored feedback and guidance from experienced photographers.
- Hands-on Experience: These workshops usually involve practical exercises, allowing you to apply theoretical concepts in real-world settings and develop your technical and creative skills.
- Networking Opportunities: You’ll have the chance to connect with fellow participants and instructors, which can lead to valuable connections, collaborations, or mentorship opportunities.
Online Courses
- Flexibility: Online courses offer the convenience of learning at your own pace, from anywhere, and at any time. This is especially beneficial for those with busy schedules or limited access to in-person workshops.
- Variety: With a wide range of online courses available, you can choose the one that best aligns with your interests, skill level, and learning style.
- Affordability: Compared to in-person workshops, online courses often have lower costs, making it more accessible for beginners to invest in their photography education.
Choosing the Right Workshop or Course
- Your Goals: Consider your photography goals and the specific areas you want to improve in. This will help you choose a workshop or course that aligns with your objectives.
- Instructor’s Experience and Expertise: Look for instructors who are accomplished photographers and have a track record of success in the areas you want to learn.
- Course Content: Assess the course curriculum to ensure it covers the topics you’re interested in and that it’s at an appropriate level for your current skillset.
- Reviews and Recommendations: Research the workshop or course by reading reviews from past participants and seeking recommendations from fellow photographers.
By investing in a photography workshop or course, you’ll gain valuable knowledge, skills, and experiences that will help you on your photography journey.
Tips for Beginners
Practice, Practice, Practice
One of the most important things for beginners to keep in mind when starting out in photography is the importance of practice. It is essential to understand that photography is an art form that requires dedication, time, and effort to master. As with any skill, the more you practice, the better you will become. Here are some tips to help you get started with practicing photography:
- Start with the basics: Begin by learning the basics of photography, such as the exposure triangle (aperture, shutter speed, and ISO), composition, and focus. Understanding these fundamentals will help you create better photographs and build a strong foundation for your photography skills.
- Shoot regularly: Set aside time each day or week to take photographs. Whether it’s shooting landscapes, portraits, or still life, make it a habit to pick up your camera and take pictures regularly. Consistency is key when it comes to improving your skills.
- Experiment with different genres: Don’t limit yourself to one genre of photography. Try shooting different types of subjects, such as people, nature, architecture, and still life. Experimenting with different genres will help you develop your unique style and find what you enjoy photographing the most.
- Learn from others: Look at the work of other photographers and learn from them. Study their techniques, composition, and style. Join photography groups or forums and participate in discussions to learn from others and get feedback on your own work.
- Be patient: Improving your photography skills takes time and patience. Don’t expect to become a master photographer overnight. Keep practicing, learning, and experimenting, and eventually, you will see improvement in your work.
By following these tips, you can start practicing photography and improve your skills over time. Remember, photography is a journey, not a destination, so enjoy the process and have fun taking pictures!
Learn from Others
One of the best ways to improve your photography skills is to learn from others. Here are some tips on how to do that:
- Attend Workshops and Classes: One of the best ways to learn photography is by attending workshops and classes. This will give you the opportunity to learn from experienced photographers and get hands-on experience with different types of cameras and techniques.
- Join Photography Communities: Joining photography communities such as online forums, social media groups, and local camera clubs can be a great way to connect with other photographers and learn from their experiences. You can ask questions, share your work, and get feedback from others.
- Follow Photography Blogs and Instagram Accounts: Following photography blogs and Instagram accounts can be a great way to stay up-to-date on the latest photography trends and techniques. You can also learn from the work of other photographers and get inspiration for your own photography.
- Read Photography Books and Magazines: Reading photography books and magazines can be a great way to learn about different photography techniques and get inspiration for your own photography. You can also learn about the history of photography and the work of famous photographers.
- Watch Photography Videos: Watching photography videos can be a great way to learn about different photography techniques and get inspiration for your own photography. You can find videos on YouTube, Vimeo, and other websites.
Overall, learning from others is an essential part of improving your photography skills. By attending workshops and classes, joining photography communities, following photography blogs and Instagram accounts, reading photography books and magazines, and watching photography videos, you can gain valuable knowledge and experience that will help you become a better photographer.
Be Patient and Persistent
Starting a new hobby can be exciting, but it can also be frustrating when you don’t see immediate results. Photography is no exception. It takes time and practice to develop your skills and eye for composition. Here are some tips to help you stay patient and persistent as you start your photography journey:
- Set realistic goals: Don’t expect to be taking award-winning photos right away. Set small, achievable goals for yourself, such as learning how to use a specific camera setting or capturing a specific type of shot.
- Practice regularly: The more you practice, the more comfortable you’ll become with your camera and the better you’ll get at identifying good photo opportunities.
- Learn from your mistakes: Every photo you take won’t be a masterpiece, and that’s okay. Use each photo as an opportunity to learn and improve.
- Seek feedback: Share your photos with others and ask for feedback. This can help you identify areas where you need to improve and give you a sense of what’s working well.
- Stay inspired: Surround yourself with other photographers, both online and in person. Look at their work and be inspired by their creativity and skill.
Remember, photography is a journey, not a destination. Be patient with yourself and keep practicing, and you’ll soon see your skills improve.
Enjoy the Process
One of the most important things to remember when starting out in photography is to enjoy the process. It’s easy to get caught up in the technical aspects of photography and forget that it’s supposed to be a fun and creative hobby. Here are a few tips to help you enjoy the process of photography:
- Don’t be afraid to experiment: One of the best ways to enjoy photography is to experiment with different techniques and styles. Don’t be afraid to try new things and see what works for you. Whether it’s trying out a new lens or playing with different exposure settings, experimentation can help you find your own unique style and keep your photography fresh and exciting.
- Take your time: It’s easy to get caught up in the rush of trying to capture the perfect shot, but it’s important to take your time and enjoy the process. Don’t be afraid to take a few extra minutes to set up your shot or to wait for the perfect moment. Remember that photography is a process, and sometimes the best shots come after a bit of patience and persistence.
- Shoot for fun: Remember that photography should be a fun and creative hobby. Don’t put too much pressure on yourself to capture the perfect shot or to follow certain rules. Shoot for fun and let your creativity flow.
- Find inspiration: Photography can be a very inspiring hobby, and finding inspiration can help you enjoy the process even more. Whether it’s looking at the work of other photographers or finding inspiration in nature, don’t be afraid to seek out new sources of inspiration to keep your photography fresh and exciting.
By following these tips, you can help ensure that you enjoy the process of photography and stay motivated to continue learning and growing as a photographer.
Stay Curious and Keep Learning
As a beginner in photography, it’s essential to approach your journey with an open mind and a thirst for knowledge. Photography is a vast field with countless techniques, styles, and approaches, and there’s always something new to learn. By staying curious and keeping a willingness to learn, you’ll be better equipped to develop your skills and find your unique voice as a photographer. Here are some tips to help you stay curious and keep learning:
- Experiment with Different Genres and Techniques: One of the best ways to stay curious in photography is to experiment with different genres and techniques. Try your hand at landscape, portrait, street, wildlife, or abstract photography. Experiment with different lighting techniques, such as natural light, artificial light, and studio lighting. Experiment with different angles, perspectives, and compositions. By trying new things, you’ll develop a deeper understanding of photography and find your unique style.
- Read and Study Photography Books and Magazines: Another great way to stay curious and keep learning is to read and study photography books and magazines. There are countless books and magazines on photography, covering a wide range of topics, from technical advice to artistic inspiration. Reading these resources can help you develop your technical skills, improve your composition, and broaden your knowledge of the history and culture of photography.
- Attend Photography Workshops and Classes: Photography workshops and classes are an excellent way to learn from experienced photographers and gain hands-on experience. Workshops and classes can cover a wide range of topics, from the basics of photography to advanced techniques and creative concepts. They provide an opportunity to learn from others, get feedback on your work, and network with other photographers.
- Join Photography Communities and Groups: Joining photography communities and groups is an excellent way to connect with other photographers, share your work, and learn from others. Online communities, such as forums and social media groups, offer a wealth of information and resources. You can ask questions, get feedback on your work, and share your experiences with others. Local camera clubs and meetups are also a great way to connect with other photographers and learn from their experiences.
- Keep a Photography Journal: Keeping a photography journal is an excellent way to reflect on your work, document your progress, and set goals for your photography practice. A photography journal can include sketches, ideas, notes, and photographs. It can help you stay focused on your goals, document your progress, and celebrate your achievements.
By staying curious and keeping a willingness to learn, you’ll be better equipped to develop your skills and find your unique voice as a photographer. Remember that photography is a journey, and there’s always something new to learn.
FAQs
1. What equipment do I need to get started in photography?
You don’t need expensive equipment to get started in photography. A smartphone with a good camera is a great place to start. If you want to take your photography more seriously, you can invest in a digital camera or a mirrorless camera. These types of cameras offer more advanced features and capabilities than a smartphone camera.
2. How can I improve my photography skills?
The best way to improve your photography skills is to practice, practice, practice. Take pictures every day, even if it’s just a few shots. Experiment with different shooting modes, angles, and lighting conditions. You can also learn from other photographers by studying their work and asking for feedback on your own images. Joining a photography club or group can also be a great way to learn from others and get feedback on your work.
3. What are the key elements of good photography?
Good photography is all about capturing a moment in time and telling a story through your images. The key elements of good photography include composition, lighting, and subject matter. Composition refers to the way you arrange the elements in your image. Lighting can make or break an image, so it’s important to understand how to use light to your advantage. And finally, the subject matter of your photographs should be interesting and relevant to your audience.
4. How can I learn about photography techniques and principles?
There are many resources available for learning about photography techniques and principles. You can start by reading books on photography, such as “The Photography Bible” by John Hedge and “Understanding Exposure” by Bryan Peterson. You can also take online courses or workshops, such as those offered by Udemy, Skillshare, and CreativeLive. Finally, you can learn by doing, by experimenting with different techniques and asking for feedback from other photographers.
5. What are some tips for taking better smartphone photos?
Taking better smartphone photos is all about understanding the limitations of your device and working within those constraints. Here are a few tips for taking better smartphone photos:
* Use the highest resolution setting possible.
* Experiment with different shooting modes, such as portrait mode or panorama mode.
* Use natural light whenever possible, or a good quality external flash if you need to use artificial light.
* Use a tripod or other stabilizing device to avoid blurry photos.
* Edit your photos using a good quality photo editing app, such as Adobe Lightroom or Snapseed.


