Macro photography is an exciting and rewarding type of photography that allows you to capture the beauty and intricacy of small objects and details that are often overlooked by the naked eye. If you’re interested in getting started with macro photography, this guide is for you. We’ll cover everything you need to know to get started, from the equipment you’ll need to the techniques and tips you’ll need to master this fascinating art form. So, let’s dive in and explore the world of macro photography!
Understanding Macro Photography
What is Macro Photography?
Macro photography is a type of photography that involves capturing images of small objects or subjects at a magnified scale. Unlike traditional photography, where the subject is usually captured from a distance, macro photography requires the photographer to get up close and personal with the subject, often using specialized equipment such as a macro lens or extension tubes.
One of the key aspects of macro photography is the use of a shallow depth of field, which allows the photographer to create images with a pleasing bokeh effect and draw attention to the subject. This is achieved by using a low aperture setting, which allows more light into the camera and creates a blurred background.
Macro photography can be used to capture a wide range of subjects, from tiny insects and flowers to intricate details on objects such as machinery or jewelry. It requires careful planning, attention to detail, and an understanding of light and composition.
Overall, macro photography is a challenging and rewarding type of photography that requires patience, persistence, and a willingness to experiment and try new techniques.
The Importance of Composition in Macro Photography
In macro photography, composition plays a crucial role in creating stunning and captivating images. The right composition can bring attention to the subject, create a sense of balance, and lead the viewer’s eye through the frame. In this section, we will discuss the importance of composition in macro photography and provide tips for achieving effective compositions.
- Framing the Subject
One of the most important aspects of composition in macro photography is the way the subject is framed within the image. This means choosing the right angle, position, and distance from the subject to create a pleasing and balanced composition. Consider the following tips when framing your subject:- Use the rule of thirds: When composing your image, place the subject at one of the intersection points of the rule of thirds grid. This will create a more dynamic and visually pleasing composition.
- Leading lines: Look for leading lines in the environment, such as branches, lines on walls, or roads, that can lead the viewer’s eye towards the subject.
- Negative space: Leave some negative space around the subject to create a more minimalist composition and draw attention to the subject.
- Depth of Field
Another important aspect of composition in macro photography is depth of field. A shallow depth of field can add visual interest to the image by blurring the background and drawing attention to the subject. To achieve a shallow depth of field, consider the following tips:- Use a narrow aperture: A smaller aperture, such as f/8 or f/11, will result in a deeper depth of field and more of the scene being in focus.
- Choose a longer focal length: Using a longer focal length, such as 100mm or more, will also result in a shallower depth of field.
- Move closer to the subject: Moving closer to the subject will also help create a shallower depth of field and blur the background.
- Symmetry and Patterns
Symmetry and patterns can add visual interest and balance to a composition in macro photography. Look for patterns in the environment, such as flowers, leaves, or textures, and try to incorporate them into your composition. Consider the following tips when incorporating symmetry and patterns into your composition:- Look for repeating patterns: Repeating patterns, such as the stripes on a beetle or the veins on a leaf, can add visual interest to the composition.
- Incorporate negative space: As mentioned earlier, negative space can help draw attention to the subject. Incorporating negative space around symmetrical or patterned subjects can help create a more balanced composition.
- Experiment with angles: Try shooting from different angles to find the most visually pleasing composition. Sometimes, a slight adjustment in angle can make all the difference in creating a stunning composition.
Overall, composition is a critical aspect of macro photography that can make or break an image. By paying attention to framing, depth of field, symmetry, and patterns, you can create stunning and captivating images that will grab the viewer’s attention and leave a lasting impression.
Macro Photography Techniques and Equipment
Mastering macro photography requires a solid understanding of the techniques and equipment involved. This section will provide an overview of the essential tools and techniques needed to capture stunning close-up shots.
Essential Equipment for Macro Photography
To begin with, a dedicated macro lens is a must-have for any macro photographer. These lenses are designed to capture images at a 1:1 magnification ratio, allowing you to capture detailed images of your subject. Some of the best macro lenses include the Canon EF 100mm f/2.8 L IS USM, Nikon AF-S Micro Nikkor 60mm f/2.8G ED, and Sony FE 90mm f/2.8 Macro G OSS.
In addition to a macro lens, a tripod is also an essential piece of equipment. Macro photography often requires a long exposure time, which can result in camera shake and blurry images. A tripod will help to stabilize your camera, ensuring that your images are sharp and in focus.
Another important piece of equipment for macro photography is a ring light or a set of LED lights. These lights are designed to provide even lighting and eliminate shadows, which can be a challenge when shooting close-up images. They can also help to bring out the details and colors of your subject, resulting in stunning images.
Techniques for Macro Photography
Macro photography requires a different approach than traditional photography. Here are some techniques to keep in mind when shooting macro images:
- Use a tripod: As mentioned earlier, a tripod is essential for macro photography. It will help to stabilize your camera and ensure that your images are sharp and in focus.
- Use a remote shutter release: To avoid camera shake, use a remote shutter release or the camera’s self-timer. This will help to minimize any movement that could result in a blurry image.
- Focus manually: Macro photography often requires manual focusing to ensure that your subject is in sharp focus. Use the magnification feature on your camera to zoom in on your subject and manually adjust the focus until it is sharp.
- Use a shallow depth of field: Macro photography can result in a shallow depth of field, which can add interest and dimension to your images. Experiment with different aperture settings to achieve the desired effect.
- Look for unique angles: Macro photography allows you to explore unique angles and perspectives. Experiment with different angles and positions to find the most interesting and dynamic composition.
By understanding the essential techniques and equipment for macro photography, you can capture stunning close-up shots that showcase the beauty and intricacy of your subject.
Choosing Your Macro Photography Subject
Selecting a Subject for Macro Photography
Selecting the right subject is crucial when it comes to macro photography. It is important to choose a subject that is interesting and visually appealing, but also one that is suitable for close-up photography. When selecting a subject, consider the following factors:
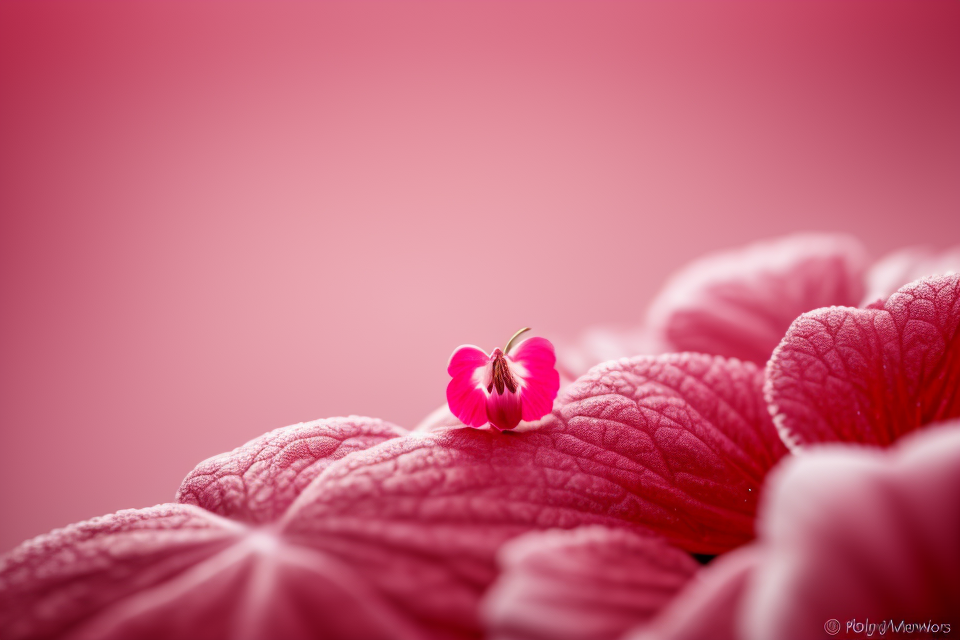
- Size: Macro photography is all about capturing small details, so choose a subject that is small enough to be captured in close-up. For example, insects, flowers, and small objects are ideal subjects for macro photography.
- Texture: Look for subjects with interesting textures that can be highlighted in close-up. This can include the bumpy skin of a fruit, the intricate patterns on a leaf, or the delicate fibers of a spider web.
- Color: Consider the color of the subject when selecting a subject for macro photography. Look for subjects with vibrant colors that will pop in close-up. For example, a bright red flower or a blue butterfly can make for stunning macro shots.
- Composition: Think about the composition of the shot when selecting a subject. Consider the rule of thirds and other composition techniques to create a visually pleasing image.
Overall, the key to selecting a subject for macro photography is to choose something that is interesting and visually appealing, but also something that can be captured in close-up with a macro lens. By carefully considering these factors, you can create stunning macro shots that showcase the beauty and intricacy of your subject.
Macro Photography and Nature
When it comes to macro photography, nature provides an endless source of inspiration and subjects to capture. From the intricate patterns on a butterfly’s wings to the delicate structures of a flower, there is no shortage of beautiful and fascinating subjects to photograph.
One of the key advantages of macro photography is the ability to capture small details that are often overlooked by the human eye. This allows you to reveal the hidden beauty of nature and showcase its intricate details in a way that would not be possible with other types of photography.
However, it’s important to note that nature is not the only subject for macro photography. Other subjects, such as insects, flowers, and even man-made objects, can also be captured in stunning detail with the right techniques and equipment.
Regardless of the subject you choose, it’s important to approach macro photography with patience and a willingness to experiment. By taking the time to explore different angles, lighting, and composition techniques, you can create stunning images that showcase the beauty of your subject in a unique and captivating way.
Macro Photography and Still Life
Macro photography and still life are two concepts that are closely related, and understanding the relationship between them is essential when it comes to choosing your macro photography subject. In this section, we will discuss the connection between macro photography and still life, and how to choose the right subject for your macro photography project.
The Relationship Between Macro Photography and Still Life
Macro photography is a type of photography that involves capturing close-up images of small objects or subjects. Still life, on the other hand, is a genre of art that involves the arrangement of inanimate objects in a still image. While these two concepts seem unrelated at first glance, they share a common thread: the careful arrangement of objects to create a composition that is visually appealing.
In macro photography, the arrangement of objects is often used to create a sense of depth and dimension. By capturing a small object from different angles and perspectives, macro photographers can create a sense of scale and complexity that is not apparent in traditional photography. This same technique can be applied to still life photography, where the arrangement of objects is used to create a sense of balance and harmony.
Choosing Your Macro Photography Subject
When it comes to choosing a subject for your macro photography project, there are a few things to consider. First, think about the message you want to convey with your photograph. Are you trying to showcase the beauty of a small object, or are you trying to make a statement about a particular issue? Once you have a clear idea of what you want to say, you can start to think about the objects you will use to create your composition.
Consider the color, texture, and shape of the objects you will use. These elements can help to create a sense of depth and complexity in your photograph. Additionally, think about the size and scale of the objects you will use. Macro photography is all about capturing small details, so choose objects that will allow you to do just that.
Finally, consider the lighting and composition of your photograph. Still life photography often relies on careful lighting and composition to create a sense of balance and harmony. When shooting macro photography, you will need to pay particular attention to the lighting and composition of your photograph to ensure that your small object is properly highlighted.
In conclusion, the relationship between macro photography and still life is an important one. By understanding the connection between these two concepts, you can choose the right subject for your macro photography project and create a composition that is visually appealing and full of depth and complexity.
Planning Your Macro Photography Shoot
Preparing for a Macro Photography Shoot
When it comes to macro photography, preparation is key. The right preparation can make the difference between a mediocre shot and a stunning image. Here are some tips to help you prepare for your macro photography shoot:
- Research Your Subject
Before you even pick up your camera, it’s important to do some research on your subject. Find out as much as you can about the subject, including its habitat, behavior, and any other relevant information. This will help you plan your shoot and ensure that you’re in the right location at the right time. - Scout Your Location
Once you know what your subject is, it’s time to scout your location. Look for a location that is suitable for your subject and provides the right background, lighting, and other conditions for your shot. Consider the time of day, weather conditions, and any other factors that may affect your shoot. - Gather Your Equipment
Macro photography requires specialized equipment, including a camera with a macro lens, a tripod, and a flash or other lighting equipment. Make sure that your equipment is in good working order and that you have all the accessories you need, such as filters, extension tubes, and ring lights. - Set Up Your Shot
Once you have your equipment and location, it’s time to set up your shot. Consider the composition, lighting, and other factors that will affect your final image. Use your tripod to keep your camera steady and your flash or other lighting equipment to illuminate your subject. - Experiment and Practice
Macro photography is all about experimentation and practice. Try different angles, lighting setups, and other techniques to see what works best for your subject and location. Don’t be afraid to experiment and try new things – that’s how you’ll improve your skills and get the best possible shots.
By following these tips, you’ll be well on your way to preparing for a successful macro photography shoot. With the right planning and preparation, you’ll be able to capture stunning images that showcase the beauty and intricacy of the world around us.
Setting Up Your Shot for Macro Photography
Proper preparation is key to achieving stunning macro photographs. In this section, we will discuss the essential aspects of setting up your shot for macro photography.
- Choosing the Right Subject
The first step in setting up your shot for macro photography is selecting the right subject. Macro photography allows you to capture intricate details of your subject, so it’s important to choose something that will benefit from this level of detail. Flowers, insects, and small objects are popular subjects for macro photography. - Finding the Right Lighting
Lighting is another critical element in setting up your shot for macro photography. Natural light is often the best option, as it can create beautiful, soft shadows that add depth and dimension to your image. However, if you’re shooting indoors or on a cloudy day, you may need to use artificial lighting to achieve the desired effect. - Choosing the Right Camera Settings
Your camera settings play a significant role in the final outcome of your macro photographs. When shooting macro, it’s essential to use a small aperture to ensure that the entire subject is in focus. A low ISO setting will help reduce noise, while a tripod will ensure that your camera remains steady throughout the shoot. - Composition and Framing
Composition and framing are also crucial aspects of setting up your shot for macro photography. Consider the rule of thirds when composing your image, and use leading lines or patterns to draw the viewer’s eye towards the subject. Framing your subject correctly is also essential, so take the time to experiment with different angles and perspectives until you find the perfect shot.
By following these tips, you’ll be well on your way to setting up the perfect shot for your macro photography adventures.
Capturing the Shot in Macro Photography
When it comes to capturing the perfect shot in macro photography, there are several key considerations to keep in mind. From selecting the right equipment to finding the ideal shooting location, these factors can all play a significant role in the success of your macro photography session.
- Selecting the Right Equipment: The first step in capturing the perfect shot in macro photography is selecting the right equipment. This includes choosing a camera with a high resolution and a fast shutter speed, as well as a good quality lens that is capable of capturing fine details. A tripod or monopod can also be helpful in ensuring that your camera remains steady during the shot.
- Finding the Ideal Shooting Location: The shooting location is also an important consideration when it comes to capturing the perfect shot in macro photography. Look for subjects that are rich in texture and detail, such as flowers, insects, or small objects. It is also important to consider the lighting conditions at your chosen location, as this can have a significant impact on the quality of your shots.
- Composition and Framing: Composition and framing are also key factors to consider when capturing the perfect shot in macro photography. Look for interesting angles and perspectives, and consider using leading lines or other compositional techniques to draw the viewer’s eye into the shot. It is also important to pay attention to the background of your shot, as this can affect the overall visual impact of your image.
- Experimenting with Different Techniques: Finally, don’t be afraid to experiment with different techniques when it comes to capturing the perfect shot in macro photography. This might include trying out different shooting angles, using different lenses or equipment, or experimenting with different lighting conditions. By being open to trying new things, you can develop your own unique style and approach to macro photography.
Editing Your Macro Photography Images
Editing Your Macro Photography Images
Once you have captured your macro photography images, the next step is to edit them to bring out the best in your shots. Editing can help you enhance the colors, adjust the exposure, and remove any unwanted elements from your images. Here are some tips for editing your macro photography images:
Choosing the Right Software
There are many software options available for editing your macro photography images, including Adobe Photoshop, Lightroom, and GIMP. It’s important to choose the right software for your needs and budget. Adobe Photoshop is a powerful and popular option for professional photographers, while Lightroom is a more user-friendly option for those just starting out. GIMP is a free and open-source alternative to Photoshop that can be a great option for those on a tight budget.
Enhancing Colors
Macro photography often captures intricate details and textures that can be enhanced with careful color editing. Use the software’s color adjustment tools to enhance the colors in your images. You can adjust the hue, saturation, and brightness of your images to bring out the rich colors and textures of your subject.
Adjusting Exposure
Exposure is the amount of light that is captured by the camera’s sensor. Adjusting the exposure of your macro photography images can help you achieve the desired look and feel of your shots. Use the software’s exposure adjustment tools to brighten or darken your images, or to adjust the contrast to create a more dramatic effect.
Removing Unwanted Elements
Macro photography often captures small details that can be distracting or unwanted in your final image. Use the software’s selection tools to remove unwanted elements from your images. You can also use the clone stamp tool to remove small blemishes or unwanted marks on your subject.
Sharpening Your Images
Finally, it’s important to sharpen your macro photography images to bring out the fine details and textures of your subject. Use the software’s sharpening tools to enhance the edges and details of your images, making them pop and come to life.
Overall, editing is a crucial step in the macro photography process. By carefully editing your images, you can bring out the best in your shots and create stunning and vibrant images that capture the intricate details and textures of your subject.
Tips and Tricks for Macro Photography
Lighting Techniques for Macro Photography
When it comes to macro photography, lighting is one of the most important factors to consider. Without proper lighting, your shots will likely be dull and lackluster. Here are some lighting techniques to keep in mind when starting out with macro photography:
- Natural Lighting: Natural light is often the best lighting option for macro photography. Shooting during the golden hour or on a cloudy day can provide soft, diffused light that is ideal for capturing small details. However, it’s important to be mindful of the direction of the light, as harsh light can cause shadows and highlights that are too strong.
- Artificial Lighting: If natural light is not available or not ideal, artificial lighting can be used to illuminate your subject. There are several types of artificial lighting that can be used for macro photography, including LED lights, fluorescent lights, and strobes. It’s important to choose a light source that is bright enough to properly illuminate your subject, but not so bright that it washes out the details.
- Reflectors: Reflectors can be used to bounce light onto your subject and fill in any shadows. They are especially useful when shooting in direct sunlight or when using a single light source.
- Multiple Light Sources: Using multiple light sources can create more interesting and dynamic lighting effects. You can use multiple LED lights, strobes, or even household lamps to create a variety of lighting setups.
- Experimentation: Experimenting with different lighting setups is key to finding the right lighting for your shots. Don’t be afraid to try different lighting techniques and adjust your settings until you get the desired result.
In conclusion, lighting is a crucial aspect of macro photography, and experimenting with different techniques is key to finding the right lighting for your shots. Whether you choose to use natural light, artificial lighting, reflectors, or multiple light sources, the most important thing is to be mindful of the direction and intensity of the light, and to adjust your settings until you get the desired result.
Focusing and Shutter Speed in Macro Photography
When it comes to macro photography, proper focusing and shutter speed are crucial for capturing stunning images. Here are some tips to help you master these techniques:
Focusing
- Use manual focus: Macro photography requires precise focusing, and using manual focus allows you to have more control over the process.
- Use a focus magnifier: Most DSLR cameras have a focus magnifier feature that allows you to zoom in on your subject and manually adjust the focus.
- Use a focus rail: A focus rail helps you to move the camera slowly and precisely to maintain focus.
- Use live view: Many cameras have a live view mode that allows you to see the image on the LCD screen and adjust the focus manually.
Shutter Speed
- Use a fast shutter speed: When shooting macro photography, it’s important to use a fast shutter speed to freeze any movement and prevent blur.
- Use a tripod: Using a tripod can help you to keep the camera still and avoid camera shake, which can result in blurry images.
- Use a remote shutter release: If you’re using a tripod, a remote shutter release can help you to trigger the camera without touching it, reducing the risk of camera shake.
- Use a low ISO: Using a low ISO setting can help you to keep the image sharp and reduce noise.
By following these tips, you can ensure that your macro photography images are sharp and well-exposed.
Composition Techniques for Macro Photography
Macro photography is all about capturing the small details that often go unnoticed. Composition plays a crucial role in macro photography, as it helps to create a visually pleasing image that tells a story. Here are some composition techniques to keep in mind when shooting macro:
- Leading Lines: Look for leading lines in your macro shot, such as lines, shapes, or textures that lead the viewer’s eye through the image. This can create a sense of depth and dimension in your shot.
- Framing: Framing is an essential composition technique in macro photography. Use natural or man-made frames to frame your subject and create a sense of balance and harmony in your image.
- Symmetry: Look for symmetry in your macro shot, such as patterns or shapes that are repeated on either side of the image. This can create a sense of balance and harmony in your shot.
- Depth of Field: Macro photography often requires a shallow depth of field to create a soft, dreamy effect. Use a small aperture and a low f-stop to increase the depth of field and keep more of your subject in focus.
- Lighting: Lighting is critical in macro photography, as it can help to create texture, depth, and mood in your image. Experiment with different lighting techniques, such as backlighting, sidelighting, and diffused lighting, to find the best lighting setup for your shot.
- Negative Space: Use negative space in your macro shot to create a sense of emptiness and isolation around your subject. This can help to draw attention to your subject and create a sense of focus and depth in your image.
- Perspective: Experiment with different perspectives in your macro shot, such as shooting from above, below, or at an angle. This can create a sense of depth and dimension in your image and help to create a unique and creative shot.
By incorporating these composition techniques into your macro photography, you can create visually stunning and engaging images that tell a story and capture the small details that often go unnoticed.
Post-Processing Techniques for Macro Photography
Macro photography is all about capturing intricate details and textures that are often overlooked by the naked eye. However, even with the best camera equipment, it can be challenging to get the perfect shot in one take. This is where post-processing techniques come into play. Here are some tips to help you enhance your macro photographs using post-processing techniques:
- Adjusting the White Balance: One of the most common post-processing techniques for macro photography is adjusting the white balance. This is especially important when shooting in artificial lighting conditions, as it can greatly affect the colors in your photographs. You can use software like Adobe Lightroom or Photoshop to adjust the white balance and make sure that your colors are accurate.
- Correcting Lens Distortion: Macro lenses can often distort the image, especially when shooting at close distances. This can be corrected using post-processing techniques. In Adobe Photoshop, you can use the “Transform” tool to correct lens distortion. This will help to straighten the lines in your photographs and make them look more natural.
- Sharpening: Sharpening is another important post-processing technique for macro photography. When shooting at close distances, it can be difficult to capture every detail in the photograph. You can use software like Adobe Lightroom or Photoshop to sharpen your images and bring out the details. This will help to make your photographs look crisp and clear.
- Noise Reduction: Macro photography often involves shooting in low light conditions, which can result in noise in your photographs. You can use post-processing techniques to reduce noise and make your photographs look smoother. In Adobe Lightroom or Photoshop, you can use the “Noise Reduction” tool to remove noise from your images.
- Enhancing Colors: Finally, you can use post-processing techniques to enhance the colors in your macro photographs. This can be done using software like Adobe Lightroom or Photoshop. You can adjust the saturation and contrast of your images to make the colors pop and add depth to your photographs.
By using these post-processing techniques, you can take your macro photographs to the next level and bring out the intricate details and textures that you may have missed in your initial shot. Remember to be patient and take your time when editing your photographs, as the post-processing process can make a significant difference in the final outcome of your macro photographs.
Macro Photography for Beginners
Understanding the Basics of Macro Photography
Macro photography is a unique type of photography that involves capturing small subjects at life-size or larger than life-size. It requires a specialized understanding of lighting, composition, and camera settings to produce high-quality images.
To begin with macro photography, it is important to understand the basics of this type of photography. This section will cover the essential elements of macro photography, including:
Subject Selection
The first step in macro photography is selecting the right subject. Macro photography is all about capturing small details, so it is important to choose a subject that has intricate details that can be highlighted in the image. Common subjects for macro photography include insects, flowers, and small objects like coins or gems.
Camera Settings
The next step is to adjust the camera settings to capture the image. Macro photography requires a narrow depth of field, which can be achieved by using a small aperture (high f-stop number). This helps to ensure that the entire subject is in focus. It is also important to use a tripod to stabilize the camera and avoid camera shake.
Lighting
Lighting is a critical element in macro photography. The subject should be lit evenly to bring out its details. Natural light is often the best option, but artificial lighting can also be used to create specific effects. It is important to experiment with different lighting options to find the best one for the subject.
Composition
Composition is another important element in macro photography. The image should be composed in a way that highlights the subject’s details. This can be achieved by using the rule of thirds, leading lines, or other composition techniques. It is also important to consider the background and try to keep it simple and uncluttered.
Focus
Focus is critical in macro photography. The subject should be in sharp focus, and the background should be blurred to draw attention to the subject. This can be achieved by using a shallow depth of field, which can be achieved by using a small aperture and a narrow focus point.
Image Processing
Finally, image processing is an important step in macro photography. The image should be edited to enhance its details and bring out the colors and textures of the subject. This can be achieved using photo editing software like Adobe Photoshop or Lightroom.
By understanding the basics of macro photography, beginners can start capturing high-quality images of small subjects. It is important to experiment with different techniques and settings to find the best approach for each subject. With practice, beginners can develop their skills and create stunning macro photographs.
Building Your Macro Photography Skills
Macro photography requires patience, attention to detail, and a willingness to experiment. To build your macro photography skills, it’s important to understand the basics of composition, lighting, and camera settings. Here are some tips to help you get started:
- Practice Composition: Good composition is key to creating striking macro photographs. Before you start shooting, take a moment to study the scene and look for interesting patterns, textures, and colors. Experiment with different angles and perspectives to find the most visually appealing composition.
- Lighting: Macro photography often requires additional lighting to illuminate your subject and create contrast. Natural light is usually the best option, but you may need to use a flash or reflector to fill in shadows. Experiment with different lighting setups to see what works best for your subject.
- Camera Settings: The right camera settings can make a big difference in the quality of your macro photographs. Use a tripod to keep your camera steady and use a low ISO to reduce noise. Shoot in manual mode to have full control over your camera settings. Adjust your aperture to create a shallow depth of field and blur the background, and use a small aperture to capture more detail.
- Experiment: Macro photography is all about experimentation. Try different angles, lighting setups, and camera settings to see what works best for your subject. Don’t be afraid to break the rules and try something new. With practice and experimentation, you’ll develop your own unique style and techniques.
By following these tips and practicing regularly, you’ll be well on your way to building your macro photography skills and creating stunning images.
Tips for Macro Photography Beginners
- Focus on the Subject:
- When starting out with macro photography, it’s important to keep the subject of the photo in sharp focus. This can be achieved by using a tripod to keep the camera steady and using a shallow depth of field to create a pleasing background blur.
- Look for Patterns and Textures:
- Macro photography is a great way to capture intricate patterns and textures that would be difficult to see with the naked eye. Keep an eye out for interesting patterns in nature, such as the veins on a leaf or the markings on an insect’s body.
- Play with Light:
- Light is a key element in any photograph, and macro photography is no exception. Experiment with different lighting conditions to see how they affect the mood and feel of your photos. Try shooting in natural light, artificial light, or a combination of both.
- Use a Macro Lens:
- A macro lens is specifically designed for close-up photography and allows you to capture detailed images of small subjects. If you don’t have a macro lens, you can still achieve similar results with a standard lens by getting close to your subject and using a small aperture.
- Experiment with Different Angles:
- Don’t be afraid to get creative with your compositions. Try shooting from different angles and perspectives to see how it affects the final image. You might find that a unique angle brings out new details in your subject.
- Get Close:
- Macro photography is all about getting up close and personal with your subject. Don’t be afraid to get right in their face and fill the frame with your subject. This will help to create a more intimate and engaging image.
Common Mistakes to Avoid in Macro Photography
Improper Focus
One of the most common mistakes in macro photography is failing to achieve proper focus. It is crucial to keep the subject in sharp focus, and using manual focus or a focus lock function can help prevent this issue.
Poor Lighting
Macro photography often requires careful management of lighting conditions. Poor lighting can lead to overexposed or underexposed images, and can also cause harsh shadows and unflattering highlights. Utilizing a diffuser or reflector, or adjusting the lighting position, can improve the overall quality of the image.
Inadequate Composition
Composition is key in any form of photography, and macro photography is no exception. Paying attention to the rule of thirds, leading lines, and negative space can greatly enhance the visual appeal of a macro photograph.
Not Adjusting for Depth of Field
Depth of field plays a significant role in macro photography, as it can greatly impact the level of detail captured in the image. Shooting with a shallow depth of field can add visual interest and draw attention to the subject, while a deeper depth of field can provide more detail and clarity.
Not Considering Backgrounds
While the subject of a macro photograph is the primary focus, the background can greatly impact the overall aesthetic of the image. Paying attention to the background and considering the overall visual balance can help create more visually appealing macro photographs.
Recap of Key Points
Macro photography is a fascinating and rewarding way to capture stunning images of small subjects, from insects to flowers. Here are some key points to remember when getting started with macro photography:
- Macro photography involves taking close-up photographs of small subjects, usually at a magnification ratio of 1:1 or greater.
- A good starting point for macro photography is to use a camera with a built-in macro mode or a macro lens, which allows you to focus on subjects that are very close to the camera.
- Lighting is critical in macro photography, as it can make or break an image. Natural light is often the best option, but artificial lighting can also be used to create dramatic effects.
- Composition is also important in macro photography, as it can help to create a sense of depth and interest in the image. Filling the frame with the subject and using leading lines or patterns can help to create a more dynamic composition.
- Finally, it’s important to experiment with different settings and techniques to find what works best for you and your subject. This might include adjusting the aperture, shutter speed, ISO, and focus mode to achieve the desired effect.
Inspiration for Future Macro Photography Adventures
- The beauty of macro photography lies in its ability to capture the intricate details of the world around us. From the delicate patterns on a butterfly’s wings to the intricate structures of a flower, macro photography allows us to see the beauty in the smallest of things.
- To truly appreciate the beauty of macro photography, it’s important to seek out inspiration from other photographers who have mastered this art form. This can be done by browsing online photography communities, attending photography workshops, or simply by spending time in nature and observing the world around us.
- Another great way to find inspiration for future macro photography adventures is to explore different types of subjects. While flowers and insects are often the go-to subjects for macro photography, there are countless other subjects that can be captured in stunning detail. This could include anything from water droplets to textures, patterns, and even abstract shapes.
- It’s also important to remember that inspiration can come from anywhere, and that it’s okay to experiment and try new things. This might mean trying out different angles, shooting in different lighting conditions, or even experimenting with different lenses and equipment.
- Finally, it’s important to keep an open mind and to always be looking for new and unique perspectives. Macro photography is all about seeing the world in a new way, and the more we explore and experiment, the more we’ll be able to capture the beauty of the world around us.
FAQs
1. What is macro photography?
Macro photography is a type of photography that captures extremely close-up images of small subjects, often with a 1:1 magnification ratio. This means that the subject appears as large as it is in real life, and the photograph can show details that are not visible to the naked eye.
2. What equipment do I need for macro photography?
The main equipment you need for macro photography is a camera with manual focus and a good quality lens with a maximum aperture of f/2.8 or wider. A tripod or other stable surface is also recommended, as well as a good light source.
3. How do I choose a subject for macro photography?
When choosing a subject for macro photography, look for small objects with interesting textures, patterns, or details. Common subjects include insects, flowers, leaves, and small household items.
4. How do I set up my camera for macro photography?
To set up your camera for macro photography, you will need to switch to manual focus and set the focus to the minimum focusing distance of your lens. You may also want to use a shallow depth of field to create a more dramatic effect. Additionally, you may want to consider using a tripod to keep the camera steady and a good light source to illuminate the subject.
5. How do I take a good macro photograph?
To take a good macro photograph, start by composing the shot and choosing the right angle. Use the manual focus to set the focus on the subject, and consider using a shallow depth of field to create a more dramatic effect. Make sure to use a good light source to illuminate the subject, and consider using a tripod to keep the camera steady. Finally, experiment with different shooting angles and backgrounds to find the best composition.


