Are you ready to capture stunning portraits with your Canon camera? Whether you’re a seasoned photographer or just starting out, taking portrait photos can be a challenging but rewarding experience. With the right techniques and settings, you can create beautiful portraits that showcase the subject’s personality and style. In this comprehensive guide, we’ll explore the essential tips and tricks for taking amazing portrait photos with your Canon camera. From choosing the right settings to posing your subject, we’ll cover everything you need to know to take stunning portraits every time. So, let’s get started and elevate your portrait photography game!
To take stunning portrait photos on your Canon camera, consider the following tips: 1) Use a low aperture setting for a blurred background effect, 2) Choose the right lens for the desired perspective, 3) Utilize the rule of thirds for composition, 4) Pay attention to lighting and use a reflector or external flash if necessary, 5) Experiment with different shooting angles, 6) Consider using a tripod for stability, and 7) Post-process your photos to enhance the final result. With practice and attention to detail, you can capture beautiful portraits with your Canon camera.
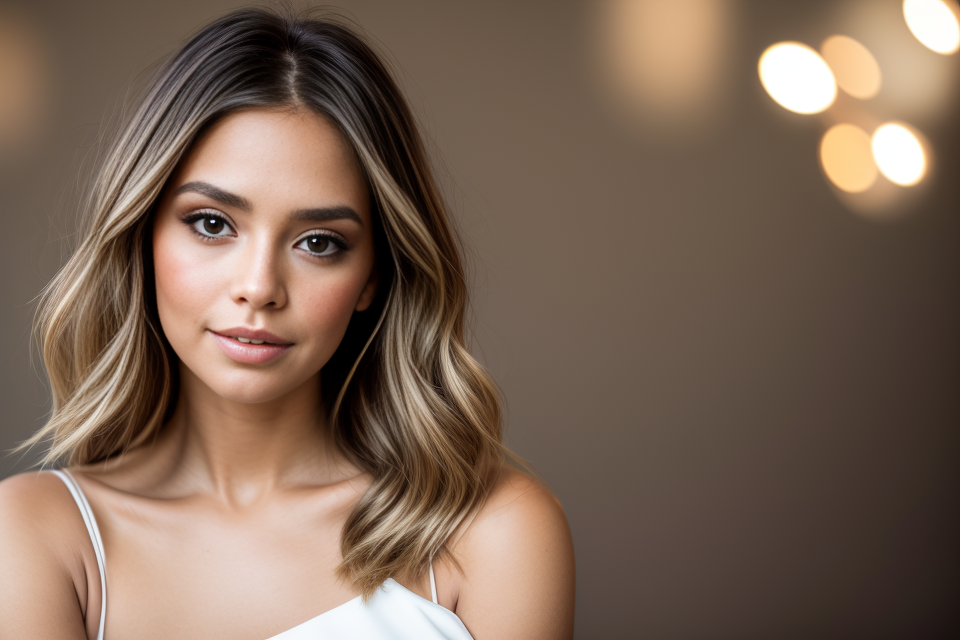
Setting Up Your Canon Camera for Portrait Photography
Adjusting Your Camera Settings
Before taking stunning portrait photos, it is essential to adjust your camera settings. Here are some critical adjustments to make:
Understanding the Exposure Triangle
The exposure triangle consists of three elements: ISO, shutter speed, and aperture. These three elements work together to control the exposure of your photos. To achieve the perfect exposure, you need to understand how each element works and how they interact with each other.
ISO Settings
ISO is the sensitivity of your camera’s sensor to light. A higher ISO setting will make your photos brighter, but it will also increase noise. For portrait photography, it is recommended to use a low ISO setting, such as 100 or 200, to ensure the best image quality.
Shutter Speed Settings
Shutter speed controls the length of time that the camera’s sensor is exposed to light. A slower shutter speed will allow more light into the camera, while a faster shutter speed will allow less light in. For portrait photography, it is recommended to use a shutter speed between 1/60th and 1/250th of a second to ensure a sharp image.
Aperture Settings
Aperture controls the amount of light that enters the camera and also has an effect on the depth of field. A larger aperture (a smaller number) will allow more light into the camera and create a shallower depth of field, while a smaller aperture (a larger number) will allow less light into the camera and create a deeper depth of field. For portrait photography, it is recommended to use an aperture between f/1.8 and f/5.6 to achieve a pleasing depth of field.
Autofocus Settings
Autofocus is essential for achieving sharp portraits. Canon cameras have several autofocus modes, including single-point autofocus, zone autofocus, and multi-point autofocus. It is recommended to use single-point autofocus and place the focus point on the subject’s eye to ensure a sharp portrait.
Choosing the Right Lens for Portraits
Choosing the right lens is crucial for capturing stunning portrait photographs. Each lens has its unique characteristics, and selecting the right one can make a significant difference in the final image.
Recommended lenses for Canon cameras:
- Canon EF 85mm f/1.2L USM
- Canon EF 50mm f/1.4 USM
- Canon EF 70-200mm f/2.8L IS III USM
Tips for shooting with prime lenses:
- Prime lenses offer a fixed focal length, which encourages the photographer to get closer to the subject and think more creatively about composition.
- Shooting with a prime lens can help to achieve a shallow depth of field, which can add a sense of depth and dimension to the portrait.
- Prime lenses are generally lighter and smaller than zoom lenses, making them easier to carry and maneuver during a photoshoot.
It’s essential to consider the distance between the subject and the background when choosing a lens for portrait photography. A longer focal length will compress the background, while a shorter focal length will create a more dramatic background. The choice of lens will also depend on the size of the room and the proximity of the subject to the camera.
Understanding Lighting for Portraits
When it comes to taking stunning portrait photos, lighting plays a crucial role. It can make or break your shot, and understanding how to use light to your advantage is essential for capturing the perfect portrait.
Natural light vs. artificial light
One of the first things to consider when it comes to lighting for portraits is whether to use natural light or artificial light. Natural light is often considered the best light source for portrait photography because it is soft and gentle, which helps to create a flattering and natural look. However, natural light can be unpredictable, and you may not always have access to it, especially when shooting indoors.
Artificial light, on the other hand, is more predictable and can be easily controlled. It is often used when shooting indoors or in low light conditions. There are several types of artificial light sources available, including fluorescent lights, LED lights, and strobes. Each type of light has its own unique characteristics, and it’s important to understand how they can affect your shot.
Lighting setups for different shooting scenarios
The type of lighting setup you use will depend on the shooting scenario. For example, if you’re shooting outdoors, you may want to use a combination of natural light and fill flash to add a bit of extra light to your subject’s face. If you’re shooting indoors, you may want to use artificial light sources to create a specific mood or to add contrast to your shot.
When setting up your lighting, it’s important to consider the direction and intensity of the light. You’ll want to position your lights so that they create a flattering and natural look on your subject’s face. You may also want to adjust the intensity of the light to create more or less contrast in your shot.
In addition to the direction and intensity of the light, you’ll also want to consider the color of the light. Different light sources can produce different colors, and you’ll want to choose a light source that produces a flattering color temperature for your subject’s skin tone.
Overall, understanding lighting for portraits is crucial for taking stunning photos. Whether you choose to use natural light or artificial light, it’s important to consider the direction, intensity, and color of the light to create a flattering and natural look for your subject.
Posing Techniques for Better Portraits
Posing is a crucial aspect of portrait photography, as it can make or break the final image. Here are some basic posing tips for different body types, as well as some communication techniques for capturing natural poses.
Basic Posing Tips for Different Body Types
- Slimming Down: If your subject has a slim figure, try angling their body away from the camera to create the illusion of more volume. You can also have them place their hands on their hips or cross their arms to add definition to their waistline.
- Bulking Up: For subjects with a heavier build, position them at a 45-degree angle to the camera to create shadows that can slim down their appearance. Ask them to place their hands on their hips or clasp them in front of their chest to create a more robust silhouette.
- Balancing Out: If your subject has a larger or smaller bust than average, have them wear a scarf or shawl that can be draped across their chest to create balance. Additionally, ask them to angle their body slightly to draw attention away from any less-flattering areas.
Communicating with Your Subject for Natural Poses
- Relaxation: Encourage your subject to relax their facial muscles and avoid forcing a smile. This will help create a more natural and authentic portrait.
- Breathing: Suggest that your subject take a deep breath and exhale slowly, which can help to relax their body and reduce tension.
- Mirroring: If you’re shooting a couple or a group, try having them mirror each other’s poses. This can create a sense of unity and balance in the image.
Tips for Shooting Couples and Groups
- Individual Portraits: Start by taking individual portraits of each person, so you can capture their unique features and personalities.
- Composite Portraits: After capturing individual portraits, ask the couple or group to strike a pose that includes both people. This can create a unique and memorable image that captures the essence of their relationship.
- Group Dynamics: Pay attention to the dynamics between the subjects and try to capture those interactions in your images. This can create a more engaging and dynamic portrait.
Capturing the Shot
Composition for Portrait Photography
- Importance of Composition in Portrait Photography
Portrait photography is all about capturing the essence of a person’s character and personality through a single image. The composition of the shot plays a crucial role in creating a powerful and compelling portrait. It is the foundation upon which the rest of the image is built. A well-composed portrait can communicate the subject’s mood, expressions, and even their relationships with others. On the other hand, a poorly composed portrait can leave the viewer feeling disconnected and disinterested. Therefore, understanding the principles of composition is essential for capturing stunning portrait photos on your Canon camera.
- The Rule of Thirds
The rule of thirds is a fundamental principle of composition that states that the placement of key elements in an image should be at one-third intervals. In portrait photography, this means placing the subject at one of the thirds intersection points. This technique creates a sense of balance and harmony in the image, and it draws the viewer’s eye to the subject. Additionally, it allows for negative space around the subject, which can create a sense of depth and separation from the background.
- Leading Lines
Leading lines are lines in the image that lead the viewer’s eye towards the subject. They can be used to create a sense of depth and to guide the viewer’s eye through the image. In portrait photography, leading lines can be used to direct the viewer’s eye towards the subject and to create a sense of movement and flow. Leading lines can be found in the environment, such as roads, paths, or even the lines of an object. By using leading lines, you can create a sense of depth and draw the viewer’s eye towards the subject.
- Framing Techniques
Framing techniques involve using objects in the environment to frame the subject. This technique can be used to create a sense of depth and to draw the viewer’s eye towards the subject. In portrait photography, framing techniques can be used to create a sense of isolation and to highlight the subject’s features. For example, you can use a doorway, window, or even a tree to frame the subject. This technique can be used to create a sense of depth and to draw the viewer’s eye towards the subject.
Overall, composition is a crucial aspect of portrait photography, and understanding the principles of composition can help you create stunning portraits on your Canon camera. By using the rule of thirds, leading lines, and framing techniques, you can create a sense of balance, harmony, and depth in your images.
Capturing Emotion in Your Portraits
When it comes to capturing emotion in your portraits, there are a few key tips to keep in mind. By following these tips, you can create portraits that tell a story and evoke emotion in the viewer.
Tips for capturing authentic expressions
- Look for genuine moments: When capturing a portrait, look for moments that are genuine and authentic. This could be a smile, a laugh, or even a moment of introspection. These moments will create a sense of connection between the subject and the viewer.
- Be patient: Sometimes, capturing an authentic expression takes time. Be patient and wait for the moment to unfold. Don’t rush the process, as this will likely result in a stiff or forced expression.
- Use props: Props can be a great way to create a sense of emotion in a portrait. For example, if you’re capturing a portrait of a musician, you could use their instrument as a prop. This can help to create a sense of connection between the subject and the viewer.
Connecting with your subject
- Build rapport: Building rapport with your subject is key to capturing emotion in your portraits. Take the time to get to know your subject and build a connection with them. This will help them to feel more comfortable in front of the camera, which will result in more authentic expressions.
- Show interest: Showing interest in your subject will help to build a connection between you and them. Ask questions about their interests, hobbies, and passions. This will help to create a sense of rapport and make the subject feel more comfortable in front of the camera.
- Be respectful: Always be respectful of your subject’s boundaries. If they are not comfortable with a certain pose or request, it’s important to respect their wishes. This will help to build trust and create a more authentic portrait.
Creating a sense of storytelling in your portraits
- Tell a story: Your portraits should tell a story about your subject. Consider what you want to convey about them through your photographs. Is it their personality, their interests, or their life story? Once you have a clear idea of what you want to convey, you can start to plan your shots accordingly.
- Use composition: Composition is key to creating a sense of storytelling in your portraits. Use the rule of thirds, leading lines, and other composition techniques to create a sense of movement and direction in your photographs. This will help to tell a story and create a sense of emotion in your portraits.
- Use lighting: Lighting can also be used to create a sense of storytelling in your portraits. Consider the mood you want to convey and use lighting to enhance that mood. For example, if you’re capturing a portrait of a musician, you could use side lighting to create a moody and dramatic effect.
Editing Your Portrait Photos
When it comes to taking stunning portrait photos, editing is just as important as capturing the shot itself. With the right editing techniques, you can enhance your portraits and bring out the best in your subjects. Here’s an overview of basic editing techniques to help you get started:
- Adjusting exposure, contrast, and colors: The first step in editing your portrait photos is to adjust the exposure, contrast, and colors. This will help to bring out the details in your subject’s face and create a more dynamic image. Use the sliders in your photo editing software to adjust these settings until you achieve the desired effect.
- Enhancing skin tones and details: Another important aspect of editing your portrait photos is enhancing the skin tones and details. Use the software’s skin tone adjustment tools to correct any discoloration or blemishes, and adjust the contrast and brightness to bring out the details in your subject’s face.
- Adding a touch of artistic flair: Once you’ve adjusted the exposure, contrast, and colors, and enhanced the skin tones and details, you can add a touch of artistic flair to your portrait photos. Experiment with filters, textures, and other effects to create a unique and creative image that stands out from the crowd.
By following these basic editing techniques, you can take your portrait photos to the next level and create stunning images that showcase your subjects in the best possible light.
Advanced Techniques for Portrait Photography
Shooting in Low Light
Shooting in low light situations can be a challenge for photographers, but with the right techniques, it is possible to capture stunning portraits even in dimly lit environments. Here are some tips for shooting in low light:
- Understanding how to shoot in low light situations
- Adjusting your camera settings
- ISO
- Shutter speed
- Aperture
- Using a tripod or other stabilizing device
- Choosing the right lens
- Adjusting your camera settings
- Techniques for shooting at night or in dimly lit areas
- Using a wide aperture to let more light into the camera
- Using a slow shutter speed to capture the ambient light
- Using a flash or other light source to add fill light
- Using slow shutter speeds for creative effects
- Capturing motion in your photos
- Creating a sense of movement in your subjects
- Experimenting with long exposures
By understanding how to shoot in low light situations, you can capture portraits that are rich in detail and mood, even when the lighting is less than ideal. With a little practice and experimentation, you can master the art of shooting in low light and create stunning portraits that stand out from the crowd.
Creating a Signature Style
As a photographer, it’s important to develop your own unique style that sets you apart from others in the field. Here are some tips for creating a signature style in your portrait photography:
- Finding your own unique style: Start by experimenting with different angles, lighting, and compositions. Pay attention to the way you frame your subjects and the emotions you want to capture. Look at the work of other photographers for inspiration, but don’t copy their style. Instead, find elements that resonate with you and incorporate them into your own work.
- Experimenting with different angles and perspectives: Try shooting from low angles, high angles, and eye level to see how it affects the mood and feel of the portrait. You can also experiment with different backgrounds, such as natural environments or urban settings, to add interest and depth to your images.
- Tips for developing your own portrait photography brand: Consider your target audience and what type of portraits they are looking for. Develop a consistent color palette and editing style that reflects your brand. Use social media to showcase your work and connect with potential clients. Network with other photographers and attend workshops or conferences to learn new techniques and stay up-to-date on industry trends.
FAQs
1. What is the best setting for taking portrait photos on my Canon camera?
The best setting for taking portrait photos on your Canon camera would depend on the specific model of your camera and the shooting conditions. However, in general, it is recommended to use a shallow depth of field to create a professional and artistic look. You can achieve this by using a low aperture value, such as f/2.8 or lower, and focusing on the subject’s eyes. Additionally, using the “Portrait” or “Close-up” mode on your camera can also help to achieve a stunning portrait.
2. How do I get the perfect focus when taking portrait photos on my Canon camera?
To get the perfect focus when taking portrait photos on your Canon camera, you can use the “One-Shot AF” mode, which is designed for stationary subjects. This mode will allow you to pre-focus on your subject and then recompose your shot before taking the photo. Alternatively, you can use the “Servo AF” mode, which is designed for moving subjects, and will continuously adjust the focus as your subject moves.
3. What is the best lighting setup for taking portrait photos on my Canon camera?
The best lighting setup for taking portrait photos on your Canon camera will depend on the shooting conditions and the desired mood of the photo. However, in general, it is recommended to use a combination of natural and artificial light to create a soft and flattering light on your subject’s face. You can achieve this by placing your subject near a window or doorway, and using a reflector or an additional light source to fill in any shadows.
4. How do I adjust the exposure when taking portrait photos on my Canon camera?
To adjust the exposure when taking portrait photos on your Canon camera, you can use the “Exposure Compensation” feature. This will allow you to increase or decrease the exposure of your photos, depending on the shooting conditions. You can access this feature by pressing the “Exposure Compensation” button on your camera and using the control dial to adjust the setting. It is recommended to take test shots and review the exposure on the camera’s LCD screen to ensure that the exposure is correct.
5. How do I get the best results when editing portrait photos taken on my Canon camera?
To get the best results when editing portrait photos taken on your Canon camera, you can use photo editing software such as Adobe Photoshop or Lightroom. In these programs, you can adjust the exposure, contrast, and color balance of your photos, as well as remove any unwanted blemishes or distractions. It is recommended to experiment with different editing techniques and see what works best for your photos.


