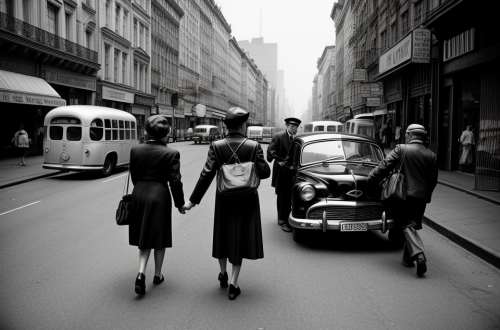
Do you have a collection of beautiful photographs that you want to showcase in a unique and personal way? Then a photo book is the perfect solution for you! A photo book is a collection of your favorite photographs, carefully selected and arranged in a book format. It is a wonderful way to preserve your memories and share them with others. In this guide, we will take you through the step-by-step process of creating a stunning photo book that you will treasure for years to come. From choosing the right photo book provider to designing your book and selecting the perfect images, we’ve got you covered. So, let’s get started and make your photo book dream a reality!
Understanding Photo Books
What is a photo book?
A photo book is a type of book that is created from a collection of photographs. It is a tangible and physical way to showcase your memories, stories, and special moments through images. Photo books can be created in various sizes, formats, and styles, making them a versatile and personalized gift or keepsake. They can be made using professional printing services or online photo book makers, and can include captions, text, and design elements to enhance the narrative and visual impact of the images. Photo books are a popular way to preserve and share cherished memories, and can be created for personal or professional purposes.
Types of photo books
Photo books come in various forms, each designed to showcase your photography skills and tell a unique story. Some of the most common types of photo books include:
- Hardcover Books: These books have a hard cover and are bound with glue. They are a classic option for displaying your photographs and are ideal for preserving memories for years to come.
- Softcover Books: Softcover books have a paper cover and are less expensive than hardcover books. They are perfect for sharing your work with friends and family or for displaying your work in a more casual setting.
- Photo Album Books: These books are similar to traditional photo albums and are designed to hold printed photographs. They are a great option for preserving your memories and sharing them with others.
- Coffee Table Books: These books are large and are designed to be displayed on a coffee table. They are a great option for showcasing your work and impressing clients or potential employers.
- Layflat Books: These books have pages that lay flat, making it easy to display your work without any gaps or distortion. They are a great option for displaying your work in a professional setting.
Understanding the different types of photo books available can help you choose the best option for your needs and ensure that your work is displayed in the best possible way.
Benefits of creating a photo book
Creating a photo book can be a highly rewarding experience, providing numerous benefits that make it an excellent way to preserve and share your memories. Here are some of the key advantages of creating a photo book:
- Relive cherished memories: A photo book allows you to relive your favorite moments and memories, making it easy to recall special occasions, trips, or events from the past.
- Tell a story: With a photo book, you can create a visual narrative of your life, allowing you to share your experiences and story with others in a unique and engaging way.
- Preserve memories for future generations: By creating a photo book, you can ensure that your memories are preserved for future generations, allowing your family and loved ones to appreciate and learn from your experiences long after you’re gone.
- Organize and display your photos: A photo book is an excellent way to organize and display your photos, providing a tangible collection of your best work that you can share with others.
- Create a personalized gift: Photo books make great personalized gifts for friends and family, allowing you to share your memories and experiences with others in a unique and thoughtful way.
- Improve your photography skills: Creating a photo book can help you improve your photography skills, as you’ll be encouraged to carefully select and curate your best work, leading to improved composition and editing skills.
- Inspire creativity: By creating a photo book, you’ll be inspired to think creatively about how to tell your story and showcase your memories, leading to new ideas and approaches to photography.
Overall, creating a photo book is a great way to preserve and share your memories, and it offers numerous benefits that make it an enjoyable and rewarding experience.
Choosing Your Photos
Selecting the right photos
Choosing the right photos for your photo book is crucial to creating a stunning final product. Here are some tips to help you select the best photos for your book:
- Consider the Theme: Think about the overall theme or story you want to tell with your photo book. This will help you narrow down the photos you want to include and ensure they flow well together.
- Quality Matters: Choose high-quality photos that are in focus and have good lighting. Low-quality photos can detract from the overall quality of your book.
- Diversity: Include a mix of different types of photos, such as portraits, landscapes, and action shots, to add variety and interest to your book.
- Emotional Impact: Choose photos that evoke emotion and tell a story. These photos will be the most impactful and memorable in your book.
- Edit Ruthlessly: Be ruthless when editing your photos. Only include the best ones that truly capture the moment or emotion you want to convey.
- Size Matters: Consider the size of your photo book when selecting photos. Larger photos may look great in a larger book, but may be too small in a smaller book.
- Sequence: Think about the order of the photos in your book. The sequence of photos should tell a story and flow well from one page to the next.
By following these tips, you can select the right photos for your photo book and create a stunning final product that tells a story and showcases your best memories.
Organizing your photos
Creating a photo book requires careful consideration of the images you want to include. One of the most important steps in the process is organizing your photos. Here are some tips to help you get started:
- Start by going through all the photos you have taken, whether they are on your phone, computer, or in printed form. It’s important to have all your photos in one place so that you can easily access them.
- Group your photos by event, location, or theme. This will help you to see which photos are suitable for your photo book.
- Make a list of the events, locations, or themes that you want to include in your photo book. This will help you to stay organized and ensure that you don’t miss any important photos.
- Be selective with your photos. A photo book is a representation of your best memories, so it’s important to choose the most meaningful and highest quality photos.
- Consider the layout and design of your photo book. Think about how the photos will look together on a page and how they will flow from one page to the next.
- Once you have organized your photos, it’s time to start creating your photo book. With your photos organized and ready to go, you can now move on to the next step in the process.
Editing your photos
When it comes to creating a photo book, one of the most important steps is editing your photos. Here are some tips to help you edit your photos effectively:
- Cull your photos: Before you start editing your photos, it’s important to cull them first. This means selecting the best photos from your collection and discarding the rest. Culling your photos will help you focus on the best ones and avoid overwhelming yourself with too many images.
- Adjust the exposure: Exposure is one of the most important elements of a photo. Adjusting the exposure can help you make your photos look better. You can adjust the exposure using photo editing software such as Adobe Lightroom or Photoshop.
- Fix the white balance: White balance is another important element of a photo. It helps to ensure that your photos look natural and true to life. If your photos have a yellow or blue cast, you can fix the white balance using photo editing software.
- Adjust the contrast and brightness: Contrast and brightness are also important elements of a photo. Adjusting the contrast and brightness can help you make your photos look better. You can adjust the contrast and brightness using photo editing software.
- Remove unwanted objects: Sometimes, you may have unwanted objects in your photos. You can remove them using photo editing software such as Adobe Photoshop.
- Sharpen your photos: Finally, it’s important to sharpen your photos. This will help to make them look crisp and clear. You can sharpen your photos using photo editing software.
By following these tips, you can edit your photos effectively and create a stunning photo book that you’ll be proud to show off.
Designing Your Photo Book
Choosing a book size and format
Selecting the right size and format for your photo book is a crucial step in creating a stunning and personalized keepsake. There are various options available, each with its own unique features and benefits.
One important factor to consider is the physical dimensions of the book. This will depend on the number of photos you want to include, as well as the overall design and layout of the book. Some popular sizes include 8×8 inches, 10×10 inches, and 12×12 inches. It’s important to choose a size that will accommodate all of the photos you want to include, while also allowing for enough space to showcase each image effectively.
Another important factor to consider is the binding style. Hardcover books offer durability and a classic look, while softcover books are more affordable and flexible. Spiral-bound books are a great option for photo books that will be frequently handled or displayed open, as they lay flat and can be easily flipped through.
In addition to the physical dimensions and binding style, you may also want to consider the type of paper used for the pages of your book. High-quality photo paper will ensure that your images look their best, with rich colors and fine details. You may also want to choose a paper type that is acid-free and lignin-free to help prevent yellowing and discoloration over time.
Overall, choosing the right size and format for your photo book is an important step in creating a stunning and lasting keepsake. Consider your needs and preferences, as well as the features and benefits of each option, to make the best choice for your project.
Designing the layout
Designing the layout of your photo book is an essential step in creating a stunning final product. It involves arranging your photographs in a way that tells a story and showcases your best work. Here are some tips to help you design the layout of your photo book:
- Determine the theme or story you want to tell with your photos. This will help you choose the right layout and design elements for your book.
- Choose a layout style that suits your photos. There are many layout styles to choose from, including grid layouts, single-page layouts, and more. Experiment with different styles to find the one that works best for your photos.
- Consider the size and shape of your book. The size and shape of your book will affect the layout of your photos. Choose a size and shape that fits your photos and the story you want to tell.
- Use white space effectively. White space can help draw attention to your photos and create a sense of balance in your layout. Don’t be afraid to use it to create a clean and modern look.
- Experiment with different fonts and colors. The fonts and colors you choose can affect the overall look and feel of your book. Choose fonts and colors that complement your photos and the story you want to tell.
- Use captions to add context to your photos. Captions can help explain the story behind your photos and provide context for your readers. Use them to add depth and meaning to your book.
- Review and revise your layout. Once you have designed your layout, review it carefully to ensure that it tells the story you want to tell and that it looks great. Revise it as needed until you are happy with the final product.
By following these tips, you can create a stunning photo book that showcases your best work and tells a story that resonates with your readers.
Adding text and captions
Creating a photo book is a wonderful way to preserve memories and tell a story through pictures. Adding text and captions to your photo book can help enhance the narrative and give context to your images. Here are some tips for adding text and captions to your photo book:
Choose the Right Fonts
The font you choose for your text and captions can greatly impact the overall look and feel of your photo book. It’s important to choose fonts that are easy to read and complement the overall theme of your book. Avoid using too many different fonts, as this can be visually overwhelming.
Keep Text and Captions Short and Sweet
While it’s important to include text and captions in your photo book, it’s equally important to keep them short and sweet. Long blocks of text can be overwhelming and take away from the beauty of the images. Instead, keep your text and captions brief and to the point.
Use Captions to Provide Context
Captions are a great way to provide context for your images. Use them to describe the who, what, when, where, and why of each image. This will help your readers understand the significance of each picture and appreciate the story you’re telling.
Add Titles to Each Section
Adding titles to each section of your photo book can help give it structure and make it easier for readers to navigate. Titles can also help set the tone for each section and give readers a sense of what to expect.
Use Bold and Italics for Emphasis
Using bold and italics can help draw attention to important words and phrases in your text. This can be a great way to emphasize key points or highlight specific details in your captions.
Proofread and Edit
Finally, it’s important to proofread and edit your text and captions before adding them to your photo book. This will help ensure that your book is free of errors and flows smoothly from start to finish. Take the time to review your text and make any necessary changes to ensure that your photo book is as polished and professional as possible.
Selecting a cover
Creating a photo book that truly captures the essence of your memories begins with selecting the perfect cover. Your cover is the first thing that will catch people’s attention and make them want to open your book. Here are some tips to help you choose the best cover for your photo book:
- Choose a theme: The theme of your photo book should be reflected in the cover. If your book is about travel, then choose a cover that reflects that theme.
- Consider the color scheme: The color scheme of your cover should complement the theme of your book. You can also choose a single color or a monochromatic color scheme to create a simple yet elegant look.
- Use high-quality images: Your cover should feature high-quality images that grab the viewer’s attention. You can use a single image or multiple images to create a collage-style cover.
- Keep it simple: A simple design is often more effective than a cluttered one. Keep your cover clean and uncluttered to let your images shine.
- Make it personal: A personal touch can make your photo book even more special. Incorporate a photo of yourself or your family to make the cover more meaningful.
By following these tips, you can create a cover that not only looks great but also tells the story of your photo book.
Printing and Binding Your Photo Book
Printing options
When it comes to printing your photo book, there are several options available. The two most common methods are digital printing and offset printing.
- Digital Printing: This method uses a digital printer to produce high-quality images directly from a digital file. It is a faster and more cost-effective option for small quantities, but the colors may not be as vibrant as with offset printing.
- Offset Printing: This method involves transferring an image from a plate to a printing press, which produces a higher-quality print with more vibrant colors. However, it is more expensive and time-consuming for small quantities.
In addition to these two methods, there are also specialty printing options available, such as dye-sublimation printing, which is commonly used for printing on materials like metal and plastic.
It’s important to consider the quality of the prints, the quantity you’ll be printing, and your budget when choosing a printing method. Once you’ve selected your printing method, you can move on to the next step of binding your photo book.
Binding options
When it comes to printing and binding your photo book, there are several options to choose from. Each option has its own advantages and disadvantages, so it’s important to consider your needs and preferences before making a decision. Here are some of the most popular binding options:
1. Hardcover Binding
Hardcover binding is a classic and durable option for photo books. With this method, the pages are attached to a spine made of cardboard or a similar material, and then covered with a hard cover. This option provides a sturdy and long-lasting finish, making it ideal for books that will be handled frequently or placed on display.
2. Softcover Binding
Softcover binding is a more affordable and flexible option for photo books. With this method, the pages are attached to a spine made of paper or a similar material, and then covered with a soft cover. This option is less durable than hardcover binding, but it is also more affordable and can be easily folded or bent without damaging the book.
3. Spiral Binding
Spiral binding is a popular option for photo books that need to lay flat when open. With this method, the pages are attached to a spiral wire that runs along the spine of the book. This option allows the book to open completely, making it ideal for large-format books or books with many pages.
4. Saddle-Stitch Binding
Saddle-stitch binding is a cost-effective option for small photo books. With this method, the pages are attached to a spine made of paper or a similar material, and then folded and stapled together along the spine. This option is less durable than other binding options, but it is also the most affordable and can be used for small books with a limited number of pages.
Overall, the binding option you choose will depend on your personal preferences and the specific needs of your photo book. Consider factors such as the size of the book, the number of pages, the intended use, and the budget when making your decision.
Reviewing and proofing your book
Now that you have designed your photo book, it’s time to print and bind it. But before you send it off to the printers, it’s important to review and proof your book to ensure that it’s perfect. Here are some tips to help you review and proof your photo book:
- Check for errors: Before you print your book, check for any errors in the text, captions, or photo credits. Make sure that all the information is accurate and up-to-date.
- Preview your book: Use the printing company’s online preview feature to see what your book will look like. This will help you catch any errors or mistakes that you may have missed.
- Look for inconsistencies: Check for any inconsistencies in the layout, design, or formatting. Make sure that all the pages are aligned correctly and that the font sizes and styles are consistent throughout the book.
- Check the binding: Check the binding of your book to make sure that it’s secure and won’t come loose. If you notice any issues with the binding, contact the printing company immediately.
- Check the print quality: Make sure that the print quality is up to your standards. If you notice any issues with the print quality, contact the printing company immediately.
- Check for any other issues: Check for any other issues that you may have missed, such as incorrect page numbers, missing images, or other errors.
By following these tips, you can ensure that your photo book is perfect and ready to be shared with others.
Finalizing your order
After selecting the right photo book printer and binding option, it’s time to finalize your order. This is the last step before sending your files to the printer, and it’s essential to make sure everything is correct. Here are some tips to help you finalize your order:
- Double-check your file format: Ensure that your photo book files are in the correct format before sending them to the printer. The most common formats are JPEG, TIFF, and PDF. If you’re using a different format, make sure it’s compatible with the printer.
- Verify the image resolution: Make sure that your images are high-resolution and will print well. A general rule of thumb is to have images that are at least 300 dpi (dots per inch) for the best quality.
- Review your pages: Before finalizing your order, review each page of your photo book to ensure that the images and text are aligned correctly and there are no errors. You can use a digital proofing tool to help you with this.
- Customize your cover: If you’re creating a custom cover, make sure it’s finalized and that all the details are correct, including the title, author name, and any other text or graphics.
- Confirm your shipping address: Double-check your shipping address to ensure that your photo book will be delivered to the correct location. If you’re ordering from a local printer, you may need to arrange for pickup instead.
- Review your order summary: Before finalizing your order, review your order summary to ensure that everything is correct, including the number of pages, the cover type, and any other options you’ve chosen. If you need to make any changes, now is the time to do it.
By following these tips, you can ensure that your photo book is printed and bound to your satisfaction. With a little attention to detail, you can create a stunning photo book that will be cherished for years to come.
Sharing Your Photo Book
Gifting your photo book
Gifting a photo book is a thoughtful and personal way to share your memories and experiences with loved ones. Here are some tips on how to make the process of gifting your photo book as special as the book itself:
- Choose the right recipient: The person you gift your photo book to should be someone who holds a special place in your heart and who will appreciate the effort and love you put into creating the book. Consider the relationship you have with the person and their interests and preferences when deciding who to gift your book to.
- Make it personal: Adding a personal touch to your gift can make it even more meaningful. Consider including a handwritten note or message inside the book, or even a small gift or token of your appreciation along with the book. This can help make the gift feel more special and thoughtful.
- Timing is key: Consider the timing of your gift when deciding when to give your photo book. Birthdays, anniversaries, and holidays are all great opportunities to share your book with loved ones, but you can also surprise them with the gift at any time throughout the year.
- Be prepared to share: Sharing your photo book with others can be a vulnerable experience, but it can also be a rewarding one. Be prepared to share your memories and experiences with others and be open to hearing their thoughts and feedback on your book.
- Make it easy to share: Consider making it easy for others to share your book with them. This could include creating an online link to your book or sending them a digital copy of the book. This can make it easier for others to access and share your book with others.
By following these tips, you can make the process of gifting your photo book as special and meaningful as the book itself. Sharing your memories and experiences with loved ones can be a powerful way to connect and create lasting bonds.
Sharing your photo book online
Once you have created your beautiful photo book, you may want to share it with others. In today’s digital age, sharing your photo book online is a convenient and accessible option. Here are some ways to share your photo book online:
Embedding Your Photo Book on Your Website or Blog
One way to share your photo book online is by embedding it on your website or blog. This is a great option if you have a personal website or blog and want to showcase your photo book to your audience. To embed your photo book, you will need to use an HTML code provided by the photo book printing company. The code will allow you to embed the photo book on your website or blog, giving your visitors the ability to flip through the pages of your book.
Sharing on Social Media
Another way to share your photo book online is by sharing it on social media platforms such as Facebook, Instagram, and Twitter. Most photo book printing companies provide options to share your photo book on social media directly from their website. This option allows you to share your photo book with your friends and family, as well as your social media followers.
Uploading to Online Photo Sharing Sites
If you want to share your photo book with a wider audience, you can upload your photo book to online photo sharing sites such as Flickr or SmugMug. These sites allow you to upload your photo book as a digital file, giving you the ability to share it with anyone who has access to the internet. You can also add a description and tags to your photo book, making it easier for people to find and view your book.
Digital Distribution
Finally, some photo book printing companies offer digital distribution options, allowing you to share your photo book with others in a digital format. This option is great if you want to share your photo book with people who do not have access to a physical copy. You can share your digital book via email, social media, or through a link on your website or blog.
Overall, sharing your photo book online is a convenient and accessible way to showcase your work to a wider audience. With the help of modern technology, you can easily share your photo book with anyone, anywhere in the world.
Creating a digital version of your photo book
Creating a digital version of your photo book is an excellent way to share your memories with friends and family who live far away or to ensure that your precious memories are backed up safely. Here are some simple steps to create a digital version of your photo book:
- Choose a Digital Platform: There are many digital platforms available that allow you to create a photo book, such as Shutterfly, Blurb, and Adobe Photoshop. Choose a platform that you are comfortable with and that offers the features you need.
- Import Your Photos: Once you have chosen a digital platform, import your photos into the platform. Most platforms allow you to upload photos from your computer, cloud storage, or social media accounts.
- Arrange Your Photos: Once your photos are imported, arrange them in the order you want them to appear in your photo book. Most platforms allow you to drag and drop photos into place, and some even offer automatic layout suggestions.
- Customize Your Layout: Most digital platforms offer various layout options, such as single-page or two-page spreads, and different font styles and colors. Choose a layout that best suits your photos and personal style.
- Add Captions and Text: Adding captions and text to your photos can add context and meaning to your memories. Most digital platforms allow you to add captions and text boxes to your photos.
- Preview and Share: Once you have finished creating your digital photo book, preview it to ensure that it looks the way you want it to. You can then share it with friends and family via email, social media, or by downloading a PDF version.
Creating a digital version of your photo book is a simple and convenient way to share your memories with others. With just a few simple steps, you can create a beautiful digital photo book that you can enjoy for years to come.
Tips and Tricks for Creating a Stunning Photo Book
Planning ahead
Creating a photo book that is both visually stunning and emotionally impactful requires careful planning and consideration. Here are some tips and tricks to help you get started:
Choose the Right Theme
The first step in creating a stunning photo book is to choose a theme that reflects the story you want to tell. This could be a specific event, a travel experience, or a collection of personal moments. The theme should be consistent throughout the book and should help guide your selection of photos.
Select Your Photos
Once you have chosen a theme, it’s time to select the photos that will appear in your book. Consider the story you want to tell and the emotions you want to evoke. Choose photos that are high quality and have a strong visual impact.
Organize Your Photos
Once you have selected your photos, it’s time to organize them into a cohesive narrative. Consider the order in which the photos will appear and how they will flow together to create a story. You may want to create a rough draft of your book to see how the photos will look together.
Choose a Layout
The layout of your photo book is important for both visual appeal and readability. Consider the size and shape of your book, the font and font size, and the amount of whitespace on each page. You may want to experiment with different layouts to find the one that works best for your book.
Consider the Binding
The binding of your photo book is an important consideration. Choose a binding that will hold up to frequent use and that will not damage the photos over time. Consider a spiral binding or a hardcover binding for a more durable option.
By planning ahead and considering these factors, you can create a stunning photo book that tells a story and captures memories in a beautiful way.
Using high-quality images
Creating a photo book is a great way to preserve your memories and showcase your best photos. One of the most important factors in creating a stunning photo book is using high-quality images. Here are some tips for selecting and preparing your images:
Selecting the right images
- Choose images that have good lighting and composition.
- Consider the theme or story you want to tell with your photo book and select images that fit that theme.
- Choose a variety of images, including portraits, landscapes, and action shots, to create a well-rounded story.
Preparing your images
- Use a high-resolution image editor to adjust the exposure, contrast, and color balance of your images.
- Crop and resize your images as needed to fit the layout of your photo book.
- Save your images in a high-quality format, such as JPEG or TIFF, to ensure they look their best in print.
By following these tips, you can ensure that your photo book will be filled with high-quality images that will make your memories come to life.
Choosing the right layout and design
Creating a photo book that truly captures the essence of your memories requires careful consideration of its layout and design. The right layout and design can make your photos come alive, while the wrong choices can detract from their impact. Here are some tips to help you choose the best layout and design for your photo book:
1. Determine the Theme of Your Photo Book
The first step in choosing the right layout and design for your photo book is to determine its theme. Are you creating a photo book to commemorate a special event, such as a wedding or a family vacation? Or is it a collection of your favorite photos that you want to display in a coffee table book? Knowing the theme of your photo book will help you choose the right layout and design that complements its purpose.
2. Choose the Right Page Size
The size of your photo book pages is another important consideration. Larger pages allow for larger photos and more text, while smaller pages are better suited for smaller photos and shorter captions. When choosing the page size, consider the number of photos you want to include, the amount of text you want to add, and the overall look and feel you want to achieve.
3. Select the Right Paper Type
The paper type you choose for your photo book can also affect its overall look and feel. Some photo books use glossy pages that enhance the colors and contrast of your photos, while others use matte pages that provide a more subtle and sophisticated look. Consider the type of photos you want to include and the overall aesthetic you want to achieve when selecting the paper type for your photo book.
4. Decide on the Layout Style
The layout style of your photo book can also have a significant impact on its overall look and feel. There are many different layout styles to choose from, including grid layouts, timeline layouts, and photo-heavy layouts. Consider the type of photos you want to include and the overall aesthetic you want to achieve when selecting the layout style for your photo book.
5. Customize Your Design
Finally, don’t be afraid to customize your design to fit your specific needs and preferences. Many photo book companies offer customization options that allow you to choose the font style and color, add custom text and graphics, and more. Take advantage of these options to create a photo book that truly reflects your personal style and taste.
Being creative with your text and captions
When it comes to creating a photo book, the text and captions you include can make a big difference in how your book looks and feels. Here are some tips for being creative with your text and captions:
- Use different font styles and sizes to add visual interest to your text. For example, you could use a larger font size for headings and a smaller font size for body text.
- Use bold or italic text to emphasize certain words or phrases.
- Experiment with different colors for your text. This can help to create a more dynamic and visually appealing layout.
- Consider using a mix of different fonts and text styles throughout your book. This can help to create a cohesive and professional-looking design.
- When it comes to captions, think about the tone and mood you want to convey. For example, you might use a more formal tone for a wedding photo book, while a family photo book might call for a more casual and playful tone.
- Use humor or clever wordplay to add personality to your captions. This can help to make your book more fun and engaging to read.
- Consider including quotes or lyrics in your captions. This can add depth and meaning to your photos and help to tell a more complete story.
- Finally, be sure to proofread your text carefully to ensure that there are no typos or grammatical errors. This will help to make your book look more polished and professional.
Experimenting with different binding options
When it comes to creating a photo book, one of the most important decisions you’ll need to make is what type of binding to use. There are many different options available, each with its own unique advantages and disadvantages. Here are some of the most popular binding options to consider:
- Hardcover Binding: This is the most traditional and durable option. It involves gluing the pages to the spine of the book, creating a sturdy and long-lasting binding. Hardcover books can be a bit more expensive than other options, but they are ideal for large, heavy books with many pages.
- Softcover Binding: This is a more flexible option that is ideal for smaller books or books that will be handled frequently. Softcover books are bound by folding the pages and gluing them to the cover, creating a more flexible binding that is easier to transport and handle.
- Spiral Binding: This option is ideal for books that will be used frequently and need to lay flat. Spiral binding involves attaching a wire or plastic coil to the spine of the book, allowing it to lay flat and stay open to any page. This is a great option for cookbooks, travel journals, or any book that needs to be used frequently.
- Wire-O Binding: This is a popular option for books that need to be bound on the short side. Wire-O binding involves punching holes in the pages and attaching a wire spine to the book, creating a strong and durable binding that is easy to transport.
- Saddle Stitching: This is a popular option for small books or magazines. It involves folding the pages in half and stapling them together along the spine, creating a simple and cost-effective binding that is easy to transport.
Experimenting with different binding options can help you create a photo book that is both beautiful and functional. Consider the size and thickness of your book, how it will be used, and the materials you will be using when choosing a binding option. With a little experimentation, you can create a photo book that is both stunning and durable.
Backing up your files
When it comes to creating a photo book, one of the most important steps is to make sure that you have a backup of all your files. This is because photo books are irreplaceable and once they are printed, you won’t be able to make any changes to them. Therefore, it’s crucial to have a backup of all your photos, so that you can easily make changes to your photo book without losing any of your precious memories.
Here are some tips for backing up your files:
- Use an external hard drive or cloud storage service to store your photos. This will ensure that your photos are safely stored offsite and won’t be damaged in case of a fire or other disaster.
- Keep multiple copies of your photos in different locations. This way, if something happens to one copy, you’ll still have others to fall back on.
- Use a photo management software to organize your photos and keep track of which ones you’ve backed up. This will make it easier to find the photos you need when it’s time to create your photo book.
- Make sure to regularly update your backups. This will ensure that you always have the most recent versions of your photos, and that you won’t lose any important memories.
By following these tips, you can ensure that your photos are safe and secure, and that you’ll be able to create a stunning photo book that you’ll treasure for years to come.
Protecting your photo book
Protecting your photo book is an essential step in ensuring that your memories are preserved for years to come. Here are some tips to help you protect your photo book:
- Use Archival-Quality Materials: To ensure that your photo book lasts for generations, it’s important to use archival-quality materials. This includes paper, ink, and binding materials that are designed to last.
- Store your book in a safe place: Once your photo book is complete, it’s important to store it in a safe place where it won’t be damaged. Avoid exposing your book to direct sunlight, high humidity, or extreme temperatures, as these can cause damage to the materials.
- Consider digitizing your photos: While physical photo books are a great way to preserve your memories, it’s also a good idea to digitize your photos. This will give you a digital backup of your photos, and you can easily share them with friends and family.
- Back up your book: In addition to digitizing your photos, it’s also a good idea to back up your photo book. This will ensure that you have a copy of your book in case the original is lost or damaged.
- Get it professionally bound: While it’s possible to create a photo book using software and a printer, it’s worth considering getting it professionally bound. A professional binding will ensure that your book is durable and can withstand the test of time.
By following these tips, you can ensure that your photo book is protected and will be a cherished memory for years to come.
Sharing your work on social media or with friends and family.
Once you have created your stunning photo book, you may be eager to share it with others. One of the easiest ways to do this is by sharing your work on social media or with friends and family. Here are some tips to help you do this effectively:
- Choose the right social media platform: Depending on the type of photos you have included in your photo book, certain social media platforms may be more appropriate than others. For example, if you have included landscape photos, Instagram may be a great platform to share them on. If you have included family photos, Facebook may be a better option.
- Use hashtags: Hashtags can help your posts reach a wider audience. When sharing your photo book on social media, consider using relevant hashtags that will help your post be discovered by others who are interested in photography or photo books.
- Add a caption: Including a caption with your photo book post can help provide context and tell a story. Consider adding a brief description of the photo book, as well as any personal anecdotes or memories that the photos evoke.
- Share with friends and family: One of the most enjoyable aspects of creating a photo book is being able to share it with loved ones. Consider sending a physical copy of the book to friends and family, or sharing it digitally through email or online platforms.
By following these tips, you can effectively share your stunning photo book with others and inspire them to create their own photo books.
FAQs
1. What is a photo book?
A photo book is a printed book that contains your cherished memories and photographs. It is a physical representation of your precious moments, which you can hold in your hands and share with others.
2. How do I create a photo book?
Creating a photo book is a simple and easy process. You can create a photo book by following these steps:
1. Choose a photo book service or website.
2. Select the type of book you want to create, such as a hardcover or softcover book.
3. Choose the number of pages you want in your book.
4. Upload your photos to the website or service.
5. Arrange your photos in the book using the online editor.
6. Customize your book with text, fonts, and other design elements.
7. Preview your book and make any necessary changes.
8. Order your book and wait for it to arrive.
3. What type of photos can I use in my photo book?
You can use any type of photos in your photo book, including digital photos, printed photos, and even Polaroids. The important thing is to choose photos that have sentimental value to you and that you want to preserve in a physical form.
4. How do I arrange my photos in the book?
You can arrange your photos in the book however you like. You can create a chronological timeline of your life, group photos by theme or event, or create a unique layout that tells a story. The online editor of the photo book service will provide you with tools to help you arrange your photos in a way that works best for you.
5. Can I add text to my photo book?
Yes, you can add text to your photo book. You can add captions to your photos, write a dedication page, or create a title page. The online editor of the photo book service will provide you with tools to help you add text to your book.
6. How long does it take to create a photo book?
The time it takes to create a photo book depends on several factors, such as the number of pages, the complexity of the design, and the shipping time. On average, it takes about 1-2 weeks to create a photo book, but this can vary depending on the service you use.
7. How much does it cost to create a photo book?
The cost of creating a photo book depends on several factors, such as the number of pages, the type of book you choose, and the shipping cost. On average, a 20-page photo book can cost anywhere from $20 to $100, but this can vary depending on the service you use.
8. What are the benefits of creating a photo book?
The benefits of creating a photo book are many. It allows you to preserve your memories in a physical form, share your story with others, and create a unique and personal gift for loved ones. It also provides a sense of accomplishment and satisfaction, as you get to hold a physical representation of your memories in your hands.