Are you ready to take your night photography skills to the next level? Then you’ve come to the right place! In this guide, we’ll dive into the world of focus modes and explore which one is best suited for capturing stunning nighttime shots. From the ever-popular manual focus to the automated features of multi-zone and single-shot AF, we’ll uncover the secrets to achieving sharp, well-lit images even in the darkest of conditions. So, whether you’re a seasoned pro or just starting out, get ready to master the art of night photography with this ultimate guide to focus modes.
Understanding Focus Modes for Night Photography
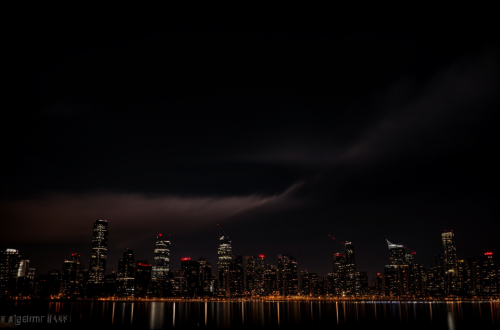
The Importance of Proper Focus in Night Photography
Proper focus is crucial in night photography as it directly affects the image quality and overall aesthetic of the photograph. In low light conditions, the camera’s autofocus system may struggle to find a clear point of focus, resulting in a blurry image. This is where understanding the different focus modes available on most DSLR and mirrorless cameras can greatly benefit a night photographer.
One of the primary benefits of proper focus in night photography is reducing camera shake. Long exposure times are often required in low light conditions, and even the slightest movement of the camera can result in a blurry image. By using a proper focus mode, such as manual focus or a single-point autofocus, the camera can be locked onto a stable point, reducing the chances of camera shake and resulting in a sharper image.
Another important aspect of proper focus in night photography is maximizing image quality. A properly focused image will have more detail and clarity, especially in the low light conditions where details can be easily lost. By using a proper focus mode, the camera can capture the details of the scene accurately, resulting in a more dynamic and engaging image.
Finally, proper focus is essential in ensuring proper exposure in night photography. Proper exposure is critical in capturing the full range of tones and details in a low light scene. By using a proper focus mode, the camera can accurately measure the light levels in the scene and adjust the exposure accordingly, resulting in a properly exposed image with richer details and colors.
In conclusion, proper focus is essential in night photography for reducing camera shake, maximizing image quality, and ensuring proper exposure. Understanding the different focus modes available and selecting the right one for the scene can greatly benefit a night photographer in capturing stunning and professional-looking images.
Choosing the Right Focus Mode for Your Needs
When it comes to night photography, choosing the right focus mode is crucial to achieving the desired results. Here are the three main focus modes available in most cameras and how they can be used to capture stunning nighttime images.
Single-Shot AF
Single-shot AF, also known as One-Shot AF, is a focus mode that is used when the subject is stationary. This mode is suitable for taking pictures of still objects such as buildings, statues, or landscapes at night. It works by locking the focus on the subject when the shutter button is half-pressed, and then releasing the shutter to capture the image.
To use single-shot AF for night photography, set the focus mode on your camera to single-shot AF and manually set the focus point on the subject. This will ensure that the camera focuses on the correct point and captures a sharp image.
Continuous AF
Continuous AF, also known as Servo AF, is a focus mode that is used when the subject is moving. This mode is suitable for taking pictures of moving objects such as cars, people, or animals at night. It works by continuously adjusting the focus as the subject moves, ensuring that the subject remains in focus at all times.
To use continuous AF for night photography, set the focus mode on your camera to continuous AF and select a focus point that is close to the subject. This will ensure that the camera focuses on the subject as it moves, capturing a sharp image.
Manual Focus
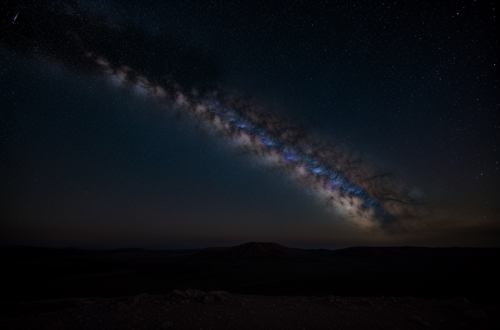
Manual focus is a focus mode that is used when the camera’s autofocus system fails to focus accurately. This mode is suitable for taking pictures of objects that are not easily distinguished by the camera’s autofocus system, such as stars or other celestial objects at night. It works by manually adjusting the focus until the desired point is in focus.
To use manual focus for night photography, set the focus mode on your camera to manual focus and manually adjust the focus until the desired point is in focus. This will ensure that the camera focuses on the correct point, capturing a sharp image.
In conclusion, choosing the right focus mode for your needs is crucial to achieving the desired results in night photography. Whether it’s single-shot AF, continuous AF, or manual focus, each mode has its own advantages and disadvantages. By understanding how each mode works and when to use it, you can capture stunning nighttime images that will leave a lasting impression.
Tips for Using Focus Modes in Night Photography
Single-Shot AF
Understanding Single-Shot AF
Single-shot AF, also known as One-Shot AF, is a focus mode used in photography where the camera locks the focus onto a specific point when the shutter button is half-pressed. This mode is suitable for stationary subjects or when the subject is moving slowly. It is important to note that the camera does not continuously focus on the subject but locks onto it once the shutter button is half-pressed.
Tips for Using Single-Shot AF in Night Photography
Single-shot AF is an effective focus mode to use in night photography when the subject is stationary or moving slowly. Here are some tips to help you make the most of this focus mode:
Choosing the Right Point of Focus
Choosing the right point of focus is crucial in night photography. The point of focus should be on the subject you want to capture. If the subject is not in the center of the frame, you may need to manually adjust the focus point. To do this, you can use the AF point selection button on the camera’s display.
Adjusting the AF Point for Different Subjects
Different subjects require different focus points. For example, if you are photographing a building at night, you may want to focus on the entrance or the windows. If you are photographing a person, you may want to focus on their eyes. Experiment with different focus points to see what works best for your subject.
Experimenting with Different Focus Areas
Single-shot AF allows you to experiment with different focus areas. You can focus on a specific part of the subject or the background. Experimenting with different focus areas can add depth and interest to your night photographs. However, it is important to ensure that the focus point is on the subject you want to capture.
Continuous AF
Continuous Autofocus (AF) is a popular focus mode that tracks moving subjects throughout the frame. In night photography, this mode can be especially useful for capturing sharp images of moving objects such as cars, people, or animals.
Understanding Continuous AF
Continuous AF continuously adjusts the focus of the camera based on the subject’s movement. The camera uses a sensor to detect the movement of the subject and adjusts the focus accordingly. This means that the camera will continuously focus on the subject even if they move across the frame.
Tips for Using Continuous AF in Night Photography
Keeping Subjects in Focus
When using Continuous AF in night photography, it’s important to keep the subject in the center of the frame. This will help the camera to track the subject more accurately and keep them in focus throughout the shot.
Tracking Moving Subjects
Continuous AF is ideal for tracking moving subjects in low light conditions. This mode will help you to capture sharp images of moving objects, even in challenging lighting conditions.
Adjusting the AF Point for Different Subjects
In some cases, you may need to adjust the AF point to keep the subject in focus. For example, if you’re photographing a moving car, you may need to adjust the AF point to keep the car in focus as it moves across the frame. This can be done by using the AF joystick or buttons on the camera to move the AF point to the desired location.
Manual Focus
Manual focus is a great option for night photography as it allows for more precise control over the focus of your images. To use manual focus effectively, it’s important to understand how it works and how to adjust it for different subjects.
Understanding Manual Focus
Manual focus means that you, the photographer, have complete control over the focus of your images. This is achieved by physically adjusting the focus ring on your lens, which determines the point of focus in your image. In contrast, automatic focus modes rely on the camera’s algorithms to determine the point of focus.
When using manual focus, it’s important to pre-focus your lens on the subject before taking the shot. This can be done by manually adjusting the focus ring until the subject is in focus in the viewfinder or on the rear screen of the camera.
Tips for Using Manual Focus in Night Photography
When using manual focus in night photography, there are a few key things to keep in mind:
- Choosing the Right Point of Focus: When shooting at night, it’s important to choose the right point of focus for your image. This may be a specific object or building, or it may be a more abstract concept like the night sky or the reflection of light on a surface.
- Adjusting the Focus Ring for Different Subjects: Different subjects require different focus points. For example, when shooting a building, you may want to focus on the front of the building, while when shooting a starry sky, you may want to focus on a specific star or group of stars.
- Experimenting with Different Focus Points: One of the benefits of manual focus is the ability to experiment with different focus points. Try focusing on different parts of your subject to see how it affects the overall composition of your image.
Overall, manual focus is a powerful tool for night photography that allows for more precise control over the focus of your images. By understanding how it works and following these tips, you can take your night photography to the next level.
Troubleshooting Common Focus Issues in Night Photography
Backfocus and Frontfocus
Backfocus and frontfocus are two common focus issues that can affect the quality of your night photography. Backfocus occurs when the camera focuses too far into the distance, resulting in a blurred foreground. Frontfocus, on the other hand, occurs when the camera focuses too closely on the subject, resulting in a blurred background.
To adjust for backfocus, try adjusting the AF point to a different area of the scene, or using manual focus to fine-tune the focus. To adjust for frontfocus, try using a smaller aperture or moving the subject further away from the camera.
Here are some tips for adjusting focus for proper exposure:
- Adjusting the AF Point for Different Subjects: When shooting a scene with multiple subjects at different distances, it can be challenging to get all of them in focus. Try adjusting the AF point to a different area of the scene to ensure that the subject you want in focus is properly exposed.
- Using Manual Focus for Greater Control: Manual focus allows you to take greater control over the focus of your shots. Use it to fine-tune the focus and ensure that your subject is sharp and properly exposed.
- Experimenting with Different Focus Points: Experiment with different focus points to see what works best for your shot. Try focusing on the foreground, background, or midground to create a different effect.
Moving Subjects
Understanding Moving Subjects
Night photography presents a unique set of challenges, especially when it comes to capturing moving subjects. Whether it’s a person walking, a car driving by, or even the stars moving across the sky, it can be difficult to keep these subjects in focus. However, with the right techniques and equipment, it is possible to capture sharp and clear images of moving subjects at night.
Tips for Keeping Moving Subjects in Focus
- Using Continuous AF for Tracking Movement: One of the most effective ways to keep moving subjects in focus is to use continuous autofocus (AF). This mode will track the subject as it moves, continuously adjusting the focus to keep it sharp. To use continuous AF, set your camera to “AF-C” mode and select a focus point that follows the subject.
- Adjusting the AF Point for Different Subjects: Depending on the subject you’re photographing, you may need to adjust the focus point to ensure the subject stays in focus. For example, if you’re photographing a person walking, you may need to adjust the focus point to follow the subject as they move. Alternatively, if you’re photographing a car driving by, you may need to adjust the focus point to capture the car at the correct moment.
- Using a Fast Shutter Speed to Freeze Motion: Another way to keep moving subjects in focus is to use a fast shutter speed. This will freeze the subject’s motion, making it easier to capture a sharp image. A shutter speed of at least 1/500th of a second is recommended for photographing moving subjects at night.
By using these techniques and adjusting your settings as needed, you can capture sharp and clear images of moving subjects at night. With practice and experimentation, you’ll be able to master the art of night photography and create stunning images that capture the beauty and magic of the night.
Accessories for Improving Focus in Night Photography
Tripods and Monopods
Understanding Tripods and Monopods
In night photography, capturing sharp and detailed images can be challenging due to low light conditions. Tripods and monopods are essential accessories that can help photographers achieve better focus and stability while shooting in the dark.
Tripods are three-legged supports that provide stability and help reduce camera shake, ensuring that the camera remains in the same position throughout the exposure. Monopods, on the other hand, are single-legged supports that offer mobility and can be used to stabilize the camera during long exposures.
Tips for Using Tripods and Monopods for Improved Focus
- Using a Tripod for Long Exposures: Tripods are ideal for long exposures as they keep the camera steady and help prevent camera shake. By using a tripod, photographers can achieve better focus and ensure that their images are sharp and detailed.
- Using a Monopod for Stability on the Move: Monopods are great for situations where mobility is required. They can be used to stabilize the camera during long exposures, especially when moving from one location to another. Monopods are also useful when shooting from a car or other moving vehicle.
- Choosing the Right Tripod or Monopod for Your Needs: When choosing a tripod or monopod, it is essential to consider the weight of the camera equipment, the type of terrain, and the shooting conditions. For example, a lightweight tripod or monopod is ideal for traveling, while a sturdy tripod is better suited for heavy equipment and rough terrain.
In conclusion, tripods and monopods are essential accessories for improving focus in night photography. By using these stabilizing devices, photographers can achieve better focus and ensure that their images are sharp and detailed, even in low light conditions.
Remote Shutter Releases
When it comes to night photography, one of the biggest challenges is achieving sharp focus in low light conditions. One way to overcome this challenge is by using a remote shutter release.
A remote shutter release is a device that allows you to trigger the camera’s shutter remotely, without touching the camera itself. This can help to reduce camera shake and achieve sharper images in low light conditions.
Understanding Remote Shutter Releases
There are two types of remote shutter releases: wired and wireless. Wired remote shutter releases are connected to the camera via a cable, while wireless remote shutter releases use radio frequency or infrared signals to communicate with the camera.
Both types of remote shutter releases have their advantages and disadvantages. Wired remote shutter releases are generally more reliable and offer faster transmission speeds, but they can be limited in range and may require additional accessories such as cables or adaptors. Wireless remote shutter releases offer greater flexibility and range, but may be subject to interference from other devices or sources of radio frequency or infrared signals.
Tips for Using Remote Shutter Releases for Improved Focus
- Avoiding Camera Shake with a Remote Shutter Release:
When using a remote shutter release, it’s important to avoid camera shake by using a tripod or other stabilizing device. This will help to ensure that the camera remains steady and that the resulting images are sharp and well-focused. - Using a Wired or Wireless Remote Shutter Release:
When choosing a remote shutter release, consider the specific needs of your night photography setup. Wired remote shutter releases may be better suited for studio or indoor photography, while wireless remote shutter releases are ideal for outdoor or on-the-go shooting. - Choosing the Right Remote Shutter Release for Your Needs:
When selecting a remote shutter release, consider factors such as range, transmission speed, and compatibility with your camera system. It’s also important to consider the type of shooting you’ll be doing and the accessories you’ll need to complete your setup.
Focus Stacking
Focus stacking is a technique used in macro photography that involves taking multiple images of the same subject at different focus points and then merging them to create a single image with a larger depth of field. This technique can also be used in night photography to capture a wider range of details in low light situations.
Understanding Focus Stacking
Focus stacking works by taking multiple images of the same subject at different focus points. The camera’s autofocus system is used to focus on different parts of the subject in each image. These images are then combined using software to create a single image with a larger depth of field.
The key to successful focus stacking is to ensure that the different focus points are captured in the same position in each image. This is typically achieved by using a tripod to keep the camera in the same position between shots.
Tips for Using Focus Stacking in Night Photography
- Take multiple shots with different focus points: Focus stacking requires taking multiple images of the same subject at different focus points. The number of images required will depend on the depth of field needed and the distance between the focus points.
- Adjust the focus ring for different subjects: Focus stacking involves adjusting the focus ring on the lens to change the focus point in each image. It is important to carefully adjust the focus ring for each shot to ensure that the focus point is in the correct position.
- Use software to merge images for maximum depth of field: Once the images have been captured, they can be merged using software to create a single image with a larger depth of field. There are a variety of software options available for focus stacking, including Adobe Photoshop and Helicon Focus.
By using focus stacking in night photography, photographers can capture a wider range of details in low light situations. This technique requires careful planning and execution, but the results can be stunning.
FAQs
1. What is focus mode in photography?
Focus mode, also known as autofocus mode, is a setting in a camera that determines how the camera focuses on a subject. There are several different focus modes available, each with its own advantages and disadvantages.
2. What is the best focus mode for night photography?
The best focus mode for night photography is typically either manual focus or single-shot autofocus. Manual focus allows the photographer to precisely control the focus of the camera, which can be especially useful when shooting in low light conditions. Single-shot autofocus is a type of autofocus mode that only focuses the camera once, based on the initial press of the shutter button. This can be useful for night photography because it allows the photographer to lock the focus on a specific point or subject, without the camera trying to refocus continuously.
3. What is the difference between manual focus and single-shot autofocus?
Manual focus allows the photographer to manually adjust the focus of the camera using a control on the camera body or lens. This gives the photographer complete control over the focus, but it can also be more time-consuming and require more skill to use effectively. Single-shot autofocus, on the other hand, is an autofocus mode that focuses the camera once, based on the initial press of the shutter button. This can be useful for night photography because it allows the photographer to lock the focus on a specific point or subject, without the camera trying to refocus continuously.
4. Can I use continuous autofocus for night photography?
Continuous autofocus is a type of autofocus mode that continuously focuses the camera on a moving subject. While it can be useful for certain types of night photography, such as shooting moving cars or people, it can also be disruptive and cause the camera to lose focus on a stationary subject. Therefore, it is generally recommended to use manual focus or single-shot autofocus for night photography, unless you are specifically trying to capture a moving subject.
5. What is the best camera setting for night photography?
The best camera setting for night photography will depend on the specific conditions and the photographer’s desired results. Some common camera settings used for night photography include using a tripod, shooting in RAW format, using a low ISO, and using a longer exposure time. It is also important to consider the use of a remote shutter release or the camera’s self-timer to avoid camera shake. Additionally, using a wide aperture lens can help to capture more light and create a shallow depth of field.