Lighting techniques are an essential aspect of photography that helps photographers to control and manipulate the light in their images. Without proper lighting, a photograph can lack depth, contrast, and overall visual appeal. In this article, we will explore the importance of lighting techniques in photography and how they can help photographers to create stunning images that tell a story. Whether you’re a beginner or a professional photographer, understanding the basics of lighting techniques is crucial to taking your photography skills to the next level. So, let’s dive in and discover the magic of lighting techniques in photography!
Understanding Light and Its Effects on Photography
The Role of Light in Capturing Different Moods and Atmospheres
In photography, light plays a crucial role in setting the mood and atmosphere of an image. It can create a sense of warmth, coldness, mystery, or drama, depending on how it is used. Understanding the role of light in capturing different moods and atmospheres is essential for photographers to create images that evoke a specific emotional response from the viewer.
There are several ways that light can be used to capture different moods and atmospheres in photography. One way is by using directional light to create a sense of depth and dimension in an image. By using shadows and highlights, photographers can create a sense of contrast and texture that adds interest and depth to an image. This can be especially effective when photographing architectural structures or landscapes.
Another way that light can be used to capture different moods and atmospheres is by using color. Different colors of light can evoke different emotions and feelings in the viewer. For example, warm colors like orange and red can create a sense of warmth and comfort, while cooler colors like blue and green can create a sense of calmness and tranquility. By using color to create a specific mood or atmosphere, photographers can draw the viewer into the image and create a more immersive experience.
Light can also be used to create a sense of movement and energy in an image. By using fast shutter speeds and panning, photographers can capture the movement of people or objects in an image, creating a sense of dynamism and energy. This can be especially effective when photographing sports or action events.
Overall, the role of light in capturing different moods and atmospheres in photography cannot be overstated. By understanding how light can be used to create contrast, texture, color, and movement, photographers can create images that evoke a specific emotional response from the viewer and transport them to a different time and place.
How Lighting Techniques Affect the Quality of a Photograph
- Lighting techniques play a crucial role in determining the quality of a photograph.
- The right lighting can bring out the best in a subject, highlighting its features and creating a sense of depth and dimension.
- On the other hand, poor lighting can make a subject look flat and lifeless, with harsh shadows and unflattering contrast.
- Lighting can also be used to create a specific mood or atmosphere in a photograph, such as highlighting the softness of a sunset or the drama of a stormy sky.
- In addition, lighting can be used to draw attention to specific parts of a scene, such as highlighting a subject’s eyes or accentuating the curves of a landscape.
- Different types of lighting techniques include natural light, artificial light, and mixed lighting, each with its own advantages and disadvantages.
- Natural light is often considered the most desirable form of lighting, as it can create a soft, warm, and natural look. However, it can also be unpredictable and difficult to control, especially in changing weather conditions.
- Artificial lighting, such as studio lights or flash, can be more predictable and controllable, but can also create a more artificial and harsh look.
- Mixed lighting, which combines natural and artificial lighting, can provide the best of both worlds, creating a more dynamic and interesting look.
- Ultimately, the choice of lighting technique will depend on the photographer’s desired effect and the specific circumstances of the shoot.
- By understanding the effects of lighting techniques, photographers can use light to their advantage, creating images that are both technically sound and aesthetically pleasing.
Different Types of Lighting Techniques
Natural Lighting Techniques
Natural lighting techniques involve utilizing the light that is available in the environment, rather than artificial light sources. This type of lighting can be particularly effective in outdoor photography, but can also be used in indoor settings.
Benefits of Natural Lighting Techniques
One of the main benefits of natural lighting techniques is that it can create a natural and authentic look in photos. Natural light can also be very versatile, as it can create a range of different moods and effects depending on the time of day and the weather conditions.
Types of Natural Lighting Techniques
There are several different types of natural lighting techniques that photographers can use. These include:
- Backlighting: This involves positioning the subject in front of a light source that is behind them. This can create a dramatic, silhouetted effect.
- Side lighting: This involves positioning the subject in front of a light source that is to the side. This can create a soft, diffused light that is ideal for portraits.
- Front lighting: This involves positioning the subject in front of a light source that is in front of them. This can create a bright, even light that is ideal for outdoor photos.
- Overcast lighting: This involves taking photos on a day with overcast weather. This can create a soft, diffused light that is ideal for landscape and portrait photography.
Tips for Using Natural Lighting Techniques
To get the most out of natural lighting techniques, it is important to understand the different types of light and how they affect photos. It is also important to pay attention to the time of day and the weather conditions, as these can have a big impact on the quality of the light.
In addition, it is important to experiment with different angles and positions to find the best light for your shot. This may involve moving the subject or changing the location of the light source.
Finally, it is important to use a tripod to help stabilize the camera and avoid camera shake, especially when shooting in low light conditions. This can help ensure that your photos are sharp and well-exposed.
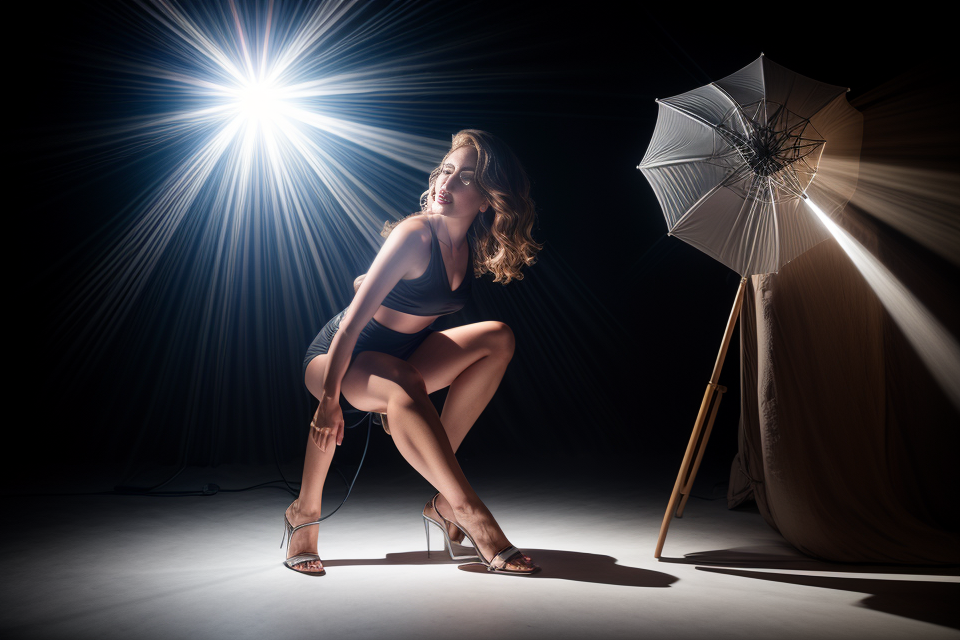
Artificial Lighting Techniques
In photography, artificial lighting techniques refer to the use of artificial light sources, such as flash, strobes, and LED lights, to create specific lighting effects in a photograph. These lighting techniques can be used to control the mood, atmosphere, and overall look of an image, and are essential for photographers who want to achieve a certain level of control over their lighting.
One of the most common artificial lighting techniques is the use of flash. Flash is a small, portable light source that is built into many cameras, and can also be purchased as an external accessory. Flash is often used to add light to a scene when there is not enough natural light available, or to create a specific lighting effect, such as highlighting a particular part of the subject.
Another popular artificial lighting technique is the use of strobes. Strobes are external flash units that are used to create a specific lighting effect, such as a high-speed sync or multiple flashes. Strobes are often used in studio photography, as they allow the photographer to control the light output and duration of the flash, which can create a variety of lighting effects.
LED lights are another type of artificial lighting technique that is becoming increasingly popular in photography. LED lights are energy-efficient and can be used to create a variety of lighting effects, from soft and diffused to harsh and direct. LED lights are often used in product photography, as they can be used to highlight specific features of the product and create a clean, professional look.
In addition to these techniques, photographers can also use a variety of light modifiers, such as softboxes, umbrellas, and snoots, to shape and control the light output from their artificial light sources. These light modifiers can be used to create specific lighting effects, such as a soft, diffused light or a harsh, directional light.
Overall, artificial lighting techniques are an essential part of photography, as they allow the photographer to control the lighting in a scene and create specific lighting effects. Whether you are a beginner or an experienced photographer, understanding the basics of artificial lighting techniques is crucial for achieving the desired look in your photographs.
Combining Natural and Artificial Lighting Techniques
In photography, lighting is one of the most important elements that can make or break an image. While natural light is often considered the best light source for photography, there are times when artificial lighting techniques are necessary to achieve the desired effect. Combining natural and artificial lighting techniques can help photographers create images that are both natural and dramatic.
One of the advantages of combining natural and artificial lighting techniques is the ability to control the mood and atmosphere of an image. For example, using a softbox or umbrella to diffuse the light from a flash unit can create a soft, natural look that is ideal for portraits or still-life images. On the other hand, using a harsh, directional light source such as a strobe can create a more dramatic effect that is suitable for action or editorial photography.
Another advantage of combining natural and artificial lighting techniques is the ability to create a sense of depth and dimension in an image. By using a combination of hard and soft light sources, photographers can create shadows and highlights that add depth and texture to an image. This can be especially useful when photographing architectural subjects or landscapes.
When combining natural and artificial lighting techniques, it is important to consider the time of day and the location of the shoot. For example, photographing outdoors during the golden hour, which is the period just after sunrise or before sunset, can create a soft, warm light that is ideal for portraits or still-life images. On the other hand, photographing indoors during the day can require the use of artificial lighting techniques to create the desired effect.
Overall, combining natural and artificial lighting techniques can help photographers create images that are both natural and dramatic. By understanding the advantages and disadvantages of each lighting technique, photographers can choose the best approach for each shoot and create images that are both technically sound and aesthetically pleasing.
Mastering Lighting Techniques for Different Photography Genres
Portrait Photography
Proper lighting is essential for capturing the essence of a subject’s personality and creating a compelling portrait. Here are some tips for mastering lighting techniques in portrait photography:
Understanding Lighting Ratios
In portrait photography, lighting ratios play a crucial role in defining the mood and tone of the image. The basic rule of thirds can be used to create a balanced composition, with the subject positioned at one-third of the frame and the light source at the other two-thirds.
Using Natural Light
Natural light is often the preferred light source for portrait photography as it can create a soft, flattering light that highlights the subject’s features. By positioning the subject near a window or using a reflector, the light can be bounced around the room to create a more dynamic and interesting image.
Experimenting with Shadows
Shadows can add depth and dimension to a portrait, and by manipulating them, photographers can create a range of moods and tones. For example, by positioning the subject so that only one side of their face is lit, a moody and dramatic effect can be achieved.
Artificial Lighting
While natural light is often preferred, artificial lighting can be used to create specific effects and enhance the mood of the image. Softboxes, umbrellas, and LED lights are all popular lighting tools that can be used to create a range of lighting effects.
Experimenting with Color Temperature
The color temperature of the light source can also affect the mood and tone of the image. Warm lighting can create a cozy and intimate feel, while cooler lighting can create a more dramatic and moody effect. By experimenting with different color temperatures, photographers can find the perfect lighting to suit their subject and desired mood.
In summary, mastering lighting techniques in portrait photography requires an understanding of lighting ratios, the use of natural and artificial lighting, and experimentation with shadows and color temperature. By following these tips, photographers can create compelling portraits that capture the essence of their subject’s personality.
Landscape Photography
Landscape photography is an art form that captures the beauty of nature, often focusing on wide vistas, natural vignettes, and unique geological formations. The success of landscape photography depends heavily on the quality of light and the photographer’s ability to harness it.
- Golden Hour:
- The golden hour, which occurs during the first hour after sunrise and the last hour before sunset, offers the most flattering light for landscape photography.
- The light is soft, warm, and diffused, producing minimal shadows and highlights that enhance the depth and dimensionality of the scene.
- Photographers should plan their shoots during the golden hour to capture the best light possible.
- Blue Hour:
- The blue hour, which occurs shortly after sunset, offers a different, equally enchanting light for landscape photography.
- The light is cooler and more saturated, producing a dramatic effect that emphasizes the silhouettes of objects and creates a moody atmosphere.
- Photographers should consider shooting during the blue hour to capture a unique and striking landscape.
- Overcast Days:
- Overcast days can provide consistent, diffused light that works well for landscape photography.
- The clouds act as a giant softbox, diffusing the light and reducing harsh shadows and contrast.
- Photographers should take advantage of overcast days to capture landscapes with softer, more even lighting.
- Backlit Scenes:
- Backlit scenes, where the sun is behind the subject, can create a dynamic and engaging composition.
- The sun’s rays can create a halo effect around the subject, drawing the viewer’s attention to the focal point.
- Photographers should consider shooting backlit scenes to add depth and interest to their landscape photographs.
- Utilizing Reflections:
- Reflections on water, snow, or other surfaces can add a unique and visually striking element to landscape photographs.
- The reflection can double the visual impact of the scene, providing an additional layer of interest.
- Photographers should seek out scenes with reflective surfaces to create stunning and unique landscape images.
- Shooting at Different Times of Day:
- Landscape photographers should experiment with shooting at different times of day to capture unique lighting conditions.
- The same scene can appear vastly different under different lighting conditions, and the photographer’s ability to adapt to these changes can significantly impact the final image.
- Photographers should be prepared to shoot at various times of day to take advantage of the best light for their chosen scene.
Still Life Photography
When it comes to still life photography, lighting is a critical element that can make or break an image. Here are some tips to help you master lighting techniques for still life photography:
- Understand the lighting requirements for your subject: Still life photography often involves photographing objects that do not move, such as food, jewelry, or products. It is important to understand the lighting requirements for each subject to create an image that showcases it in the best possible way.
- Use directional lighting: Directional lighting is the most commonly used lighting technique in still life photography. This involves positioning the light source directly over the subject, which creates shadows and highlights that define the form and texture of the object. This technique can be used to create a sense of depth and dimension in the image.
- Consider the lighting ratio: The lighting ratio refers to the relative amount of light from the key light and the fill light. A typical still life setup involves a key light that provides the main light source and a fill light that adds additional light to the scene. The lighting ratio can be adjusted to create different moods and effects in the image.
- Use reflectors and diffusers: Reflectors and diffusers can be used to modify the light and create a more even lighting pattern. Reflectors can be used to bounce light back onto the subject, while diffusers can be used to soften the light and reduce harsh shadows.
- Experiment with different lighting setups: Still life photography is all about experimentation. Try different lighting setups and see what works best for your subject. Don’t be afraid to try new techniques and see how they affect the final image.
By mastering lighting techniques for still life photography, you can create images that are visually stunning and full of depth and dimension. So, experiment with different lighting setups and techniques to create your own unique style of still life photography.
Documentary Photography
When it comes to documentary photography, lighting techniques play a crucial role in creating a narrative and capturing the essence of a story. In this genre, photographers often have to work with available light, as using artificial lighting can alter the authenticity of the scene. Here are some key lighting techniques that documentary photographers should master:
- Natural Light: Documentary photographers often have to work with natural light, as it can create a sense of realism and authenticity in the scene. To master natural light, photographers should learn how to read light and understand how to use it to their advantage. This includes understanding the quality of light at different times of day, the direction of the light, and how to use shadows to create depth and contrast in the scene.
- Ambient Light: Ambient light is the general illumination in a room or space, and it can be used to create a sense of atmosphere in a documentary photograph. To master ambient light, photographers should learn how to use it to their advantage by adjusting the shutter speed and ISO to capture the scene in the right light.
- Remote Flash: Remote flash is a technique where a photographer uses an external flash unit that is triggered remotely by the camera. This technique can be used to add light to a scene when there is not enough ambient light, or to create a specific effect. To master remote flash, photographers should learn how to use a flashgun and how to adjust the power and angle of the flash to create the desired effect.
- LED Light Panels: LED light panels are a versatile lighting tool that can be used to add light to a scene when there is not enough ambient light, or to create a specific effect. To master LED light panels, photographers should learn how to use them to create the desired effect, including adjusting the color temperature and intensity of the light.
In conclusion, documentary photography requires a different approach to lighting than other genres. Photographers need to master the use of natural light, ambient light, remote flash, and LED light panels to create a sense of realism and authenticity in the scene. By understanding how to use these techniques, photographers can capture the essence of a story and create powerful documentary photographs.
Tips for Using Lighting Techniques to Enhance Your Photography Skills
Understanding the Exposure Triangle
When it comes to photography, understanding the exposure triangle is essential for achieving the desired results. The exposure triangle consists of three key elements: aperture, shutter speed, and ISO. Each of these elements plays a crucial role in determining the exposure of an image.
- Aperture: Aperture refers to the size of the camera’s aperture, which determines the amount of light that enters the camera. Aperture is measured in f-stops, and a larger aperture (a smaller f-stop number) allows more light into the camera, while a smaller aperture (a larger f-stop number) allows less light in. Aperture also has an effect on the depth of field in an image, with a larger aperture resulting in a shallower depth of field and a smaller aperture resulting in a deeper depth of field.
- Shutter speed: Shutter speed refers to the length of time that the camera’s shutter is open, and it determines how much light enters the camera during that time. A slower shutter speed allows more light into the camera, while a faster shutter speed allows less light in. Shutter speed also affects the motion in an image, with a slower shutter speed resulting in a more blurred image and a faster shutter speed resulting in a sharper image.
- ISO: ISO refers to the sensitivity of the camera’s sensor to light, and it determines how much light is needed to produce a correct exposure. A higher ISO setting allows the camera to capture more light in low light conditions, but it also increases the noise in the image. A lower ISO setting reduces noise but requires more light to produce a correct exposure.
By understanding the exposure triangle, photographers can make informed decisions about how to adjust their camera settings to achieve the desired exposure and creative effects.
Utilizing Shadows and Highlights
Utilizing shadows and highlights is an essential aspect of lighting techniques in photography. It can greatly impact the mood and overall aesthetic of your photographs. Here are some tips for using shadows and highlights to enhance your photography skills:
- Understanding the relationship between light and shadow: To effectively utilize shadows and highlights, it’s important to understand how they interact with each other. Shadows can add depth and dimension to a photograph, while highlights can add contrast and draw attention to specific areas.
- Experimenting with different light sources: Different light sources can create different types of shadows and highlights. For example, a hard light source like the sun will create sharp shadows, while a soft light source like a diffused flash will create softer shadows. Experimenting with different light sources can help you achieve the desired effect in your photographs.
- Utilizing shadows to create mood: Shadows can be used to create a certain mood or atmosphere in a photograph. For example, a photograph with dark shadows can create a sense of mystery or danger, while a photograph with bright highlights can create a sense of joy or optimism.
- Highlighting key elements: Highlights can be used to draw attention to specific elements in a photograph. For example, you can use highlights to draw attention to a subject’s eyes or to emphasize the texture of a particular object.
- Balancing shadows and highlights: It’s important to balance shadows and highlights in a photograph to avoid a harsh or unbalanced look. You can do this by using fill flash or by positioning your subject in relation to the light source.
Overall, utilizing shadows and highlights is a powerful tool for enhancing your photography skills. By understanding the relationship between light and shadow and experimenting with different techniques, you can create photographs that are both technically sound and aesthetically pleasing.
Experimenting with Light Intensity and Direction
Light intensity and direction are crucial factors that can significantly impact the final output of your photographs. Experimenting with these elements can help you create a more dynamic and visually appealing image. Here are some tips for experimenting with light intensity and direction:
- Shadows and Contrast
The intensity of light can affect the level of contrast in your photographs. By experimenting with different light intensities, you can create a range of contrast levels, from high contrast to low contrast. High contrast images have sharp shadows and highlights, while low contrast images have softer shadows and highlights. Experimenting with contrast can help you create a more dynamic and visually interesting image.
- Light Direction
The direction of light can also affect the mood and feel of your photographs. For example, side lighting can create a dramatic effect, while backlighting can create a more ethereal and dreamy feel. Experimenting with different light directions can help you create a more unique and visually appealing image.
- Soft Light
Soft light is a type of light that is diffused and gentle, creating a more natural and flattering look. Soft light can be achieved by using softboxes, umbrellas, or other light modifiers. Experimenting with soft light can help you create a more natural and flattering look for your subjects.
- Hard Light
Hard light is a type of light that is direct and harsh, creating strong shadows and contrast. Hard light can be achieved by using a single light source, such as a flash or a direct sunlight. Experimenting with hard light can help you create a more dramatic and striking image.
- Sidelighting
Sidelighting is a technique that involves positioning the light source to one side of the subject, creating a subtle shadow on one side of the face. This technique can be used to create a more natural and flattering look for portraits.
- Backlighting
Backlighting is a technique that involves positioning the light source behind the subject, creating a silhouette or a halo effect. This technique can be used to create a more dramatic and eye-catching image.
- Multiple Light Sources
Using multiple light sources can help you create a more complex and dynamic image. Experimenting with different combinations of light sources can help you create a more unique and visually appealing image.
By experimenting with light intensity and direction, you can create a more dynamic and visually appealing image. Experimenting with these elements can help you develop your photography skills and create a more unique and creative style.
Using Lighting to Create a Unique Style
One of the key ways in which lighting can be used to enhance photography skills is by creating a unique style. By using lighting techniques to add a distinctive look to your images, you can set yourself apart from other photographers and make your work stand out. Here are some tips for using lighting to create a unique style:
- Experiment with different light sources: Light sources such as candles, lamps, and neon lights can all create unique and distinctive lighting effects. Try experimenting with different types of light sources to see how they affect the mood and feel of your images.
- Use light to create depth and dimension: By using light to create depth and dimension in your images, you can add a sense of depth and complexity to your photos. Try using shadows and highlights to create a sense of depth, or using light to create contrast and interest in your images.
- Play with light direction: The direction of light can have a big impact on the mood and feel of your images. Try experimenting with different light directions to see how they affect your photos.
- Create a signature look: Once you have developed a style that you like, try to make it your signature. Use lighting techniques to create a consistent look across all of your images, and use this signature style to make your work stand out.
Overall, using lighting to create a unique style is a great way to enhance your photography skills and make your work stand out. By experimenting with different light sources, using light to create depth and dimension, playing with light direction, and creating a signature look, you can develop a style that is all your own.
FAQs
1. What is the role of lighting in photography?
Lighting is an essential element in photography as it helps to create the desired mood, highlight the subject, and provide contrast and depth to the image. Without proper lighting, the image may appear flat and lack dimension. Therefore, lighting techniques are crucial to achieving the desired results in photography.
2. Why can’t we rely on natural light alone for photography?
While natural light can be a great source of lighting for photography, it may not always be sufficient or suitable for the desired effect. Natural light can be unpredictable, harsh, and inconsistent, which can affect the quality of the image. Therefore, photographers often use artificial lighting techniques to control and manipulate light to achieve the desired effect.
3. What are some common lighting techniques used in photography?
There are several lighting techniques used in photography, including ambient lighting, directional lighting, reflective lighting, and diffused lighting. Ambient lighting refers to the existing light in the environment, while directional lighting involves using a light source to create a specific directional effect. Reflective lighting involves using reflective surfaces to bounce light onto the subject, and diffused lighting involves using a diffuser to soften the light.
4. What are the benefits of using lighting techniques in photography?
Using lighting techniques in photography can provide several benefits, including enhancing the quality of the image, creating a specific mood or atmosphere, highlighting the subject, and providing contrast and depth to the image. Lighting techniques can also help to control the tone and texture of the image, and can be used to create a variety of effects, such as shadows, highlights, and rim lighting.
5. How can I improve my lighting techniques in photography?
Improving your lighting techniques in photography requires practice and experimentation. You can start by studying the basics of lighting, such as the intensity, direction, and quality of light. You can also experiment with different lighting techniques and equipment, such as softboxes, reflectors, and flash guns, to see what works best for your style and subject matter. Practicing and studying the work of other photographers can also help to improve your lighting techniques.


