Photography is an art form that captures moments in time and preserves them for eternity. When it comes to taking photos, one of the most important decisions you’ll make is whether to shoot in landscape or vertical orientation. While both formats have their advantages and disadvantages, understanding the difference between them is crucial to capturing the perfect shot. In this comprehensive guide, we’ll explore the key differences between landscape and vertical photos, and help you determine which format is best suited for your needs. So, whether you’re a seasoned photographer or just starting out, read on to discover the world of landscape vs vertical photos.
What is a Landscape Photo?
Definition and Characteristics
A landscape photo is a type of photography that captures the natural environment, including its physical features, such as mountains, valleys, rivers, and forests, as well as its natural light and weather conditions. Landscape photography often emphasizes the beauty and majesty of nature, and can be used to capture a specific moment in time or to convey a particular mood or emotion.
In terms of its characteristics, a landscape photo typically has a horizontal orientation, with the camera pointing horizontally to capture a wide view of the scene. The composition of a landscape photo often includes the use of leading lines, such as roads, paths, or rivers, to draw the viewer’s eye through the image and create a sense of depth and perspective. The use of light and shadow is also an important element in landscape photography, as it can be used to create contrast and highlight specific elements of the scene. Additionally, landscape photos often feature a clear and sharp focus, with the foreground, midground, and background all in focus to create a sense of depth and dimension.
When to Use Landscape Orientation
When it comes to taking photos, the orientation of the camera can greatly impact the final result. Landscape orientation is one of the two standard orientations for photography, and it is commonly used for capturing wide scenes or objects that are taller than they are wider. Here are some specific situations where landscape orientation may be the best choice:
- Capturing Wide Scenes: Landscape orientation is ideal for capturing scenes that are wider than they are tall, such as panoramic views, cityscapes, or group photos. It allows you to capture more of the scene in a single frame, which can create a more immersive and dynamic image.
- Shooting Tall Objects: Landscape orientation is also useful when photographing tall objects, such as buildings, trees, or mountains. This orientation can help to capture the height and scale of the object, while also maintaining a sense of perspective.
- Preserving Detail: In some cases, landscape orientation can help to preserve detail in the image. For example, if you are photographing a document or other text-heavy image, landscape orientation can help to ensure that all of the text is visible and legible in the final image.
- Artistic Effects: Finally, landscape orientation can be used to create artistic effects or compositions. For example, you might use this orientation to create a leading line or to emphasize the horizontal or vertical elements of an image.
Overall, landscape orientation is a versatile choice that can be used in a variety of situations. Whether you are photographing wide scenes, tall objects, or simply looking to create a unique composition, landscape orientation is worth considering.
Examples of Landscape Photos
When discussing landscape photos, it is important to consider the subject matter and composition of the image. Landscape photos typically depict natural scenery, such as mountains, forests, or bodies of water, and are often captured in a horizontal orientation.
- Mountains: Landscape photos of mountains often showcase their majesty and grandeur, capturing their size and shape as they stretch towards the sky.
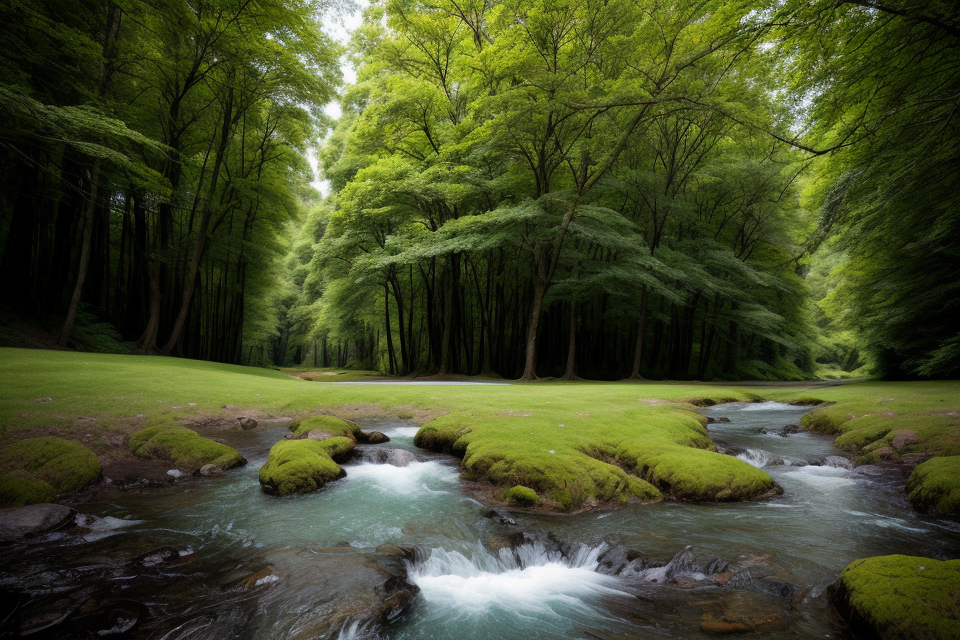
- Forests: Forest landscapes can include a variety of elements, such as towering trees, rolling hills, and streams. These photos often highlight the beauty and complexity of nature.
- Bodies of water: Landscape photos of bodies of water, such as lakes, rivers, or oceans, can capture the vastness and power of these natural wonders. They may also showcase the beauty of sunrises and sunsets over the water.
In addition to these examples, landscape photos can also include cityscapes, agricultural landscapes, and even industrial landscapes, depending on the focus of the photographer. No matter the subject, landscape photos often evoke a sense of awe and wonder, showcasing the beauty and diversity of the natural world.
What is a Vertical Photo?
A vertical photo is an image that is captured with the camera held in a vertical orientation, perpendicular to the ground. This type of photography is often used to capture tall buildings, landscapes, and portraits, where the subject is positioned vertically in the frame. The characteristic of a vertical photo is that it is taller than it is wide, resulting in a more narrow field of view. This can create a different perspective and composition compared to a landscape photo, which is captured horizontally. Additionally, vertical photos can also be used to emphasize height and depth, and can be more effective in capturing the movement and dynamics of fast-paced subjects such as action sports or wildlife.
When to Use Vertical Orientation
Vertical orientation is commonly used in photography when the subject of the photo is tall and thin, such as people, buildings, and trees. In these cases, using a vertical orientation allows the subject to be captured in its full height and can create a more dramatic effect. Additionally, using a vertical orientation can help to eliminate the need for wide-angle lenses, which can distort the image and make it appear wider than it actually is.
Vertical orientation is also commonly used in portrait photography, as it can create a more flattering and slimming effect for the subject. It can also be used to create a sense of height and power, such as in photos of skyscrapers or mountains.
It’s important to note that not all cameras have a built-in option for vertical orientation, so photographers may need to use a special tripod or mount to shoot in this orientation. Additionally, when sharing photos online, it’s important to consider the platform’s aspect ratio and whether the photo will be displayed in its full vertical orientation.
Examples of Vertical Photos
Vertical photos are images captured in a portrait orientation, where the camera is held vertically, resulting in a taller image format compared to landscape photos. These photos are commonly used in social media platforms such as Instagram and TikTok, where the vertical format is ideal for mobile device screens. Vertical photos can be taken using a variety of devices, including smartphones, DSLR cameras, and mirrorless cameras.
Some examples of vertical photos include:
- Portraits: Vertical photos are often used for portrait photography, where the subject’s height is emphasized, and the image is captured from head to toe.
- Cityscapes: When capturing tall buildings or skyscrapers, a vertical photo orientation can showcase the height and grandeur of the structures better than a landscape orientation.
- Event photography: For events such as concerts, festivals, or conferences, a vertical photo orientation can capture the atmosphere and energy of the event more effectively.
- Nature photography: Vertical photos can be used to capture the grandeur of tall trees, waterfalls, or mountains, emphasizing their height and majesty.
Overall, vertical photos are an excellent way to capture tall subjects or scenes and are well-suited for social media platforms that support the vertical format.
Choosing the Right Orientation for Your Photos
Factors to Consider
When it comes to choosing the right orientation for your photos, there are several factors to consider. Here are some of the most important ones:
- Composition: The composition of your photo is one of the most important factors to consider when choosing the orientation. Landscape photos are often used to capture wide, panoramic views, while vertical photos are better suited for tall, narrow subjects such as people or buildings.
- Intent: The intent behind your photo can also play a role in choosing the orientation. If you’re trying to convey a sense of height or movement, a vertical photo may be more appropriate. On the other hand, if you’re trying to capture a sweeping view, a landscape photo may be the better choice.
- Platform: The platform you’re using to share your photo can also impact your choice of orientation. For example, on Instagram, vertical photos tend to perform better than landscape photos, while on Pinterest, landscape photos are more popular.
- Personal preference: Ultimately, the orientation you choose should align with your personal preference and style. Some photographers prefer to shoot in landscape mode exclusively, while others may switch between landscape and vertical depending on the subject matter.
By considering these factors, you can make an informed decision about the orientation that will best suit your photo and your goals as a photographer.
Tips for Deciding on the Best Orientation
Deciding on the best orientation for your photos can be a challenging task, but it is crucial to ensure that your images look their best. Here are some tips to help you choose the right orientation for your photos:
- Consider the subject matter: The subject matter of your photo can help you determine the best orientation. For example, if you are taking a photo of a landscape, it is best to shoot in landscape orientation to capture the full scope of the scene. On the other hand, if you are taking a photo of a person or object, a vertical orientation may be more appropriate to capture the subject in its entirety.
- Think about the final use: The final use of your photo can also help you determine the best orientation. For example, if you are planning to print your photo, you may want to choose an orientation that will result in the least amount of distortion when printed. If you are planning to share your photo on social media, you may want to choose an orientation that will look best on a mobile device.
- Experiment with different orientations: Don’t be afraid to experiment with different orientations to see which one works best for your photo. Try shooting in both landscape and vertical orientations and compare the results. You may find that one orientation brings out the best in your subject matter or enhances the overall composition of your photo.
- Consider the rule of thirds: The rule of thirds is a compositional guideline that suggests dividing your photo into thirds vertically and horizontally, and placing your subject at one of the intersection points. This technique can help create a more visually pleasing composition, and can be used in both landscape and vertical orientations.
- Pay attention to symmetry: Symmetry can be a powerful compositional tool, and can be used to create a sense of balance and harmony in your photo. If your subject is symmetrical, consider shooting in a vertical orientation to emphasize the symmetry.
- Look at the light: The direction and quality of light can also influence your choice of orientation. For example, if you are shooting in a bright, harsh light, you may want to shoot in a landscape orientation to avoid squinting shadows. On the other hand, if you are shooting in soft, diffused light, a vertical orientation may be more flattering to your subject.
By considering these tips, you can make an informed decision about the best orientation for your photos, and ensure that your images look their best.
Examples of Photos with Different Orientations
When it comes to choosing the right orientation for your photos, it’s important to understand the different options available to you. Landscape and vertical photos are two of the most common orientations, but there are also other options like square and panoramic photos. Here are some examples of photos with different orientations to help you understand the differences between them.
Landscape Orientation
A landscape orientation is a horizontal orientation that is often used for wide-angle shots of scenery or landscapes. This orientation is often used to capture a wide view of a scene, such as a panoramic shot of a mountain range or a city skyline. Here are some examples of landscape orientation photos:
- A photo of a mountain range at sunset, taken from a low angle to capture the vastness of the landscape.
- A photo of a city skyline at night, taken from a high angle to capture the buildings and the sky.
- A photo of a beach at sunrise, taken from a low angle to capture the expanse of the sand and the waves.
Vertical Orientation
A vertical orientation is a portrait orientation that is often used for close-up shots of people or objects. This orientation is often used to capture a tall object or person, such as a building or a person standing in the foreground. Here are some examples of vertical orientation photos:
- A photo of a person standing in front of a building, taken from a low angle to capture the person’s height and the building’s height.
- A photo of a flower, taken from a close-up angle to capture the intricate details of the petals.
- A photo of a tall tree, taken from a high angle to capture the tree’s height and the surrounding landscape.
Square Orientation
A square orientation is a square-shaped orientation that is often used for social media posts or portraits. This orientation is often used to capture a specific moment or subject, such as a portrait of a person or a still life of objects. Here are some examples of square orientation photos:
- A photo of a person’s face, taken in a square orientation to capture the person’s features and expression.
- A photo of a still life of objects, taken in a square orientation to capture the composition of the objects.
- A photo of a city street, taken in a square orientation to capture the urban environment.
Panoramic Orientation
A panoramic orientation is a wide-angle orientation that is often used for panoramic shots of landscapes or cityscapes. This orientation is often used to capture a wide view of a scene, such as a panoramic shot of a mountain range or a city skyline. Here are some examples of panoramic orientation photos:
By understanding the different orientations available to you, you can choose the right orientation for your photos based on the subject matter and the effect you want to achieve. Whether you choose a landscape, vertical, square, or panoramic orientation, your photos will be more compelling and engaging.
Composition Techniques for Different Orientations
When it comes to composition, the orientation of your photos can make a big difference in how they are perceived. In this section, we will explore some of the composition techniques that are specific to each orientation.
Landscape Orientation
- Rule of Thirds: One of the most common composition techniques for landscape orientation is the rule of thirds. This technique involves placing the horizon line one-third of the way up or down the image, and placing other important elements, such as the sun or a building, at the other two-thirds points.
- Leading Lines: Another popular technique for landscape orientation is using leading lines. This can be done by framing the shot in such a way that there is a clear line leading the viewer’s eye from the foreground to the background. This can be done with roads, rivers, or even the edge of a building.
- Depth of Field: Landscape orientation also allows for more depth of field, which can be used to create a sense of distance and scale. By using a small aperture, you can keep both the foreground and background in focus, creating a sense of depth and dimension.
Vertical Orientation
- Symmetry: One of the most common composition techniques for vertical orientation is symmetry. This can be achieved by framing the shot so that the subject is directly in the center of the image. This can be particularly effective when shooting buildings or other man-made structures.
- Framing: Another technique for vertical orientation is framing. This can be done by using elements in the foreground to frame the subject. This can be particularly effective when shooting nature scenes, such as trees or mountains.
- Point of View: Vertical orientation also allows for a unique point of view. By shooting straight up or down, you can create a sense of height or depth that is not possible with landscape orientation. This can be particularly effective when shooting in tight spaces, such as alleys or stairwells.
Overall, the composition techniques for landscape and vertical orientation are different, but both can be used to create stunning images. By understanding these techniques and how to use them, you can take your photography to the next level.
Recap of Key Points
- Composition is key when deciding on the orientation of your photos.
- Consider the subject matter and the story you want to tell when choosing between landscape and vertical orientation.
- The rule of thirds is a useful guideline for composing photos in either orientation.
- Landscape orientation is often used for wide-angle shots, while vertical orientation is better for portraits and tall structures.
- Experiment with different orientations to find the best fit for your photo.
Final Thoughts and Recommendations
When it comes to choosing the right orientation for your photos, there are a few key things to keep in mind. First and foremost, consider the subject matter and the message you want to convey. For example, if you’re photographing a beautiful landscape, a horizontal orientation may be more appropriate to capture the vastness of the scene. On the other hand, if you’re taking a portrait of a person, a vertical orientation may be more flattering and natural.
Another important factor to consider is the intended use of the photo. If you’re planning to print the photo, you may want to choose an orientation that will look best in print form. For example, a horizontal orientation may work better in a large format print, while a vertical orientation may be more suitable for a smaller print or online use.
Additionally, think about the composition of the photo and how the orientation will affect it. For example, if you have a strong leading line in your photo, a horizontal orientation may be more effective in emphasizing it. On the other hand, if you have a strong diagonal line, a vertical orientation may be more appropriate.
Ultimately, the choice of orientation should be based on the specific needs and goals of the photo. By considering the subject matter, message, intended use, and composition, you can make an informed decision that will help you capture the best possible photo.
FAQs
1. What is the difference between landscape and vertical photos?
Landscape photos are horizontally oriented, capturing a wide view of a scene from side to side, while vertical photos are taken in portrait orientation, capturing a tall view of a scene from top to bottom. The main difference between the two is the aspect ratio, with landscape photos having a wider aspect ratio and vertical photos having a taller aspect ratio.
2. When should I use landscape photos?
Landscape photos are best used when you want to capture a wide view of a scene, such as a panoramic landscape or a city skyline. They are also ideal for group photos, as they can fit more people in the frame horizontally. Landscape photos are commonly used in advertising, travel, and real estate photography.
3. When should I use vertical photos?
Vertical photos are best used when you want to capture a tall view of a scene, such as a tall building or a person’s profile. They are also ideal for social media platforms that display content in portrait orientation, such as Instagram and TikTok. Vertical photos are commonly used in portrait photography, fashion photography, and product photography.
4. Can I edit the orientation of my photos?
Yes, you can edit the orientation of your photos in photo editing software such as Adobe Photoshop or Lightroom. You can easily rotate or flip your photos to change their orientation. However, it’s important to note that editing the orientation of your photos may affect the quality of the image and the final result may not be as good as if you had taken the photo in the correct orientation to begin with.
5. What are the advantages of taking photos in the correct orientation?
Taking photos in the correct orientation has several advantages. Firstly, it ensures that your photo will look its best when viewed on any device, whether it’s a phone, tablet, or computer. Secondly, it allows you to take full advantage of the aspect ratio of the photo, which can enhance the composition and impact of the image. Finally, taking photos in the correct orientation can save you time and effort in post-processing, as you won’t need to edit the orientation of your photos.


