Welcome to the world of photography! Are you ready to take your first steps in understanding the fundamentals of camera controls? In this guide, we will be exploring the two basic camera controls that every photographer should know. These controls may seem simple, but they have a significant impact on the final outcome of your photographs. Get ready to learn about aperture and shutter speed, the building blocks of photography.
Aperture:
Aperture is one of the most essential camera controls that every photographer should understand. It refers to the size of the camera’s aperture, which is the opening in the lens through which light passes. Aperture controls the amount of light that enters the camera, and it also has an impact on the depth of field in your photographs. A shallow depth of field, for example, can create a beautiful blurred effect in the background of your photos, while a deep depth of field can keep everything in focus.
Shutter Speed:
Shutter speed is another crucial camera control that every photographer should know. It refers to the length of time that the camera’s shutter is open, and it controls the amount of light that enters the camera. A slower shutter speed allows more light to enter the camera, while a faster shutter speed allows less light in. Shutter speed also affects the motion in your photographs. A slower shutter speed can create a sense of motion, while a faster shutter speed can freeze motion.
Conclusion:
Understanding the basics of camera controls is essential for any photographer. Aperture and shutter speed are two of the most important controls, and they have a significant impact on the final outcome of your photographs. By mastering these controls, you can take your photography to the next level and create stunning images that tell a story. So, get out there and start experimenting with aperture and shutter speed today!
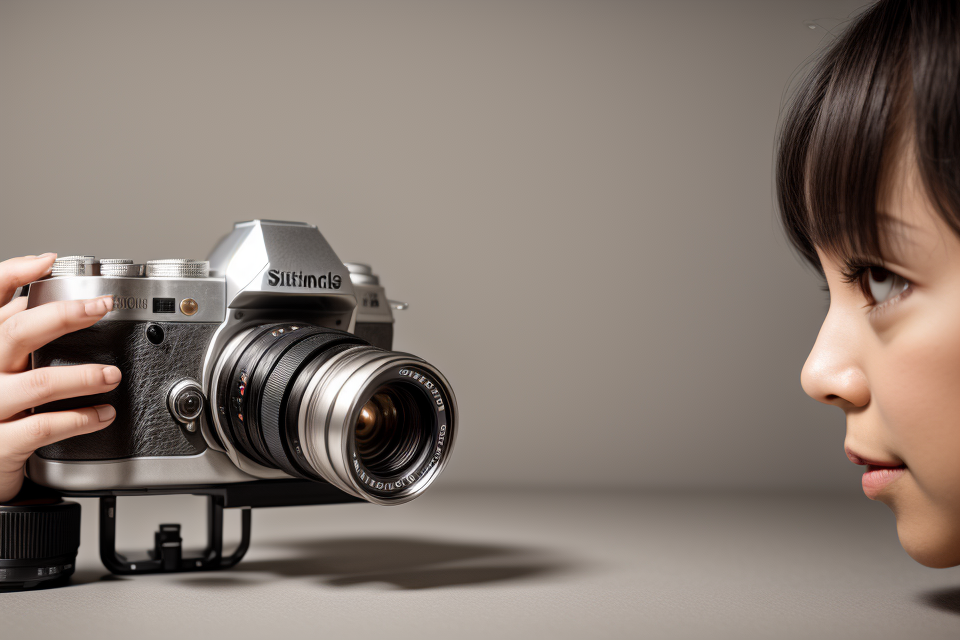
Camera Basics
Lens Aperture
Lens Aperture is a fundamental concept in photography that refers to the size of the camera’s aperture, which is the opening in the lens through which light passes. It is measured in f-stops, and a larger aperture (a smaller f-stop number) allows more light to enter the camera, while a smaller aperture (a larger f-stop number) allows less light in.
How does it work?
The aperture works by adjusting the size of the aperture within the lens, which in turn controls the amount of light that enters the camera. When the aperture is open, more light is allowed in, and when it is closed, less light is allowed in. This is important because it allows the photographer to control the exposure of the image, which is the amount of light that reaches the camera’s sensor.
How to adjust it?
Aperture can be adjusted by using the camera’s aperture control, which is typically located on the camera body or on the lens itself. To adjust the aperture, the photographer will typically turn the control to a lower f-stop number to open the aperture and allow more light in, or to a higher f-stop number to close the aperture and allow less light in.
Why is it important?
Aperture is important because it allows the photographer to control the exposure of the image, which is critical for creating a well-exposed photograph. It also has an impact on the depth of field in the image, which refers to the area of the image that appears in focus. A larger aperture (a smaller f-stop number) will result in a shallower depth of field, while a smaller aperture (a larger f-stop number) will result in a deeper depth of field. This can be used to create a variety of creative effects in the image, such as blurring the background to create a more dramatic portrait.
Shutter Speed
Shutter speed refers to the length of time that the camera’s shutter is open, allowing light to enter the camera and be captured as an image. It is measured in seconds or fractions of a second, and it is a critical component of photography that allows for control over the amount of light that enters the camera and the resulting exposure of the image.
The shutter speed is controlled by a mechanism within the camera that opens and closes the shutter, and it can be adjusted by the photographer to suit the lighting conditions and the desired effect. A slower shutter speed allows more light to enter the camera, resulting in a brighter image, while a faster shutter speed allows less light in, resulting in a darker image.
To adjust the shutter speed, photographers can use the camera’s mode dial or the manual controls to select a specific shutter speed. Some cameras also have a shutter priority mode, which allows the photographer to select a specific shutter speed and the camera will automatically adjust the aperture to achieve the correct exposure.
Shutter speed is important because it allows the photographer to control the amount of light that enters the camera and to create different effects by using different shutter speeds. A slower shutter speed can be used to capture motion in an image, such as a moving subject, while a faster shutter speed can be used to freeze action and create sharp images. Understanding how to adjust shutter speed is essential for controlling the exposure and creating the desired effects in an image.
Exposure
Exposure Triangle
When it comes to understanding the fundamentals of photography, the exposure triangle is a critical concept to grasp. It consists of three key elements that determine the exposure of an image: aperture, shutter speed, and ISO. By understanding how these elements work together, photographers can achieve the desired exposure in any given situation.
Understanding the exposure triangle
The exposure triangle is a fundamental concept in photography that describes the relationship between aperture, shutter speed, and ISO. These three elements work together to control the amount of light that enters the camera and ultimately determines the exposure of an image.
Aperture refers to the size of the camera’s aperture, which is the opening in the lens through which light passes. Aperture is measured in f-stops, and a larger aperture (a smaller f-stop number) allows more light to enter the camera, while a smaller aperture (a larger f-stop number) allows less light in.
Shutter speed, on the other hand, refers to the length of time that the camera’s shutter is open, allowing light to enter the camera. Shutter speed is measured in seconds or fractions of a second, and a slower shutter speed allows more light to enter the camera, while a faster shutter speed allows less light in.
Finally, ISO refers to the sensitivity of the camera’s sensor to light. A higher ISO setting makes the sensor more sensitive to light, allowing for a faster shutter speed or a smaller aperture in low light conditions. However, a higher ISO setting also results in more noise in the image.
Balancing aperture, shutter speed, and ISO
Balancing aperture, shutter speed, and ISO is essential to achieving the desired exposure in any given situation. In general, photographers try to keep the ISO as low as possible to minimize noise, while adjusting aperture and shutter speed to achieve the desired exposure.
For example, if a photographer wants to take a picture of a moving subject in broad daylight, they might use a smaller aperture (a larger f-stop number) to ensure that the subject is in focus and a faster shutter speed to freeze the motion. In this case, the ISO might be set to a lower value to minimize noise.
On the other hand, if a photographer is taking a picture at night or in a low-light environment, they might need to increase the ISO to achieve the desired exposure. This might result in more noise in the image, but it is a necessary trade-off to capture the scene accurately.
Tips for getting the right exposure
Getting the right exposure can be challenging, but there are a few tips that can help. First, it’s essential to understand the exposure triangle and how the different elements work together to control exposure. Second, it’s important to use a light meter or the camera’s built-in metering system to ensure that the exposure is accurate.
It’s also a good idea to bracket exposures, taking multiple shots at different exposure settings to ensure that the best shot is captured. Finally, it’s important to review images on the camera or computer screen to ensure that the exposure is accurate and make any necessary adjustments.
Overall, understanding the exposure triangle is a critical part of mastering the fundamentals of photography. By balancing aperture, shutter speed, and ISO, photographers can achieve the desired exposure in any given situation and capture stunning images.
ISO
What is ISO?
ISO, or International Organization of Standardization, is a measure of a camera’s sensitivity to light. It is used to control the amount of light that enters the camera and is recorded on the image sensor. The higher the ISO, the more sensitive the camera is to light, and the less light is needed to take a photo.
How does it work?
ISO works by adjusting the sensitivity of the image sensor in the camera. When the ISO is set to a higher value, the sensor becomes more sensitive to light, allowing for shorter exposure times and faster shutter speeds. This is useful in low light conditions, as it allows for the capture of more light in a shorter amount of time.
How to adjust it?
ISO can be adjusted manually on most DSLR and mirrorless cameras, usually by turning a dial on the camera body or using a menu in the camera’s settings. It can also be set automatically by the camera based on the lighting conditions, or through a program or shutter priority mode.
Why is it important?
ISO is an important camera control because it allows for greater control over the exposure of an image. It is especially important in low light conditions, where a slower shutter speed or wider aperture may not be possible, and a higher ISO is necessary to capture enough light to create a properly exposed image. However, it is also important to be aware of the trade-offs of using a higher ISO, as it can also increase noise in the image, which can be especially noticeable in images with a lot of detail or in prints.
Focus
Autofocus
Autofocus is a camera control that allows the camera to automatically adjust the focus of the lens based on the subject’s distance from the camera. This feature is especially useful for photographers who want to capture sharp and clear images of moving subjects or when shooting in low light conditions.
How autofocus works
Autofocus works by using a series of sensors located throughout the camera that detect the distance of the subject from the camera. These sensors measure the distance by calculating the time it takes for a beam of light to bounce off the subject and return to the camera. Based on this information, the camera’s processor calculates the appropriate focal distance and adjusts the lens accordingly.
Types of autofocus systems
There are several types of autofocus systems available in cameras, including:
- Single-point autofocus: This system uses a single point to focus on the subject. It is useful for photographing stationary subjects or when the subject is moving in a straight line.
- Multi-point autofocus: This system uses multiple points to focus on the subject. It is useful for photographing moving subjects or when the subject is moving in an unpredictable manner.
- Zone autofocus: This system divides the frame into multiple zones and focuses on the subject based on its position within the zone. It is useful for photographing moving subjects in complex environments.
- Face detection autofocus: This system uses face detection technology to identify faces in the scene and focus on them. It is useful for photographing portraits or in situations where the subject is moving.
Tips for using autofocus effectively
- Use the right autofocus mode: Choose the appropriate autofocus mode based on the subject and shooting conditions. For example, use single-point autofocus for stationary subjects and multi-point autofocus for moving subjects.
- Use the focus lock: Use the focus lock feature to lock the focus on a subject when it moves out of the focus area.
- Use the manual focus: Use the manual focus feature to fine-tune the focus when the autofocus system fails to lock onto the subject.
- Check the autofocus point: Make sure the autofocus point is placed on the correct area of the subject to ensure accurate focusing.
- Use the AF assist beam: Use the AF assist beam to help the autofocus system focus on the subject in low light conditions.
Manual Focus
Manual focus is a camera control that allows the photographer to adjust the focus of the camera manually. This means that the photographer has full control over the area of the image that will be in focus.
When to use manual focus
Manual focus is often used in situations where the camera’s autofocus system may not be able to accurately focus on the subject. This can include shooting in low light conditions, when the subject is moving, or when the camera is being used for macro photography. Manual focus can also be used to achieve a specific artistic effect, such as intentionally blurring the background of a portrait.
How to adjust manual focus
To adjust manual focus, the photographer must first switch the camera to manual focus mode. This can usually be done by switching the focus mode dial on the camera to “M” or by pressing the “AF” button and turning the focus ring on the lens. Once the camera is in manual focus mode, the photographer can adjust the focus by turning the focus ring on the lens. The focus ring allows the photographer to adjust the focus distance and depth of field.
Tips for achieving sharp focus
When using manual focus, it is important to take your time and carefully adjust the focus to ensure that the subject is sharp. Here are a few tips for achieving sharp focus when using manual focus:
- Use the live view mode on the camera to carefully examine the image on the screen and adjust the focus accordingly.
- Use the magnification feature on the camera to zoom in on a specific area of the image and adjust the focus manually.
- Use a tripod to stabilize the camera and ensure that the subject is in the same position while adjusting the focus.
- Use the depth of field preview button on the camera to preview the depth of field and ensure that the subject is in focus.
- Pay attention to the distance between the subject and the camera, as well as the aperture and shutter speed settings, to achieve the desired depth of field and focus.
Composition
The Rule of Thirds
The rule of thirds is a fundamental principle in photography that suggests dividing the frame into thirds, both horizontally and vertically, creating a grid of nine equal parts. The idea is to place the key elements of the composition, such as the subject, along the lines or at the intersection points of the grid. This method helps create visually appealing and balanced images.
Understanding the Rule of Thirds
The rule of thirds is based on the idea that our eyes naturally gravitate towards points of interest that are placed along the gridlines or at the intersection points. By aligning the subject or key elements with these points, photographers can create more dynamic and visually pleasing images.
How to Apply the Rule of Thirds
To apply the rule of thirds, follow these steps:
- Activate the gridlines on your camera or smartphone camera by accessing the settings menu.
- Compose your shot by aligning the subject or key elements along the gridlines or at the intersection points.
- Frame the shot, considering the balance of elements and the overall composition.
Tips for Creating Visually Appealing Compositions with the Rule of Thirds
- Leading Lines: Use natural or man-made lines in the environment to lead the viewer’s eye to the subject.
- Symmetry: Look for symmetrical subjects or scenes that can be framed along the gridlines for a balanced composition.
- Depth: Utilize the rule of thirds to create depth in the image by placing the foreground, midground, and background elements along the gridlines.
- Negative Space: Use the empty space in the frame to emphasize the subject and create a sense of isolation or tranquility.
- Experiment: Don’t be afraid to break the rule of thirds when it serves the purpose of the image. Remember, there are no hard and fast rules in photography; the most important thing is to create a compelling image.
Leading Lines
Leading lines is a composition technique used in photography that involves using lines in the scene to lead the viewer’s eye to the main subject. These lines can be created by using the natural lines found in the scene, such as roads, paths, or even the lines created by the sunlight.
How to use leading lines in your photography
- Look for leading lines in the scene: When composing a shot, look for lines that can lead the viewer’s eye to the main subject. These lines can be created by anything in the scene, such as roads, paths, buildings, or even the lines created by the sunlight.
- Use the lines to frame the subject: Once you have identified the leading lines, use them to frame the main subject of the photograph. This can be done by placing the subject at the point where the lines converge or by placing the subject on one of the lines and using the other line to lead the viewer’s eye to the subject.
- Experiment with different angles: Don’t be afraid to experiment with different angles to find the most dynamic composition. Sometimes, tilting the camera or changing the angle can create a more dynamic composition.
Tips for creating dynamic compositions
- Keep it simple: Keep the composition simple and uncluttered, with a clear focal point.
- Use the rule of thirds: Use the rule of thirds to position the leading lines and the main subject.
- Pay attention to the background: The background can affect the composition, so pay attention to it and try to find a simple and uncluttered background that doesn’t distract from the main subject.
- Look for patterns and textures: Leading lines can also be created by patterns and textures, so look for these in the scene and use them to create a dynamic composition.
- Be patient and wait for the right moment: Sometimes, the leading lines might not be perfectly aligned, so be patient and wait for the right moment when the leading lines and the main subject are aligned.
Depth of Field
Depth of field refers to the distance range in a photo that appears in focus, from the nearest point to the farthest point. The depth of field is determined by the aperture, focal length, and distance between the camera and the subject.
How to control depth of field:
- Use a larger aperture (smaller f-number) to create a shallow depth of field and blur the background.
- Use a smaller aperture (larger f-number) to create a deeper depth of field and keep more of the scene in focus.
- Change the focal length of the lens to control the depth of field. A longer focal length will create a shallower depth of field, while a shorter focal length will create a deeper depth of field.
- Move closer to or further away from the subject to change the depth of field.
Tips for achieving shallow depth of field and sharp focus:
- Use a low aperture setting (wide open aperture) to create a shallow depth of field and blur the background.
- Use a narrow aperture setting (smaller aperture) to create a deeper depth of field and keep more of the scene in focus.
- Use a longer focal length to create a shallower depth of field and isolate the subject.
- Use a shorter focal length to create a deeper depth of field and capture more of the scene.
- Experiment with different distances between the subject and the camera to control the depth of field.
Advanced Techniques
Hyperfocal Distance
Hyperfocal distance is a concept in photography that refers to the distance from the camera at which everything from a certain point onwards will be in focus, given a specific aperture and focal length. This concept is important because it allows photographers to maximize the depth of field in their images, which can be especially useful in landscape, architecture, and street photography.
In order to calculate hyperfocal distance, you will need to know the focal length of your lens, the aperture you are using, and the circle of confusion. The circle of confusion is a concept in photography that refers to the amount of blur that is acceptable in an image. It is determined by the size of the image sensor, the viewing distance, and the print size.
Once you have these values, you can use the following formula to calculate hyperfocal distance:
Hyperfocal distance = (focusing distance * (n – 1)) / (focal length * (n – 1) * (2 * 3.56 * (n – 1) + (2 * 3.56 * (n – 1) + (2 * 3.56 * (n – 1) + (2 * 3.56 * (n – 1)))) / (2 * 3.56 * (n – 1))))
Where:
- focusing distance is the distance at which you want to have maximum depth of field
- focal length is the length of the lens in millimeters
- n is the circle of confusion, which is typically set to 30 or 50
Once you have calculated the hyperfocal distance, you can use it to focus your camera at the appropriate distance, and everything from a certain point onwards will be in focus. This technique can be especially useful when shooting landscapes, architecture, and street scenes, as it allows you to capture a wide range of distances in focus.
Some tips for using hyperfocal distance in your photography include:
- Use a small aperture to maximize the depth of field
- Use a tripod to ensure that the camera is stable and that the image is sharp
- Use a narrow aperture to create a deeper depth of field
- Use a wide aperture to create a shallower depth of field
- Experiment with different focal lengths and apertures to see how they affect the depth of field
- Pay attention to the distance between the camera and the subject, as this will affect the depth of field.
Time-Lapse Photography
What is time-lapse photography?
Time-lapse photography is a technique used in filmmaking and photography where a series of still images are captured at regular intervals and then played back in quick succession to create an illusion of motion or fast-paced action. The process involves capturing a series of images of a scene over a period of time, usually hours, days, or even weeks, and then combining them into a video that showcases the changes that occurred during that time.
How to create a time-lapse video
Creating a time-lapse video involves several steps, including planning, capturing, editing, and exporting. Here are the basic steps to create a time-lapse video:
- Plan your shots: Before you start capturing images, it’s important to plan your shots. Decide on the location, subject, and composition you want to capture. Consider the time of day, weather conditions, and any other factors that may affect your shots.
- Set up your camera: Set up your camera on a tripod or other stable surface and make sure it’s pointed at the scene you want to capture. Set the camera to manual mode and adjust the settings, including aperture, shutter speed, and ISO, to capture the best images.
- Capture the images: Once your camera is set up, it’s time to start capturing images. Depending on the interval you want to use, you may need to set your camera to intervalometer mode, which will automatically capture images at regular intervals.
- Edit the video: Once you’ve captured all the images, it’s time to edit the video. You’ll need to import the images into your video editing software and create a new project. Choose the images you want to use and arrange them in the timeline. You may need to adjust the speed of the video to ensure it looks natural.
- Export the video: Finally, it’s time to export the video. Choose the export settings and save the video to your computer or upload it to your preferred platform.
Tips for capturing stunning time-lapse sequences
To capture stunning time-lapse sequences, here are some tips to keep in mind:
- Use a sturdy tripod: A sturdy tripod is essential for keeping your camera stable and preventing blurry images.
- Use a remote shutter release or self-timer: To avoid camera shake, use a remote shutter release or self-timer to trigger the camera.
- Choose the right interval: The interval you choose will depend on the subject and scene you’re capturing. A shorter interval will result in a faster video, while a longer interval will result in a slower video.
- Adjust your settings: Depending on the light conditions, you may need to adjust your camera settings to ensure you capture the best images. Consider using a lower ISO, a slower shutter speed, and a larger aperture to capture more light.
- Use a polarizing filter: A polarizing filter can help reduce glare and reflections, resulting in richer colors and more vibrant images.
- Experiment with different angles: Experiment with different angles and compositions to create unique and interesting time-lapse sequences.
Astrophotography
Astrophotography is a type of photography that captures images of celestial objects, such as stars, planets, and nebulae. It requires careful planning, preparation, and specialized equipment to capture the beauty of the night sky. In this section, we will discuss the basics of astrophotography and provide tips for capturing stunning night sky photos.
What is astrophotography?
Astrophotography is a type of photography that involves capturing images of celestial objects, such as stars, planets, and nebulae. It requires specialized equipment and techniques to capture the faint light of these objects and create images that are both visually appealing and scientifically valuable.
How to capture stunning night sky photos
Capturing stunning night sky photos requires careful planning, preparation, and specialized equipment. Here are some tips for photographing the stars and milky way:
- Use a tripod: A tripod is essential for astrophotography because it allows you to keep the camera still and capture sharp images of the night sky.
- Use a remote shutter release: To avoid camera shake, use a remote shutter release or set the camera on a timer to trigger the shutter.
- Use a wide-angle lens: A wide-angle lens allows you to capture a wide field of view and capture more of the night sky in a single shot.
- Use a high ISO: To capture the faint light of celestial objects, you will need to use a high ISO setting. This will allow you to capture more light and create a brighter image.
- Use long exposures: Long exposures are essential for capturing the faint light of celestial objects. Experiment with different exposure times to find the best setting for your shot.
- Use a polar aligning mount: A polar aligning mount helps you align your camera with the celestial sphere, allowing you to capture more accurate and precise images of the night sky.
- Use post-processing techniques: Post-processing techniques, such as stacking and noise reduction, can help you enhance the quality of your astrophotography images and bring out the details of the night sky.
By following these tips and using the right equipment, you can capture stunning night sky photos that showcase the beauty and wonder of the universe.
Tips and Tricks
Photography is an art form that requires practice and dedication to master. Even experienced photographers can benefit from learning new tips and tricks to improve their skills and capture stunning photos. Here are some tips and tricks to help you take your photography to the next level:
Tips for Improving Your Photography Skills
- Learn the Exposure Triangle: The exposure triangle consists of aperture, shutter speed, and ISO. Understanding how these three elements work together can help you achieve the desired exposure in any situation.
- Pay Attention to Composition: Composition is the foundation of photography. Consider the rule of thirds, leading lines, and negative space to create visually appealing images.
- Shoot in RAW: Shooting in RAW format gives you more flexibility during post-processing. It allows you to adjust settings like exposure, white balance, and ISO without losing image quality.
- Practice Shooting in Manual Mode: Manual mode gives you complete control over your camera settings. Practice using manual mode to develop your understanding of how different settings affect your photos.
- Experiment with Different Perspectives: Try shooting from different angles and heights to create unique compositions. Get low or high to capture fresh perspectives.
Tricks for Capturing Stunning Photos in Various Situations
- Freeze Motion with a Fast Shutter Speed: Use a fast shutter speed to freeze motion in action shots, such as sports or wildlife photography.
- Capture the Magic Hour: The magic hour, just after sunrise or before sunset, offers soft, warm light perfect for portraits and landscapes. Use a narrow aperture and low ISO to ensure maximum detail.
- Create Dramatic Silhouettes: Find a bright light source behind your subject and shoot with a narrow aperture to create a silhouette. Adjust the exposure to retain detail in the highlights.
- Utilize Leading Lines: Look for leading lines in your composition, such as roads, trails, or rivers, to lead the viewer’s eye through the image.
- Capture the Weather: Weather can greatly impact the mood of your photos. Embrace rain, snow, and fog to create dramatic atmospheres.
Recommended Camera Settings for Different Scenarios
- Landscape Photography: Use a narrow aperture (f/11-f/22), a low ISO (100-400), and a tripod to ensure maximum detail and sharpness. Consider using a polarizing filter to reduce reflections and enhance colors.
- Portrait Photography: Aim for a wider aperture (f/2.8-f/5.6) to create a shallow depth of field and isolate your subject. Adjust the ISO and shutter speed based on available light.
- Action and Sports Photography: Use a fast shutter speed (1/1000s or higher) and a narrow aperture to freeze motion. Increase the ISO if necessary to maintain a fast shutter speed.
- Night Photography: Use a higher ISO (800-3200) and a wider aperture (f/2.8-f/4) to capture enough light. Use a tripod for stability and consider using long exposure techniques for star trails or light trails.
- Macro Photography: Use a narrow aperture (f/8-f/16) and a high ISO (400-800) to ensure sharpness and detail. A tripod can help with stability, and using a polarizing filter can reduce glare and enhance colors.
FAQs
1. What are the two basic camera controls?
The two basic camera controls are aperture and shutter speed. Aperture refers to the size of the camera’s aperture, which controls the amount of light that enters the camera. Shutter speed refers to the length of time that the camera’s shutter is open, which controls the amount of time that light is allowed to enter the camera.
2. What is aperture?
Aperture is the size of the camera’s aperture, which controls the amount of light that enters the camera. Aperture is measured in f-stops, and a larger aperture (a smaller f-stop number) allows more light into the camera, while a smaller aperture (a larger f-stop number) allows less light into the camera. Aperture also has an effect on the depth of field in a photo, with a larger aperture resulting in a shallower depth of field and a smaller aperture resulting in a deeper depth of field.
3. What is shutter speed?
Shutter speed refers to the length of time that the camera’s shutter is open, which controls the amount of time that light is allowed to enter the camera. Shutter speed is measured in seconds or fractions of a second, and a slower shutter speed allows more light into the camera over a longer period of time, while a faster shutter speed allows less light into the camera over a shorter period of time. Shutter speed also has an effect on the motion in a photo, with a slower shutter speed resulting in more motion blur and a faster shutter speed resulting in less motion blur.


