Digital photography has revolutionized the way we capture and share images. With its convenience and versatility, it has become the preferred choice for photographers of all levels. But did you know that there are two types of digital photography? In this comprehensive guide, we will explore the differences between these two types and what they mean for your photography journey. Get ready to learn about the exciting world of digital photography!
What is Digital Photography?
The Evolution of Photography
Photography has come a long way since its inception in the early 19th century. It has evolved from the cumbersome and expensive processes of the past to the convenient and accessible digital photography we know today.
The first photographic images were created using the camera obscura, a device that allowed people to project images onto a surface using a lens. The camera obscura was invented in the 16th century, but it wasn’t until the early 1800s that the first photographs were created using a process called the “calotype.” This process involved using a box camera to capture an image on a light-sensitive paper negative.
From there, photography continued to evolve rapidly. In the mid-1800s, the daguerreotype process was introduced, which produced a one-of-a-kind photograph on a silver plate. This process was quickly replaced by the more affordable and accessible albumen print, which was made using a paper negative and a printing process that involved the application of a solution of silver salts.
In the late 1800s, the introduction of the Kodak box camera made photography accessible to the masses. This camera was designed to be easy to use and required no technical knowledge, making it possible for anyone to take photographs.
In the early 1900s, photography underwent a significant change with the introduction of the digital camera. These cameras used a digital sensor to capture images, which could then be stored on a memory card or transferred to a computer for editing and sharing.
Today, digital photography is the most widely used form of photography, and it continues to evolve with new technologies and innovations.
The Advantages of Digital Photography
Increased Control Over Images
One of the most significant advantages of digital photography is the increased control that photographers have over their images. Unlike film photography, where the photographer has limited control over the final product, digital photography allows for endless manipulation and adjustment of the image. This includes adjusting the exposure, color balance, sharpness, and more, all of which can be done non-destructively.
Immediate Feedback
Another significant advantage of digital photography is the immediate feedback that photographers receive. With the ability to review images on the camera’s LCD screen or on a computer, photographers can quickly see the results of their work and make adjustments as needed. This instant feedback helps photographers to improve their skills and to capture the perfect shot.
Cost-Effectiveness
Digital photography is also a more cost-effective option compared to film photography. With no need for expensive film or processing, photographers can save money on the costs associated with traditional film photography. Additionally, digital cameras are often more affordable than their film counterparts, making it easier for photographers to upgrade their equipment as needed.
Versatility
Digital photography is also highly versatile, allowing photographers to capture a wide range of images. From portraits to landscapes, action shots to still life, digital cameras are up to the task. And with the ability to shoot in both RAW and JPEG formats, photographers have the flexibility to choose the best format for each image.
Backup and Storage
Another significant advantage of digital photography is the ease of backup and storage. With images stored on a digital medium, photographers can easily back up their work and protect their images from loss or damage. This is particularly important for professional photographers who rely on their images for their livelihood.
Overall, digital photography offers a range of advantages over traditional film photography, including increased control over images, immediate feedback, cost-effectiveness, versatility, and ease of backup and storage. These advantages have made digital photography the preferred choice for many photographers, both amateur and professional.
Types of Digital Photography
Digital photography offers a wide range of image formats, such as JPEG, RAW, and GIF, each with its own advantages and disadvantages. It is important to understand these formats and choose the right format for your needs. Additionally, digital photography offers a variety of editing tools, such as cropping, resizing, removing red eye, and retouching. By mastering these techniques, you can enhance your images and create stunning results.
### Key takeaway:
### FAQs:
1. What are the advantages of shooting in RAW format?
Shooting in RAW format offers several advantages, including greater flexibility in post-processing, more detail and control over the final image, and the ability to make non-destructive edits.
2. What are the disadvantages of shooting in JPEG format?
Shooting in JPEG format has several disadvantages, including loss of image quality during compression, limited editing capabilities, and the inability to make non-destructive edits.
3. What is metadata in digital photography?
Metadata is data that is embedded within a digital image file, such as the camera model, date and time, and other information.
4. How do I convert RAW files to JPEG or other formats?
To convert RAW files to JPEG or other formats, you can use specialized software, such as Adobe Lightroom or Photoshop. These programs allow you to adjust the settings and save the image in the desired format.
5. What are some basic image editing techniques?
Some basic image editing techniques include adjusting brightness and contrast, cropping and resizing, and removing red eye.
6. How do I remove red eye in digital images?
To remove red eye in digital images, you can use specialized software, such as Adobe Photoshop, to selectively remove the red color from the eyes. There are also automated red eye removal tools available in some photo editing software.
7. What are some tips for working with RAW files?
Some tips for working with RAW files include understanding the limitations and advantages of the format, using specialized software, and being mindful of the file size and storage requirements.
8. How do I optimize my digital images for web and print?
To optimize your digital images for web and print, you can use a combination of file size, quality, and compression. For web use, you can use JPEG or PNG formats and adjust the settings to achieve the desired file size and quality. For print, you can use TIFF or PNG formats and adjust the settings to achieve the desired output.
9. What are some advanced image editing techniques?
Some advanced image editing techniques include color correction, retouching and restoration, and using layers and filters.
10. How do I use layers and filters in digital image editing?
To use layers and filters in digital image editing, you can use specialized software, such as Adobe Photoshop, to selectively edit and enhance your images. You can use layers to add and remove elements from your images, and you can use filters to enhance the color, contrast, and sharpness of your images.
11. What are some tips for using filters and effects in digital image editing?
Some tips for using filters and effects in digital image editing include understanding the different types of filters and effects, such as sharpening, color correction, and noise reduction, and using them effectively to enhance your images. Additionally, it is important to experiment with different settings and techniques to achieve the desired results.
12. How do I save and export my edited images?
To save and export your edited images, you can use specialized software, such as Adobe Photoshop, to save the images in a variety of file formats, such as JPEG, TIFF, and PNG. It is important to choose the right file format and settings to achieve the desired output.
13. What are some common techniques for removing red eye in digital images?
Some common techniques for removing red eye in digital images include using the spot healing brush tool, using the red eye reduction tool, and using the red eye removal filter. Additionally, you can use advanced techniques, such as content-aware fill and the clone stamp tool, to remove red eye and other unwanted elements from your images.
14. What are some tips for retouching and restoring digital images?
Some tips for retouching and restoring digital images include using the clone stamp tool, using the spot healing brush tool, and using advanced techniques, such as content-aware fill and the patch tool. Additionally, it is important to be mindful of the ethical considerations of retouching and restoring images, such as maintaining the integrity of the original image and respecting the privacy of the subjects.
15. What are some basic image editing techniques?
Some basic image editing techniques include adjusting brightness and contrast, cropping and resizing, and using the clone stamp tool and the spot healing brush tool. Additionally, it is important to be mindful of the ethical considerations of image editing, such as maintaining the integrity of the original image and respecting the privacy of the subjects.
16. What are some tips for using layers in digital image editing?
Some tips for using layers in digital image editing include understanding the different types of layers, such as smart objects and adjustment layers, and using them effectively to enhance your images. Additionally, it is important to be mindful of the ethical considerations of layer editing, such as maintaining the integrity of the original image and respecting the privacy of the subjects.
17. What are some tips for using filters and effects in digital image editing?
Some tips for using filters and effects in digital image editing include understanding the different types of filters and effects, such as sharpening, color correction, and noise reduction, and using them effectively to enhance your images. Additionally, it is important to be mindful of the ethical considerations of filter and effect editing, such as maintaining the integrity of the original image and respecting the privacy of the subjects.
18. What are some tips for working with RAW files?
Some tips for working with RAW files include understanding the limitations and advantages of the format,
Film Photography vs. Digital Photography
Introduction to Film Photography
Film photography has been a popular method of capturing images for over a century. It involves the use of photographic film to record the image formed by the lens of a camera. The film is then processed in a lab or darkroom to produce a print or a digital image. Film photography offers a unique aesthetic that is different from digital photography, with its distinct color palette and grain structure.
Advantages of Film Photography
One of the advantages of film photography is its ability to capture a wide range of light values, making it ideal for high-contrast scenes. Film also has a unique “film look” that is difficult to replicate in digital photography. Film photographers also have a greater degree of control over the final image, as they can experiment with different film stocks, developers, and printing processes to achieve a specific look.
Disadvantages of Film Photography
However, film photography also has its disadvantages. It is more time-consuming than digital photography, as the film must be processed and printed or scanned to produce a digital image. Film is also more expensive than digital media, and the process of developing and printing film can be costly. Additionally, film is less forgiving than digital photography, as there is no ability to edit or correct mistakes after the film has been processed.
Introduction to Digital Photography
Digital photography, on the other hand, involves the use of an electronic sensor to capture and record images. The sensor converts light into digital data, which is then stored on a memory card or hard drive. Digital photography offers a number of advantages over film photography, including instant feedback, easy editing, and the ability to shoot large numbers of images without the need for film or processing.
Advantages of Digital Photography
One of the most significant advantages of digital photography is its ability to review and edit images immediately after they are taken. This allows photographers to adjust settings, compose shots, and check for errors in real-time, making it easier to get the perfect shot. Digital photography also offers a much wider range of exposure options than film photography, making it easier to capture images in challenging lighting conditions. Additionally, digital images can be easily shared and stored on a variety of devices, making it easier to manage and share photographs.
Disadvantages of Digital Photography
However, digital photography also has its disadvantages. One of the most significant is the potential for image quality degradation over time, as digital images are subject to data rot and other forms of degradation. Additionally, digital cameras and equipment can be expensive, and the cost of memory cards and other media can add up quickly. Finally, digital photography can be less intuitive than film photography, and may require more time and effort to master.
Analog vs. Digital: Key Differences
Analog and digital photography are two distinct types of photography that differ in various aspects. Analog photography is the traditional form of photography that has been around for more than a century, while digital photography is a relatively new technology that has been widely adopted in recent years. Here are some key differences between analog and digital photography:
Film vs. Sensor
The most significant difference between analog and digital photography is the way they capture images. Analog photography uses film to capture an image, while digital photography uses a sensor. The film used in analog photography is a light-sensitive material that records an image when exposed to light. The sensor in digital photography works similarly, capturing light and converting it into digital data that can be processed and stored on a memory card.
Chemical vs. Digital Processing
Analog photography relies on chemical processing to develop the film and create a print. This process involves several steps, including exposing the film to light, processing the film to create a negative, and then printing the negative onto paper to create a positive image. Digital photography, on the other hand, uses digital processing to create an image. This process involves capturing the image with a digital camera, transferring the data to a computer, and then processing the image using software.
Image Quality
Another significant difference between analog and digital photography is the quality of the images they produce. Analog photography has a natural, warm, and organic look that is difficult to replicate in digital photography. Digital photography, on the other hand, has higher resolution and a wider dynamic range, allowing for more detailed and accurate representation of an image. However, digital photography can suffer from noise and artifacts, especially in low-light conditions.
Cost
Analog photography is generally more expensive than digital photography, especially when you consider the cost of film, processing, and printing. Digital photography, on the other hand, is relatively inexpensive, especially when you consider the cost of memory cards and printer ink. However, the cost of digital photography can add up over time, especially when you factor in the cost of equipment, software, and storage.
In summary, analog and digital photography differ in various aspects, including the way they capture images, the processing methods used, the quality of the images they produce, and the cost involved. While both types of photography have their advantages and disadvantages, digital photography has become the preferred choice for many photographers due to its convenience, versatility, and affordability.
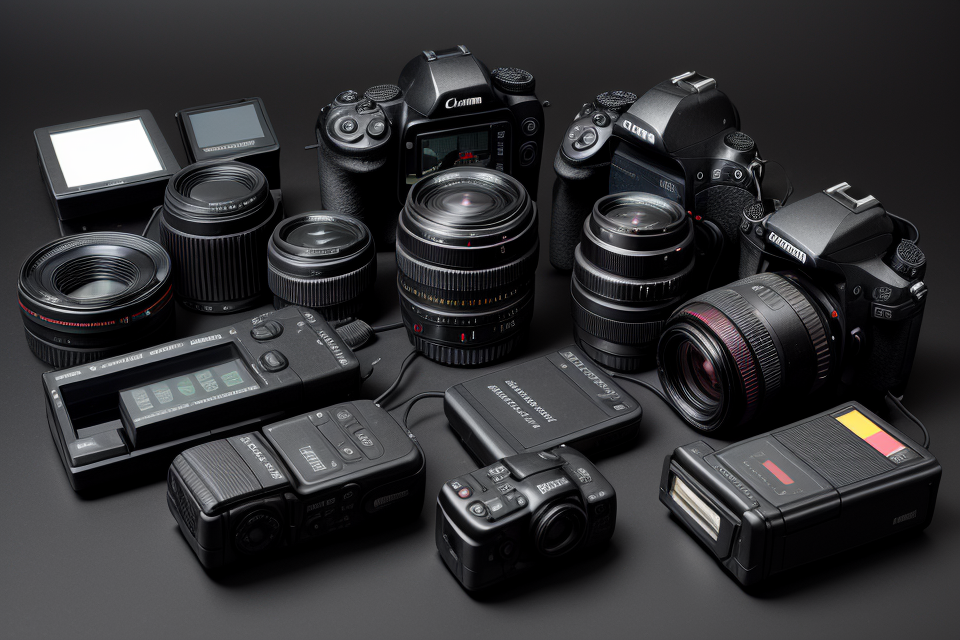
Digital SLR Cameras
Digital Single-Lens Reflex (SLR) cameras are one of the two primary types of digital photography. These cameras are characterized by their use of a mirror and a pentaprism to reflect light from the lens to an optical viewfinder. This allows the photographer to see exactly what the camera sees, including depth of field and exposure, before taking the picture.
Digital SLR cameras offer several advantages over other types of digital cameras. They have larger sensors, which means they can capture more light and produce higher-quality images. They also offer greater control over exposure, focus, and other settings, making them ideal for professional photographers and serious enthusiasts.
Another advantage of digital SLR cameras is their interchangeable lens system. This allows photographers to use different lenses to suit different shooting situations, such as wide-angle or telephoto lenses. This flexibility is particularly useful for professional photographers who need to adapt to a wide range of shooting conditions.
Digital SLR cameras also offer faster autofocus and shutter speeds than other types of digital cameras. This is because the mirror in the camera allows light to be directed to a phase-detection autofocus sensor, which can quickly and accurately determine the focus of the image. This is particularly important for capturing fast-moving subjects, such as sports or wildlife.
However, digital SLR cameras can be more complex and expensive than other types of digital cameras. They also require more accessories, such as lenses and external flash units, which can add to the cost. Additionally, digital SLR cameras can be heavier and bulkier than other types of cameras, making them less convenient for travel or everyday use.
Overall, digital SLR cameras are a popular choice for professional photographers and serious enthusiasts who want the highest quality images and the greatest control over their shooting settings. While they may be more complex and expensive than other types of digital cameras, their flexibility and performance make them a valuable tool for many photographers.
Point-and-Shoot Cameras
Point-and-shoot cameras are a type of digital camera that are designed to be easy to use and portable. They are called “point-and-shoot” because they allow users to simply point the camera at their subject and press the shutter button to take a photo. These cameras are popular among amateur photographers and those who are new to photography because they are generally less expensive than other types of cameras and require less technical knowledge to operate.
Key Features of Point-and-Shoot Cameras
- Autofocus: Most point-and-shoot cameras have an autofocus feature, which automatically adjusts the focus of the lens to ensure that the subject is in focus.
- Automatic Exposure: These cameras also have an automatic exposure feature, which adjusts the camera’s settings to ensure that the photo is properly exposed.
- Image Stabilization: Some point-and-shoot cameras have image stabilization technology, which helps to reduce blur in photos taken in low light or when the camera is moved during exposure.
- Zoom: Many point-and-shoot cameras have a built-in zoom lens, which allows users to zoom in on their subject without the need for additional lenses.
- Built-in Flash: Most point-and-shoot cameras have a built-in flash, which helps to illuminate the subject in low light conditions.
Pros and Cons of Point-and-Shoot Cameras
- Pros:
- Easy to use and intuitive
- Portable and lightweight
- Generally less expensive than other types of cameras
- Automatic features make it easy to take good photos
- Built-in flash and zoom can be useful in certain situations
- Cons:
- Limited control over settings and features
- Lower image quality compared to other types of cameras
- Lens quality may not be as good as higher-end cameras
- Not suitable for professional or advanced photography work
Overall, point-and-shoot cameras are a great option for those who are new to photography or looking for a simple and easy-to-use camera for everyday use. However, they may not be suitable for more advanced or professional photography work due to their limited features and lower image quality.
Smartphone Photography
The advancements in smartphone technology have made it possible for users to capture high-quality images without the need for expensive equipment. Smartphone photography has become increasingly popular due to the convenience and accessibility it provides. In this section, we will explore the key features and characteristics of smartphone photography.
Advantages of Smartphone Photography
One of the most significant advantages of smartphone photography is its accessibility. Unlike traditional digital cameras, smartphones are always carried by their owners, making it easy to capture spontaneous moments without any delay. Additionally, smartphones offer a wide range of features, such as built-in editing tools and social media integration, which enhance the overall photography experience.
Camera Features
Smartphone cameras have come a long way since their initial release. Most modern smartphones have multiple cameras, including primary, ultra-wide, and telephoto lenses, which provide greater flexibility in framing and composition. Some smartphones also feature specialized lenses, such as macro lenses for close-up shots and depth sensors for improved bokeh effects.
The image quality of smartphone photography has significantly improved in recent years. Many smartphones now feature high-resolution sensors, larger apertures, and advanced software algorithms that enhance image clarity and reduce noise. Furthermore, the ability to shoot in RAW format allows for greater flexibility in post-processing and editing.
Challenges and Limitations
Despite its many advantages, smartphone photography also has its challenges and limitations. The small sensor size and limited physical controls can make it difficult to achieve precise focus and exposure. Additionally, the use of digital zoom can result in a loss of image quality, and low-light conditions can be challenging to capture without a tripod or external lighting.
Tips and Techniques
To get the most out of smartphone photography, it is essential to understand some basic tips and techniques. Using natural light sources, such as windows or outdoor environments, can enhance image quality and reduce the need for external lighting. Additionally, experimenting with different shooting modes, such as portrait mode or panorama mode, can add creative depth to your shots. Finally, investing in a good tripod or stabilizing device can help mitigate the effects of camera shake and enable longer exposures in low-light conditions.
Overall, smartphone photography offers a convenient and accessible way to capture high-quality images. With its many features and capabilities, it is possible to create stunning photos that rival those taken with traditional digital cameras.
Mirrorless Cameras
Mirrorless cameras are a relatively new type of digital camera that have gained popularity in recent years. They are called “mirrorless” because they do not have a mirror to reflect light from the lens to the viewfinder, unlike traditional DSLRs. Instead, mirrorless cameras use an electronic viewfinder or the rear LCD screen to preview the image.
One of the main advantages of mirrorless cameras is their compact size. Since they do not have a mirror or a pentaprism, they can be smaller and lighter than DSLRs, making them a popular choice for travel and everyday use. Additionally, many mirrorless cameras offer interchangeable lens systems, allowing photographers to switch between different types of lenses depending on their needs.
Another advantage of mirrorless cameras is their autofocus system. Many mirrorless cameras use a hybrid autofocus system that combines both contrast-detect and phase-detect autofocus. This allows for fast and accurate autofocus, even in low-light conditions.
However, mirrorless cameras also have some disadvantages. One of the main drawbacks is their battery life. Since they do not have a mirror to actuate the shutter, mirrorless cameras rely on electronic sensors to capture the image. This can drain the battery quickly, especially when using live view or the electronic viewfinder.
Another potential disadvantage of mirrorless cameras is their lack of native lenses. While many mirrorless cameras offer a wide range of lens options, they may not have as many native lenses available as DSLRs. This can make it more difficult to find a specific lens for a particular shooting situation.
Overall, mirrorless cameras offer a compact and lightweight alternative to traditional DSLRs, with fast autofocus and advanced features. However, they may have some drawbacks, such as shorter battery life and fewer native lenses.
Comparison of Digital Camera Types
When it comes to digital photography, there are two main types of cameras: DSLR (Digital Single-Lens Reflex) and mirrorless. Both have their own unique advantages and disadvantages, and understanding these differences can help you choose the right camera for your needs.
DSLR Cameras
DSLR cameras are the traditional type of digital camera, and they use a mirror to reflect light from the lens to an optical viewfinder. When you press the shutter button, the mirror flips up, allowing light to hit the image sensor and capture the image. DSLRs are known for their excellent image quality, versatility, and ease of use. They typically have a larger body size and weight compared to mirrorless cameras, but they also have a larger selection of lenses and accessories available.
Mirrorless Cameras
Mirrorless cameras, on the other hand, do not have a mirror or an optical viewfinder. Instead, they use an electronic viewfinder or the rear LCD screen to preview the image. Light from the lens is directly captured by the image sensor, which then sends the image to the rear screen or electronic viewfinder. Mirrorless cameras are generally smaller and lighter than DSLRs, making them a popular choice for travel and everyday use. They also tend to have better autofocus systems and are often more affordable than DSLRs.
Comparison of Features
When comparing DSLR and mirrorless cameras, there are several key features to consider:
- Size and weight: Mirrorless cameras are generally smaller and lighter than DSLRs, making them easier to carry around.
- Image quality: Both types of cameras can produce high-quality images, but DSLRs tend to have better low-light performance and more dynamic range.
- Autofocus: Mirrorless cameras typically have better autofocus systems than DSLRs, especially when it comes to tracking moving subjects.
- Lens selection: DSLRs have a larger selection of lenses available, but mirrorless cameras are catching up with new lenses being released all the time.
- Battery life: DSLRs tend to have better battery life than mirrorless cameras, especially when using the viewfinder.
Conclusion
Choosing between a DSLR and a mirrorless camera ultimately depends on your personal preferences and needs. If you prioritize image quality, low-light performance, and a larger selection of lenses, a DSLR may be the better choice. If you value portability, autofocus performance, and affordability, a mirrorless camera may be the way to go. Regardless of which type of camera you choose, with the right knowledge and practice, you can capture stunning images and enhance your photography skills.
Factors to Consider When Choosing a Digital Camera
When choosing a digital camera, there are several factors to consider. Here are some of the most important ones:
- Sensor Size: The size of the camera’s sensor affects the quality of the images it produces. Full-frame sensors are larger and generally produce better image quality, while smaller sensors found in smartphones and point-and-shoot cameras may have more noise and lower dynamic range.
- Resolution: The number of megapixels in a camera’s sensor determines how large prints can be made from the images. Higher resolution cameras can produce larger prints with more detail, but they also require more storage space and may be more difficult to use.
- Lens Selection: Different types of photography require different lenses. If you plan to take landscape photos, a wide-angle lens may be necessary. For portraits, a prime lens or a telephoto lens can create a shallow depth of field, which can produce a pleasing background blur.
- Autofocus and Shutter Speed: Autofocus speed and shutter speed are important for capturing fast-moving subjects. Cameras with faster autofocus and higher shutter speeds are better suited for sports and action photography.
- Battery Life: The battery life of a camera can be a crucial factor, especially if you plan to take a lot of photos. Look for cameras with long battery life or consider an external battery pack to ensure you can keep shooting all day.
- Weight and Size: If you plan to carry your camera with you everywhere you go, weight and size may be important factors. Compact cameras and smartphones are generally more portable than DSLRs and mirrorless cameras.
- Price: The price of a camera can vary widely, from a few hundred dollars to several thousand. Consider your budget and what features are most important to you when choosing a camera.
By considering these factors, you can find a digital camera that meets your needs and helps you capture the images you want.
Digital Image Formats
JPEG
JPEG (Joint Photographic Experts Group) is a widely used digital image format that employs lossy compression to reduce the size of images while maintaining a high level of quality. JPEG is a popular choice for photographers due to its ability to compress large files without significant loss of image quality.
Here are some key points to understand about JPEG format:
- Lossy Compression: JPEG uses lossy compression, which means that some image data is discarded to reduce the file size. This results in a loss of image quality, but the difference is usually imperceptible to the human eye.
- 256-Color Palette: JPEG uses a 256-color palette, which limits the number of colors that can be represented in an image. This allows for more efficient compression of image data.
- 8-Bit Channels: JPEG uses 8-bit channels for each color component (red, green, and blue), which means that it can represent 256 different colors for each channel. This provides a wide range of color options for images.
- Suitable for Web and Print: JPEG is suitable for use on the web and in print, as it provides a good balance between image quality and file size. It is also widely supported by web browsers and image editing software.
- Not Ideal for Professional Printing: Despite its versatility, JPEG is not ideal for professional printing, as it can suffer from image degradation and loss of detail when printed at high resolutions. For professional printing, other formats such as TIFF or RAW may be more appropriate.
Overall, JPEG is a versatile and widely used digital image format that offers a good balance between image quality and file size. It is suitable for most purposes, including web use and printing, but may not be ideal for professional printing or situations where the highest image quality is required.
RAW
RAW image format is a digital image file that contains all the information captured by a camera’s sensor during exposure. This format is different from other image formats like JPEG, TIFF, or PNG, which are processed and compressed by the camera before being saved to the memory card. RAW files are often used by professional photographers because they provide more flexibility in post-processing and can preserve more image detail.
One of the main advantages of RAW image format is that it allows for greater flexibility in post-processing. Because the file contains all the original image data captured by the camera’s sensor, it can be edited in various ways without losing image quality. This is particularly useful when trying to recover details in shadows or highlights, or when trying to adjust the white balance or color saturation of an image.
Another advantage of RAW image format is that it can preserve more image detail than other formats. Because the file is not processed or compressed by the camera, it contains all the original image data captured by the sensor. This means that when an image is processed and edited, the camera’s processor does not have to make any assumptions about the image data, which can result in a loss of detail.
However, it is important to note that RAW image format can also have some disadvantages. For example, because the files are larger than other image formats, they can take up a lot of storage space. Additionally, RAW image files can be more difficult to work with than other image formats, and require special software to edit and process them.
Overall, RAW image format can be a useful tool for photographers who want to have greater control over their images and preserve as much image detail as possible. However, it is important to consider the advantages and disadvantages of this format before deciding to use it for your photography needs.
GIF
GIF (Graphics Interchange Format) is a popular digital image format that is widely used for images that contain a limited color palette and are intended for use on the web. It is a lossless format, which means that it does not degrade the quality of the image as it is compressed and decompressed.
Compression and Decompression
GIF uses a process called LZW (Lempel-Ziv-Welch) compression to reduce the size of the image file without losing any image data. LZW compression works by finding repeated patterns in the image data and replacing them with a smaller set of instructions that can be used to recreate the pattern.
When an image is saved in the GIF format, it is compressed and the compressed data is saved to the file. When the image is displayed or printed, the compressed data is decompressed and the image is reconstructed from the original data.
Color Palette
One of the main advantages of the GIF format is its ability to support a limited color palette. GIF images can contain a maximum of 256 colors, which makes them ideal for simple graphics and images with a small number of colors. This is because the limited color palette allows the images to be compressed more efficiently, resulting in smaller file sizes.
Transparency
Another advantage of the GIF format is its support for transparency. This means that images can be made to appear semi-transparent or to have a transparent background. This is achieved by adding a separate color channel to the image data that represents the transparency of each pixel.
Animated GIFs
GIFs are also commonly used to create simple animations. Animated GIFs are created by combining a series of images into a single file, with each image being displayed for a specific duration of time. This allows for the creation of simple animations that can be used for entertainment or to convey information.
Overall, the GIF format is a versatile and widely used format that is well suited for images with a limited color palette and for simple animations. Its support for transparency and compression make it an ideal format for use on the web.
When to Use JPEG, RAW, and GIF
When it comes to digital photography, understanding the different image formats available is crucial for capturing and storing your photos. JPEG, RAW, and GIF are three popular formats used in digital photography, each with its own unique characteristics and benefits.
JPEG
JPEG is the most commonly used image format for storing and sharing photos. It is a lossy format, meaning that some image data is lost during compression. This loss of data can result in a decrease in image quality, particularly when the image is edited or manipulated. However, JPEG is ideal for everyday use, as it allows for smaller file sizes and faster upload and download times.
RAW
RAW is an image format that is not processed or compressed, allowing for greater flexibility in post-processing. RAW files retain all of the original image data, including color and tone information, which can be adjusted during post-processing to create a final image that meets the photographer’s desired look. RAW is ideal for professional photographers or those who want to have complete control over their images.
GIF
GIF is a lossless image format that is commonly used for images with a limited color palette, such as graphics or simple images. It allows for the creation of images with a maximum of 256 colors, and is often used for web graphics and social media images. GIF files are also ideal for creating simple animations, as they can be saved as a series of images that loop to create an animation effect.
In summary, when deciding which image format to use, consider the intended use of the image, the desired level of image quality, and the need for flexibility in post-processing. Whether it’s the small file size and fast upload time of JPEG, the greater flexibility of RAW, or the simple graphics and animations of GIF, understanding the different image formats available will help you capture and share your photos with greater ease and success.
Tips for Working with Different Image Formats
When it comes to digital photography, understanding the different image formats is crucial for achieving the desired results. Here are some tips for working with different image formats:
- Choose the right format for your needs: Different image formats are suited for different purposes. For example, JPEG is ideal for photographs that will be used on the web or printed on paper, while RAW is better for photographs that will be heavily edited or used in professional applications.
- Understand the pros and cons of each format: Each image format has its own set of pros and cons. For example, JPEGs are compressed, which makes them easy to share and store, but they can suffer from image degradation over time. RAW files, on the other hand, are not compressed and can be edited extensively, but they take up a lot of storage space and require special software to edit.
- Be mindful of file size: Large image files can slow down your computer and make it difficult to share your work. Be mindful of the file size when saving your images, and consider compressing them if necessary.
- Use the right settings: Different image formats have different settings that can affect the quality of your images. Make sure to use the right settings for each format to get the best results.
- Convert to other formats as needed: Sometimes, you may need to convert your images to a different format for specific applications. Be sure to understand the differences between the formats and choose the right one for your needs.
By following these tips, you can ensure that you are working with the right image formats for your needs and getting the best results from your digital photography.
File Size, Quality, and Compression
In digital photography, file size refers to the amount of storage space that an image requires on a device. This is determined by several factors, including the resolution, number of colors, and compression method used. Higher resolution images will have a larger file size, while lower resolution images will have a smaller file size. The number of colors in an image also affects file size, with images containing more colors requiring more storage space. Finally, the compression method used to save an image can significantly impact file size. Compression methods such as JPEG and PNG can reduce file size by removing redundant data, but can also decrease image quality.
File size is an important consideration for photographers, as larger files can be more difficult to store and transfer. Additionally, larger files may take longer to upload and download, which can be a concern for photographers who share their work online. However, larger file sizes also allow for greater flexibility in post-processing and printing, as they contain more image data.
Quality, on the other hand, refers to the visual appearance of an image. This is determined by several factors, including resolution, color depth, and compression. Higher quality images will have a higher resolution, more colors, and less compression artifacts. Resolution refers to the number of pixels in an image, with higher resolution images having more pixels and therefore more detail. Color depth refers to the number of colors that an image can display, with higher color depth images having more vibrant and accurate colors. Compression artifacts refer to any distortion or loss of image data that can occur when an image is compressed.
Photographers must balance file size and quality when choosing a digital image format. For example, JPEG is a popular format for photographers because it allows for high quality images with relatively small file sizes. However, JPEG images are not lossless, meaning that some image data is lost during compression. This can be a concern for photographers who want to make large prints or need to edit their images extensively. In these cases, photographers may choose to use a lossless format such as TIFF or PNG.
Overall, understanding file size, quality, and compression is crucial for photographers who want to get the most out of their digital images. By choosing the right format and settings, photographers can ensure that their images look their best and are easy to store and share.
Metadata and Digital Images
Metadata is data that provides information about other data. In the context of digital photography, metadata refers to the information that is embedded within a digital image file. This information can include details such as the camera model and settings used to capture the image, the date and time the image was taken, and any copyright or ownership information.
Metadata can be used for a variety of purposes, including organizing and searching for images, providing context for images, and enforcing copyright and licensing agreements. For example, metadata can be used to quickly identify all images taken with a particular camera model, or to ensure that images are only used for their intended purpose.
There are different types of metadata that can be embedded in a digital image file, including:
- Exif metadata: This type of metadata is specific to digital images and includes information such as the camera model and settings used to capture the image, the date and time the image was taken, and GPS location information.
- IPTC metadata: This type of metadata is used for news and editorial photography, and includes information such as the photographer’s name, caption, and copyright information.
- XMP metadata: This type of metadata is used by Adobe Photoshop and other software applications, and includes information such as color profiles and editing history.
While metadata can be useful for a variety of purposes, it is important to consider the privacy implications of embedding personal information within digital images. In some cases, metadata can reveal sensitive information such as the location of a photograph or the identity of the photographer. It is therefore important to be mindful of the metadata that is embedded within digital images, and to take steps to protect personal information when necessary.
Working with RAW Files
RAW files are digital images that have not been processed or compressed. They contain all the data captured by the camera’s sensor, including color, brightness, and exposure information. Shooting in RAW format offers several advantages over shooting in JPEG or other processed formats.
Advantages of Shooting in RAW Format
- RAW files provide more flexibility in post-processing, allowing photographers to adjust the exposure, white balance, and other settings without losing image quality.
- RAW files can be edited multiple times without degrading the image.
- RAW files can be processed to create high-quality images for printing or other professional uses.
Working with RAW Files
Working with RAW files requires specialized software, such as Adobe Lightroom or Camera Raw. These programs allow photographers to view, edit, and process RAW files. When working with RAW files, it is important to understand the following:
- RAW files are larger than processed files, so storage space is required.
- RAW files require more processing time, so photographers need to allow extra time for editing.
- RAW files are not compatible with all software, so it is important to ensure that the software used can handle RAW files.
In summary, shooting in RAW format offers photographers more flexibility and control over their images. While working with RAW files requires specialized software and more processing time, the benefits of RAW format outweigh the drawbacks.
Converting RAW to JPEG or Other Formats
Converting RAW to JPEG or other formats is an essential step in the digital photography workflow. RAW is the native file format for many digital cameras, while JPEG is a commonly used file format for storing and sharing images. Both formats have their advantages and disadvantages, and choosing the right format depends on your specific needs and preferences.
RAW files contain more detailed information about the image, including the sensor data, than JPEG files. This means that RAW files are less compressed and can be edited more easily without losing image quality. However, RAW files are also larger in size and require more storage space, and they are not directly viewable on most devices.
On the other hand, JPEG files are smaller in size and can be viewed directly on most devices. They are also optimized for printing and sharing, making them ideal for web use and social media. However, JPEG files are compressed, which can result in a loss of image quality, especially when editing the image.
To convert RAW files to JPEG or other formats, you can use software such as Adobe Lightroom or Photoshop. These programs allow you to adjust the settings, such as brightness, contrast, and saturation, to optimize the image for the desired output. It is essential to have a good understanding of the different settings and how they affect the image quality when converting RAW files.
In summary, converting RAW to JPEG or other formats is an important step in the digital photography workflow. It is essential to understand the advantages and disadvantages of each format and choose the right format based on your specific needs and preferences. With the right software and settings, you can optimize the image quality and achieve the desired output for your images.
Editing Digital Images
Basic Image Editing
Basic image editing involves making simple adjustments to an image’s brightness, contrast, color, and other basic elements. This type of editing is typically done using photo editing software such as Adobe Photoshop, Lightroom, or GIMP. Here are some common basic image editing techniques:
- Adjusting Brightness and Contrast: Brightness and contrast are two of the most basic image editing adjustments that can be made to an image. Adjusting the brightness of an image can make it lighter or darker, while adjusting the contrast can make the image appear more vibrant or muted.
- Adjusting Color: Color adjustments can be made to change the overall color tone of an image, such as making it more warm or cool. This can be done by adjusting the color temperature, saturation, and hue of the image.
- Removing Red-Eye: Red-eye is a common issue in digital photography and can be easily fixed using photo editing software. To remove red-eye, the software will need to detect the red-eye in the image and then replace it with a neutral color.
- Cropping and Resizing: Cropping and resizing are two basic image editing techniques that can be used to improve the composition of an image. Cropping can be used to remove unwanted elements from an image, while resizing can be used to make an image smaller or larger.
- Sharpening: Sharpening is an image editing technique that can be used to improve the clarity and definition of an image. This is often done by adjusting the contrast of the edges in an image.
These are just a few examples of basic image editing techniques that can be used to improve the quality of digital images. Whether you’re a professional photographer or a hobbyist, understanding these basic editing techniques can help you take your digital photography to the next level.
Advanced Image Editing
When it comes to editing digital images, there are a variety of tools and techniques that can be used to enhance and improve the overall quality of the image. One such technique is known as advanced image editing.
Advanced image editing involves the use of specialized software programs to make more complex changes to the image. This can include things like removing unwanted elements from the image, adjusting the color and brightness of specific areas, and adding special effects.
One of the most popular software programs used for advanced image editing is Adobe Photoshop. This program offers a wide range of tools and features that can be used to make precise changes to the image, including the ability to adjust the exposure, contrast, and saturation of the image.
Another important aspect of advanced image editing is the use of layers. Layers allow the user to make changes to specific parts of the image without affecting the rest of the image. This is especially useful when making complex changes to the image, as it allows the user to see exactly what changes are being made in real-time.
Overall, advanced image editing is a powerful tool that can be used to improve the overall quality of digital images. Whether you’re a professional photographer or simply someone who enjoys taking pictures, understanding the basics of advanced image editing can help you to take your images to the next level.
Color Correction
When it comes to editing digital images, color correction is a crucial step in the process. This is because it allows photographers to adjust the colors in their images to create a more visually appealing result. In this section, we will discuss the basics of color correction and how it can be used to enhance digital photographs.
One of the first things that photographers need to understand when it comes to color correction is the color model that is being used. There are three primary color models that are used in digital photography: RGB, CMYK, and LAB. Each of these models represents colors in a different way, and they are used for different purposes.
RGB is the most commonly used color model for digital photography. It is an additive color model, which means that it adds colors together to create a final image. This model is commonly used for screen-based applications such as monitors and projectors.
CMYK is another color model that is commonly used in digital photography. It is a subtractive color model, which means that it subtracts colors from white paper to create a final image. This model is commonly used for print-based applications such as newspapers, magazines, and books.
LAB is a color model that is used for color correction and is based on the human eye’s perception of color. It is a device-independent color space, which means that it can be used on any device without altering the colors.
Once photographers have a basic understanding of the color models that are used in digital photography, they can begin to apply color correction techniques to their images. One of the most common techniques is adjusting the color balance of an image. This involves adjusting the relative proportions of the colors in an image to create a more pleasing result.
Another technique that is commonly used in color correction is adjusting the saturation of colors in an image. This involves increasing or decreasing the intensity of the colors in an image to create a more vibrant or muted result.
In addition to these techniques, photographers can also use color curves to adjust the tonal values of an image. This involves adjusting the brightness and contrast of specific colors in an image to create a more balanced result.
Overall, color correction is an essential aspect of digital photography. By understanding the basics of color models and applying color correction techniques, photographers can create images that are more visually appealing and better suited to their intended purpose.
Cropping and Resizing
When it comes to editing digital images, two of the most common techniques are cropping and resizing. Both of these techniques can greatly enhance the appearance of your photos and help you to create the perfect image for your needs. In this section, we will explore these techniques in more detail and discuss how they can be used to improve your digital photography.
Cropping
Cropping is the process of selectively removing parts of an image in order to change its shape and size. This technique is often used to remove unwanted elements from an image, such as people or objects that are intruding on the scene. Cropping can also be used to change the aspect ratio of an image, or to create a specific composition.
When cropping an image, it is important to consider the composition and balance of the scene. You should try to maintain the original integrity of the image while still achieving the desired effect. Cropping should be done carefully and thoughtfully, as it can greatly affect the overall impact of the photo.
There are several different tools and techniques that can be used for cropping, including the crop tool, the lasso tool, and the magic wand tool. Each of these tools has its own unique features and capabilities, and can be used to achieve different effects.
Resizing
Resizing is the process of changing the size of an image. This technique is often used to adjust the size of a photo to fit a specific format or requirement. Resizing can be done in a variety of ways, including manually adjusting the dimensions of the image, or using automated tools and software.
When resizing an image, it is important to consider the resolution and quality of the photo. You should try to maintain the original resolution of the image while still achieving the desired size. Resizing should be done carefully and thoughtfully, as it can greatly affect the overall quality of the photo.
There are several different tools and techniques that can be used for resizing, including the resize tool, the scale tool, and the crop tool. Each of these tools has its own unique features and capabilities, and can be used to achieve different effects.
In conclusion, cropping and resizing are two essential techniques for editing digital images. By understanding how to use these techniques effectively, you can greatly enhance the appearance of your photos and create the perfect image for your needs. Whether you are a beginner or an experienced photographer, these techniques are sure to help you to take your digital photography to the next level.
Removing Red Eye
Red eye is a common issue that occurs in digital photography, especially in low light conditions or when using flash. It occurs when the flash from the camera reflects off the blood vessels in the subject’s eyes, resulting in a red glow. While it can add a dramatic effect to some photos, it is often undesirable and can make the subject’s eyes appear unnatural. Fortunately, there are several methods for removing red eye in digital images.
Manual Methods
One manual method for removing red eye is to use the paint tool in photo editing software to manually select and remove the red pixels around the subject’s eyes. This method can be time-consuming and requires a high level of precision, but it can provide more precise results than automatic methods.
Another manual method is to use the clone stamp tool to select and replace the red pixels with surrounding skin tones. This method can also be time-consuming, but it allows for more precise control over the area being corrected.
Automatic Methods
For faster and more automated red eye removal, many photo editing software programs have built-in tools specifically designed for this purpose. These tools use algorithms to detect and remove the red eye automatically, which can save a significant amount of time.
Some software programs also allow users to adjust the sensitivity of the red eye detection, which can help to ensure that only the red eye is removed and not other colors in the image. Additionally, some software programs allow users to apply a “before and after” preview, which can help to ensure that the red eye removal is satisfactory before saving the final image.
Tips and Considerations
When removing red eye from digital images, it is important to consider the lighting conditions and the subject’s eye color. Darker eyes may require more aggressive red eye removal, while lighter eyes may require less. Additionally, removing red eye can sometimes result in a loss of detail in the subject’s eyes, so it is important to strike a balance between removing the red eye and preserving the integrity of the image.
In conclusion, removing red eye from digital images is a common but important task for photographers and photo editors. Whether using manual or automatic methods, it is important to consider the lighting conditions, subject’s eye color, and overall image integrity when removing red eye.
Retouching and Restoration
Digital photography has revolutionized the way we capture and store images. With the ability to edit digital images, photographers can enhance their photographs in ways that were once impossible. Two common types of image editing are retouching and restoration.
Retouching
Retouching is the process of removing or modifying specific parts of an image. This can include removing blemishes, smoothing wrinkles, or enhancing the color and tone of an image. Retouching can be done using a variety of software programs, such as Adobe Photoshop, and can be done on both digital and printed photographs.
Techniques
There are several techniques used in retouching, including:
- Skin smoothing: This technique is used to remove blemishes and wrinkles from portraits. It involves using a combination of layers and masks to selectively remove imperfections from the skin.
- Color correction: This technique is used to enhance the color and tone of an image. It involves adjusting the brightness, contrast, and saturation of specific areas of the image to create a more balanced and visually appealing image.
- Removing objects: This technique is used to remove unwanted objects from an image. It involves using layers and masks to selectively remove the object from the image.
Advantages and Disadvantages
The advantages of retouching include:
- It can enhance the visual appeal of an image by removing blemishes and imperfections.
- It can be used to create a more balanced and visually appealing image by adjusting the color and tone.
- It can be used to remove unwanted objects from an image.
The disadvantages of retouching include:
- It can be time-consuming and labor-intensive.
- It can be expensive, especially if done by a professional.
- It can be difficult to achieve a natural look when retouching skin.
Restoration
Restoration is the process of repairing and enhancing damaged or degraded photographs. This can include removing scratches, tears, and other types of damage, as well as restoring lost detail and color. Restoration can be done using a variety of software programs, such as Adobe Photoshop, and can be done on both digital and printed photographs.
There are several techniques used in restoration, including:
- Scratch removal: This technique is used to remove scratches and other types of damage from photographs. It involves using layers and masks to selectively remove the damage from the image.
- Dust removal: This technique is used to remove dust and other particles from photographs. It involves using layers and masks to selectively remove the dust from the image.
The advantages of restoration include:
- It can enhance the visual appeal of an image by removing scratches and other types of damage.
- It can be used to restore lost detail and color in damaged photographs.
- It can increase the value of an image by restoring it to its original condition.
The disadvantages of restoration include:
- It can be difficult to achieve a natural look when restoring damaged photographs.
Working with Layers
Working with layers is a fundamental aspect of digital image editing, as it allows photographers to manipulate individual elements of their photographs without affecting the overall composition. Layers can be added, removed, and rearranged to create complex and intricate designs that enhance the visual impact of digital images.
In digital image editing software, layers are typically represented as separate elements that can be easily manipulated and modified. Each layer can contain a different element of the photograph, such as a background, foreground, or text overlay. Photographers can then manipulate each layer independently, adjusting the opacity, color, and position of each element to create a desired effect.
One of the primary benefits of working with layers is the ability to make non-destructive edits to digital images. Unlike traditional image editing techniques, where modifications are made directly to the original image file, working with layers allows photographers to make changes without altering the original file. This ensures that the original image remains unchanged, while allowing for endless possibilities for creative manipulation and enhancement.
In addition to non-destructive editing, working with layers also allows for greater control over the final image. Photographers can experiment with different layering techniques, such as blending multiple layers together or adding textures and effects to individual elements, to create a unique and compelling visual effect.
However, working with layers can also be a complex and time-consuming process, requiring a certain level of technical skill and expertise. Photographers must be familiar with the software and tools used for layering, as well as have a solid understanding of composition and design principles to ensure that their final images are cohesive and visually appealing.
Overall, working with layers is a powerful tool for digital image editing, offering endless possibilities for creative expression and visual enhancement. With the right skills and knowledge, photographers can unlock the full potential of this technique to create stunning and memorable digital images.
Using Filters and Effects
When it comes to editing digital images, one of the most popular methods is using filters and effects. These tools can help enhance the look of your photos by adjusting the colors, brightness, contrast, and more. In this section, we will explore the different types of filters and effects available and how to use them effectively.
Types of Filters and Effects
There are many different types of filters and effects that you can use when editing digital images. Some of the most common include:
- Color filters: These filters can help enhance or change the colors in your photos. For example, you can use a red filter to make the sky appear more vibrant or a blue filter to make the water look more intense.
- Black and white filters: These filters can convert your photos into black and white or sepia tones. This can be a great way to add a classic or nostalgic look to your images.
- Skylight filters: These filters can add a special effect to your photos, such as making them look like they were taken with a tilt-shift lens or adding a starburst effect to lights.
- Split tone filters: These filters can add a specific color cast to your photos, such as making them look more warm or cool.
- Lens correction filters: These filters can help correct lens distortion and other issues that can occur when using certain lenses.
How to Use Filters and Effects
Using filters and effects is easy. All you need to do is open your photo editing software and select the filter or effect you want to use. Most software will allow you to preview the effect before applying it to your image.
To apply a filter or effect, simply click on the filter or effect and then click on the “Apply” or “OK” button. Some software may also allow you to adjust the intensity of the effect, so you can experiment until you find the perfect look for your photo.
In addition to using pre-made filters and effects, you can also create your own custom filters and effects. This can be a great way to add a unique look to your photos and make them stand out.
Tips for Using Filters and Effects
Here are a few tips to keep in mind when using filters and effects:
- Use filters and effects sparingly. Too many filters and effects can make your photos look overprocessed and unnatural.
- Experiment with different filters and effects to find the ones that work best for your photos.
- Don’t be afraid to try new things and be creative with your photo editing.
- Always save a copy of your original photo before applying any filters or effects, in case you want to revert back to the original later.
By following these tips and experimenting with different filters and effects, you can enhance your digital images and create stunning, unique photos.
Saving and Exporting Edited Images
When editing digital images, it is important to understand how to save and export your work. The two types of digital photography, RAW and JPEG, have different methods for saving and exporting images.
Saving RAW Images
RAW images are unprocessed and contain all the original data from the camera’s sensor. To save a RAW image, you will need to use software that supports RAW files, such as Adobe Lightroom or Photoshop. When saving a RAW image, it is important to choose a file format that will preserve all the original data. The most common file formats for saving RAW images are Adobe’s Camera Raw (.CR2) and DNG (.DNG).
Exporting JPEG Images
JPEG images are processed and compressed, which reduces the file size and makes them easier to share. When exporting a JPEG image, you will need to choose a file format that supports JPEGs, such as JPEG (.JPG) or TIFF (.TIF). When exporting a JPEG image, it is important to choose a high-quality setting to ensure that the image looks good when viewed on a computer or printed.
Saving and Exporting Both Types of Images
It is important to note that RAW and JPEG images are saved and exported differently. RAW images should be saved as RAW files using software that supports RAW files, while JPEG images should be exported as JPEG files using software that supports JPEG files. It is also important to choose the appropriate file format for each type of image.
Summary
Understanding how to save and export digital images is an important part of digital photography. When editing RAW images, it is important to save them as RAW files using software that supports RAW files. When exporting JPEG images, it is important to choose a high-quality setting and save them as JPEG files using software that supports JPEG files. By following these guidelines, you can ensure that your digital images look their best.
Optimizing Images for Web and Print
When it comes to editing digital images, one of the most important steps is optimizing them for both web and print. This process involves adjusting the image size, resolution, and file format to ensure that the image looks its best on different devices and in different contexts. Here are some key things to keep in mind when optimizing images for web and print:
- Image Size: The size of an image can have a big impact on how it looks online. For web use, it’s important to keep images relatively small, so they load quickly on pages. However, for print, larger images are often needed to ensure that the final product looks good.
- Resolution: Resolution refers to the number of pixels in an image. For web use, a resolution of 72-96 dpi is typically sufficient, while for print, a resolution of 300 dpi or higher is recommended.
- File Format: The file format of an image can also affect how it looks online and in print. For web use, formats like JPEG and PNG are commonly used, while for print, formats like TIFF and EPS are more appropriate.
- Compression: When optimizing images for web use, it’s important to compress them to reduce their file size. This can help speed up page load times and improve overall user experience.
- Sharpening: When preparing images for print, it’s often necessary to sharpen them to ensure that they look crisp and clear. This can be done using photo editing software like Adobe Photoshop.
Overall, optimizing images for both web and print requires a bit of trial and error, as different images may require different adjustments. However, by following these guidelines, you can help ensure that your images look their best in any context.
Digital Photography Techniques
Composition
Composition is a crucial aspect of digital photography that involves the arrangement of visual elements in a photograph to create a desired effect. It is the process of deciding what to include in the frame and how to arrange those elements to create a compelling image. The rules of composition are not hard and fast, but they are guidelines that can help photographers create more visually appealing images.
Some of the key principles of composition include:
- The Rule of Thirds: This rule suggests that images should be composed with the main subject placed at one of the four intersection points of a grid of thirds. This creates a more dynamic and visually pleasing image.
- Leading Lines: Leading lines are lines in the image that lead the viewer’s eye to the main subject. These can be roads, lines on a building, or even the edge of a sidewalk.
- Framing: Framing is the process of using objects in the foreground to frame the main subject. This can create a more dynamic and interesting image.
- Symmetry: Symmetry is when the main subject is placed in the center of the image, creating a sense of balance and stability.
- Depth of Field: Depth of field refers to the range of distance in an image that appears in focus. A shallow depth of field can create a more dramatic image, while a deep depth of field can create a more documentary-style image.
By understanding and applying these principles of composition, photographers can create images that are more visually appealing and effective in conveying their message.
Lighting
Proper lighting is crucial in digital photography, as it can make or break an image. There are several types of lighting techniques that photographers can use to achieve the desired effect.
Types of Lighting
There are two main types of lighting in digital photography: natural lighting and artificial lighting.
Natural Lighting
Natural lighting is light that comes from outside the studio or location, such as sunlight or moonlight. It is a popular choice for photographers because it is often free and can create a soft, diffused light that is flattering to subjects. However, natural lighting can also be unpredictable, as it can change depending on the time of day, weather conditions, and other factors.
Artificial Lighting
Artificial lighting is light that is created by artificial sources, such as lamps, flashes, or strobes. It is a versatile option for photographers, as it can be controlled and adjusted to create a variety of effects. There are several types of artificial lighting, including continuous lighting and flash lighting.
Continuous Lighting
Continuous lighting is a type of artificial lighting that provides constant light without any interruption. It is often used for studio photography, as it allows photographers to see the results of their lighting adjustments in real-time. There are several types of continuous lighting sources, including tungsten, fluorescent, and LED lights.
Flash Lighting
Flash lighting is a type of artificial lighting that provides a burst of light for a short period of time. It is often used for still photography, as it can provide a high-intensity light source that is ideal for freezing motion or highlighting specific areas of an image. There are several types of flash lights, including speedlights and studio strobes.
Importance of Lighting
Lighting is a critical element in digital photography, as it can affect the mood, tone, and overall quality of an image. Proper lighting can bring out the best in a subject, while poor lighting can create harsh shadows, uneven tones, and other unwanted effects. As such, photographers must carefully consider their lighting choices when planning a shoot.
Tips for Lighting
Here are some tips for effective lighting in digital photography:
- Use natural light when possible, as it is often the most flattering and versatile light source.
- Consider the time of day and weather conditions when planning a shoot, as these can affect the quality of natural light.
- Use artificial lighting to supplement natural light or create specific effects.
- Experiment with different types of artificial lighting sources to find the best fit for your needs.
- Consider the size and shape of your subject when choosing a lighting setup.
- Use reflectors or diffusers to soften harsh light or create a more even light source.
- Pay attention to the direction and intensity of light, as these can affect the mood and tone of an image.
- Be aware of the shutter speed and aperture settings, as these can affect the exposure and depth of field in an image.
By following these tips and understanding the different types of lighting in digital photography, photographers can take their skills to the next level and create stunning images that captivate and inspire.
Focus and Depth of Field
When it comes to capturing an image, focus and depth of field are two essential concepts that every photographer should understand. These terms refer to the sharpness of the subject and the background in a photograph.
What is Focus?
Focus refers to the point in an image where the lens of the camera has been adjusted to capture the sharpest detail. The area in focus is usually the main subject of the photograph, but it can also include other elements in the frame.
What is Depth of Field?
Depth of field, on the other hand, refers to the range of distance in an image that appears in focus. This includes the foreground, middle ground, and background of the photograph. A shallow depth of field means that only a small portion of the image is in focus, while a deep depth of field means that most or all of the image is in focus.
Factors Affecting Focus and Depth of Field
Several factors can affect the focus and depth of field in a photograph, including:
- Aperture: A wider aperture (a smaller f-number) will result in a shallower depth of field, while a narrower aperture (a larger f-number) will result in a deeper depth of field.
- Distance: The closer the subject is to the camera, the shallower the depth of field will be. Conversely, the farther away the subject is, the deeper the depth of field will be.
- Focal length: A longer focal length (a higher magnification) will result in a shallower depth of field, while a shorter focal length (a lower magnification) will result in a deeper depth of field.
- Movement: If the subject or the camera is moving during the exposure, it can cause blur in the image, affecting the focus and depth of field.
The Importance of Focus and Depth of Field
Understanding focus and depth of field is crucial for photographers as it allows them to control the visual elements in their images. By adjusting the focus and depth of field, photographers can create a specific mood or effect in their photographs. A shallow depth of field, for example, can be used to isolate the subject from the background and create a sense of depth. On the other hand, a deep depth of field can be used to capture a wide scene with sharp detail from foreground to background.
Shutter Speed and Aperture
Shutter speed and aperture are two of the most important concepts in digital photography. They work together to control the amount of light that enters the camera and how long the camera’s shutter is open. Understanding how to adjust these settings can greatly improve your photos.
Shutter Speed
Shutter speed refers to the length of time that the camera’s shutter is open. This is measured in seconds or fractions of a second. A slower shutter speed allows more light into the camera, while a faster shutter speed allows less light in. Slower shutter speeds are typically used in low light conditions or to create a sense of motion in a photo. Faster shutter speeds are used to freeze fast-moving subjects or in bright light conditions.
Aperture
Aperture refers to the size of the camera’s aperture, which is the opening in the lens through which light passes. Aperture is measured in f-stops, and a larger aperture (a smaller f-stop number) allows more light into the camera, while a smaller aperture (a larger f-stop number) allows less light in. Aperture also has an effect on the depth of field in a photo, with a larger aperture resulting in a shallower depth of field and a smaller aperture resulting in a deeper depth of field.
Combining Shutter Speed and Aperture
Shutter speed and aperture are often used together to achieve the desired exposure in a photo. A correct exposure is when the photo is neither too dark nor too light. By adjusting the shutter speed and aperture, the photographer can control the amount of light that enters the camera and how long the shutter is open. This allows for creative control over the final image, including the ability to freeze motion or create a sense of motion, control the depth of field, and adjust for low light conditions.
It is important to note that changing one of these settings will affect the other. For example, if the photographer wants to use a slower shutter speed, they may need to adjust the aperture to let in more light or use a tripod to keep the camera steady. Similarly, if the photographer wants to use a larger aperture, they may need to adjust the shutter speed to avoid overexposing the photo.
Understanding how to adjust shutter speed and aperture is a crucial part of digital photography and can greatly improve the quality of your photos. With practice, you will be able to make accurate exposure adjustments and use these settings creatively to achieve the desired effect in your photos.
ISO and Noise Reduction
ISO
ISO (International Organization of Standardization) is a standard measurement for sensitivity to light in digital cameras. The ISO setting determines how sensitive the camera’s image sensor is to light. A higher ISO setting means the sensor is more sensitive to light, which allows for shooting in low light conditions. However, a higher ISO setting also increases the amount of digital noise in the image.
Noise Reduction
Noise reduction is a technique used to reduce the amount of digital noise in an image. Digital noise appears as random patterns of color that can degrade the overall quality of an image, especially in low light conditions. There are two main types of noise reduction techniques: in-camera noise reduction and post-processing noise reduction.
In-Camera Noise Reduction
In-camera noise reduction is a feature that is built into many digital cameras. This feature automatically reduces the amount of digital noise in an image when shooting in low light conditions. In-camera noise reduction works by processing the image before it is saved to the camera’s memory card.
Post-Processing Noise Reduction
Post-processing noise reduction is a technique that is performed after the image has been captured. This technique involves using software to reduce the amount of digital noise in the image. There are several software programs available that can be used for post-processing noise reduction, including Adobe Photoshop and Lightroom.
In conclusion, understanding ISO and noise reduction techniques is essential for capturing high-quality digital images. By adjusting the ISO setting and using noise reduction techniques, photographers can achieve better results in low light conditions and improve the overall quality of their images.
White Balance
White balance is a crucial concept in digital photography that determines the color temperature of the image. It refers to the process of adjusting the colors in an image to ensure that they appear natural and true to life.
White balance is particularly important when shooting in different lighting conditions, such as daylight, shade, tungsten light, or fluorescent light. Different light sources can produce colors that appear cold or warm, and white balance helps to correct this and ensure that the colors in the image appear natural.
There are several methods of adjusting white balance in digital photography, including automatic white balance, preset white balance, and manual white balance. Automatic white balance is the most common method and is usually selected by default on most cameras. This method uses the camera’s built-in light sensor to automatically adjust the white balance based on the ambient lighting conditions.
Preset white balance, on the other hand, allows the photographer to select a pre-defined white balance setting, such as daylight, shade, tungsten, or fluorescent, to match the lighting conditions. This method is useful when shooting in specific lighting conditions and can help to produce more accurate colors in the image.
Manual white balance, as the name suggests, allows the photographer to manually adjust the white balance settings on the camera. This method requires a good understanding of color temperature and the specific lighting conditions. Manual white balance can be adjusted using a gray card or a white/black reference card, which helps to provide a neutral reference point for the camera to adjust the white balance settings.
Overall, understanding and adjusting white balance is essential for achieving accurate and natural colors in digital photography. It can be a complex concept, but with practice and experience, photographers can develop a good understanding of white balance and use it to their advantage to produce high-quality images.
Experimenting with Different Techniques
When it comes to digital photography, there are a plethora of techniques that one can experiment with to achieve the desired outcome. Some of these techniques include adjusting the ISO, shutter speed, and aperture settings, utilizing lighting, composition, and focusing. Each of these techniques can greatly impact the final image and should be understood and utilized to their full potential. By experimenting with different techniques, photographers can expand their skill set and achieve more creative and dynamic images.
Developing Your Photography Skills
Mastering digital photography requires dedication, practice, and a willingness to learn and experiment. To become proficient in digital photography, you must develop your skills in various areas, including:
- Composition: Understanding the rules of composition, such as the rule of thirds, balance, and symmetry, is essential for creating visually appealing images. Practice composing your shots using these principles and experiment with different compositions to find what works best for you.
- Lighting: Lighting is one of the most critical elements of photography, and understanding how to use it to your advantage is crucial. Learn about different types of lighting, such as natural light, artificial light, and mixed lighting, and how to use them to create the desired mood and effect in your images.
- Exposure: Exposure is the amount of light that enters the camera’s sensor, and it is crucial to get it right to capture a well-exposed image. Learn about aperture, shutter speed, and ISO, and how to use them to control exposure and create the desired depth of field and motion effect.
- Editing: Editing is an essential part of digital photography, and learning how to edit your images can make a significant difference in the final result. Familiarize yourself with photo editing software and learn how to use it to enhance your images, correct any mistakes, and bring out the best in your photographs.
Developing your photography skills requires dedication and practice. Start by mastering the basics, such as composition, lighting, and exposure, and then move on to more advanced techniques, such as editing and post-processing. Practice regularly, experiment with different techniques, and seek feedback from others to help you improve your skills and become a better photographer.
The Future of Digital Photography
The future of digital photography is a rapidly evolving field that is constantly changing. As technology advances, so do the tools and techniques used in digital photography. Some of the key trends and developments to watch for in the future of digital photography include:
Advancements in Camera Technology
As technology continues to improve, digital cameras are becoming more advanced and feature-rich. Some of the advancements to look for in the future include:
- Improved image quality and resolution
- Greater dynamic range and color accuracy
- More advanced autofocus systems
- Enhanced low-light performance
- Built-in artificial intelligence and machine learning algorithms
Increased Use of Smartphones as Cameras
Smartphones have become the primary camera for many people, and this trend is likely to continue in the future. With the advancements in smartphone camera technology, many people are able to capture high-quality images and videos without the need for a separate digital camera.
Greater Emphasis on Post-Processing
Post-processing has become an essential part of digital photography, and this trend is likely to continue in the future. With the increased use of smartphones as cameras, many people are able to capture high-quality images, but they still need to know how to edit and enhance their images effectively.
Greater Emphasis on Social Media and Online Sharing
Social media and online sharing have become a significant part of digital photography, and this trend is likely to continue in the future. As more people share their images and videos online, they will need to learn how to effectively showcase their work and connect with others in the online community.
The Emergence of New Technologies and Techniques
As digital photography continues to evolve, new technologies and techniques will continue to emerge. Some of the key areas to watch for in the future include:
- Virtual and augmented reality
- 3D printing
- Drone photography
- Artificial intelligence and machine learning
- Alternative printing methods, such as metal and canvas prints
Overall, the future of digital photography is bright, and there are many exciting developments and trends to look forward to. As technology continues to advance, digital photographers will have access to an ever-increasing range of tools and techniques, enabling them to capture and create images in new and innovative ways.
The Joy of Digital Photography
Digital photography has revolutionized the way we capture and share images. It has opened up a world of possibilities, from easily sharing photos with friends and family to editing and enhancing them in ways that were once impossible. The joy of digital photography lies in its convenience, versatility, and creative potential.
Convenience
One of the greatest joys of digital photography is its convenience. With a digital camera or smartphone, you can take as many photos as you want without worrying about the cost of film or the hassle of developing prints. You can instantly share your photos with others, whether it’s through social media, email, or text message. And if you accidentally capture a bad photo, you can simply delete it and try again.
Digital photography is also incredibly versatile. You can shoot in different modes, such as automatic, program, aperture priority, and manual, depending on your skill level and the type of shot you want to achieve. You can also adjust settings like ISO, shutter speed, and aperture to control the exposure and mood of your photos. And with the ability to shoot in RAW format, you can capture more detail and have more flexibility in post-processing.
Creativity
Finally, digital photography has opened up a world of creative possibilities. With the ability to edit and enhance your photos, you can bring out the best in your shots and create images that are truly unique. You can adjust the colors, contrast, and saturation to make your photos pop. You can add filters, textures, and effects to give your photos a distinct look. And with software like Adobe Photoshop, you can even remove unwanted elements from your photos or combine multiple shots into one stunning image.
In short, the joy of digital photography lies in its convenience, versatility, and creative potential. Whether you’re a professional photographer or a hobbyist, digital photography has made it easier than ever to capture and share your images with the world.
Tips for Continuing Your Digital Photography Journey
- Experiment with different genres: One of the best ways to improve your digital photography skills is to experiment with different genres such as landscape, portrait, wildlife, and still-life photography. Each genre has its own unique challenges and techniques, and by trying them out, you can develop a better understanding of the art form.
- Learn about composition: Composition is a crucial aspect of digital photography, and there are many rules and principles to learn. Take the time to study the basics of composition, such as the rule of thirds, leading lines, and framing, and practice applying them to your shots.
- Practice editing: Editing is an essential part of digital photography, and it can greatly enhance your images. Take the time to learn about editing software and techniques, such as adjusting exposure, contrast, and color balance, and experiment with different effects and filters.
- Join a photography community: Joining a photography community, whether online or in-person, can provide you with valuable feedback and support. Share your work with others, participate in critiques, and learn from the experiences of others.
- Keep learning: Digital photography is a constantly evolving art form, and there is always something new to learn. Stay up-to-date with the latest techniques and trends, and continue to experiment and push your boundaries as a photographer.
FAQs
1. What are the two types of digital photography?
There are two main types of digital photography: film-based and digital-based. Film-based photography uses traditional film to capture images, while digital-based photography uses an electronic sensor to capture images.
2. What is film-based photography?
Film-based photography is a traditional method of capturing images using film. In this method, the camera uses a piece of film to capture an image. The film is then processed in a lab to create a physical print of the image. Film-based photography has been around for many years and is still used by some photographers today.
3. What is digital-based photography?
Digital-based photography is a modern method of capturing images using an electronic sensor. In this method, the camera uses an electronic sensor to capture an image. The image is then stored as a digital file, which can be edited and printed using a computer. Digital-based photography has become increasingly popular in recent years due to its convenience and versatility.
4. What are the advantages of digital-based photography?
One of the main advantages of digital-based photography is that it allows for easy editing and sharing of images. Digital images can be edited using photo editing software, and they can be easily shared online or via social media. Digital-based photography is also more convenient than film-based photography, as it eliminates the need for film processing and printing.
5. What are the disadvantages of digital-based photography?
One of the main disadvantages of digital-based photography is that it requires a significant investment in equipment. Digital cameras and lenses can be expensive, and they require regular maintenance and upgrades. Additionally, digital-based photography does not have the same warm and nostalgic quality as film-based photography.
6. What are the advantages of film-based photography?
One of the main advantages of film-based photography is that it has a unique and timeless quality. Film has a certain aesthetic that cannot be replicated by digital photography. Additionally, film-based photography is a physical medium, which means that the final product is a tangible object that can be held and displayed.
7. What are the disadvantages of film-based photography?
One of the main disadvantages of film-based photography is that it can be expensive and time-consuming. Film is not as widely available as it once was, and it requires special processing to create a physical print. Additionally, film-based photography does not allow for easy editing or sharing of images.


